I am working on my Sew Fun projects for October including one from Annie’s Quilting called Oh Christmas Tree. This beautiful pattern calls for turned edge appliqué to make the tree. Well, I’ve never done appliqué that way, so I thought I would share my experience with you. Of course, I know that many of you are world class sewists, and this is probably nothing new to you. But it was new to me, so here goes!
I must admit, at first I thought I’d just do a blanket stitch around the raw edge of the fused appliqué . Certainly there are many choices when it comes to appliqué, and what you use depends on what look you want, how much time you have, and how you’re going to use the finished project. Appliqué with a turned edge takes a bit more time than fusible or raw edge, but it has a lovely finished look and will launder well.
Oh Christmas Tree
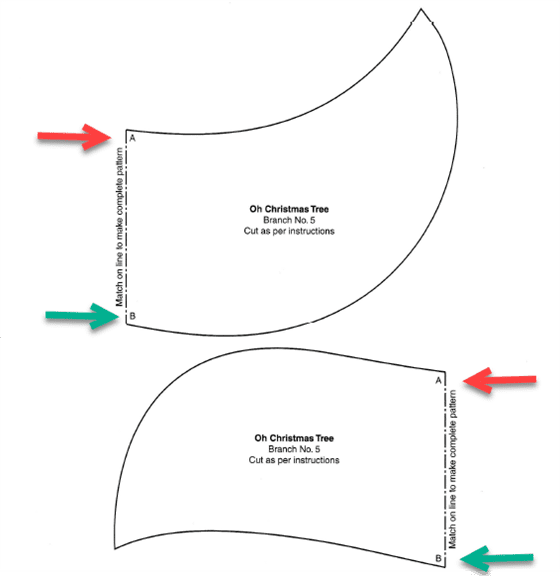
The pattern book has templates for each part of the tree and for the circle at the top. In July I showed you how to use freezer paper to copy the Cool Cat Pajama Bag patterns to iron to fabric. This makes it so easy to cut out the pattern along the lines of the freezer paper. The process here is similar, except you leave a 1/4″ margin around the freezer paper template to fold the fabric.
Freezer Paper
I love the letter-sized cut sheets for quilters because it’s slightly heavier than the stuff on a roll from the grocery store. Since these sheets are letter size you can print the patterns directly on the freezer paper if you have a multi-function copier/printer handy. Even better, the sheets are nice and flat and don’t curl.
Create Templates
Trace or copy your design onto a piece of freezer paper . Be sure the line you are tracing is the finished edge, not a seam allowance edge. You want your freezer paper template to be the exact size of your finished appliqué piece. (No worries with Oh Christmas Tree as the patterns provided are the finished edge.)
Note: For the Old Christmas Tree pattern, you do have to combine two patterns to make one section of the tree.
Iron Fabric to Freezer Paper
Iron the freezer paper template, waxy side down on the wrong side of the fabric.
Cut around the template leaving a 1/4″ margin all around.
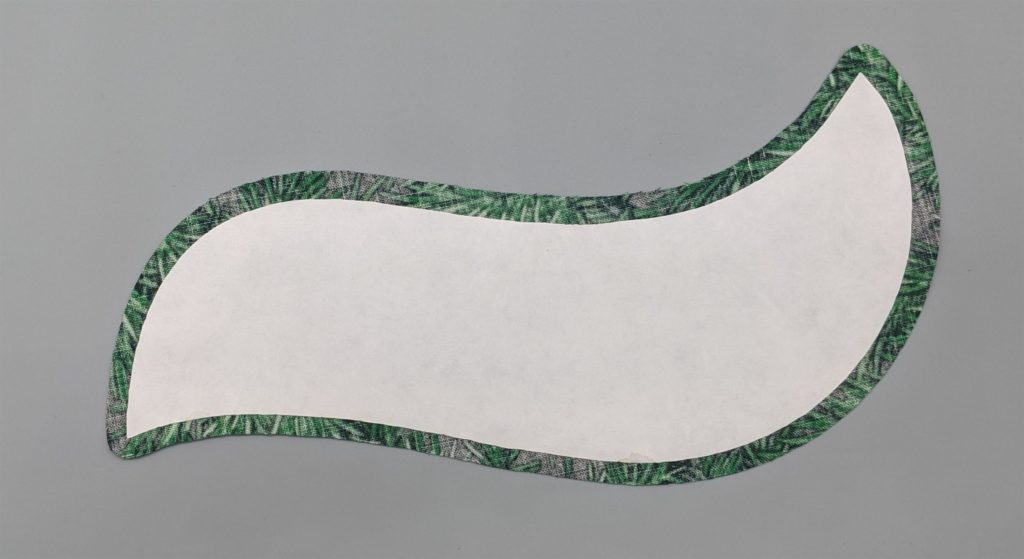
Since these edges are turned under the appliqué, just make sure you leave a enough margin around the template for easy folding. The edges do not have to be exact.
Note: This fabric is non directional. If you have a fabric that is directional OR if your design has a specific orientation like letters, stop before you trace and cut to consider which side of the pattern you should be tracing from and how your fabric should be oriented. You’ll want your tracing to be a reverse image if it has a specific direction like a letter.
“Size” It Up
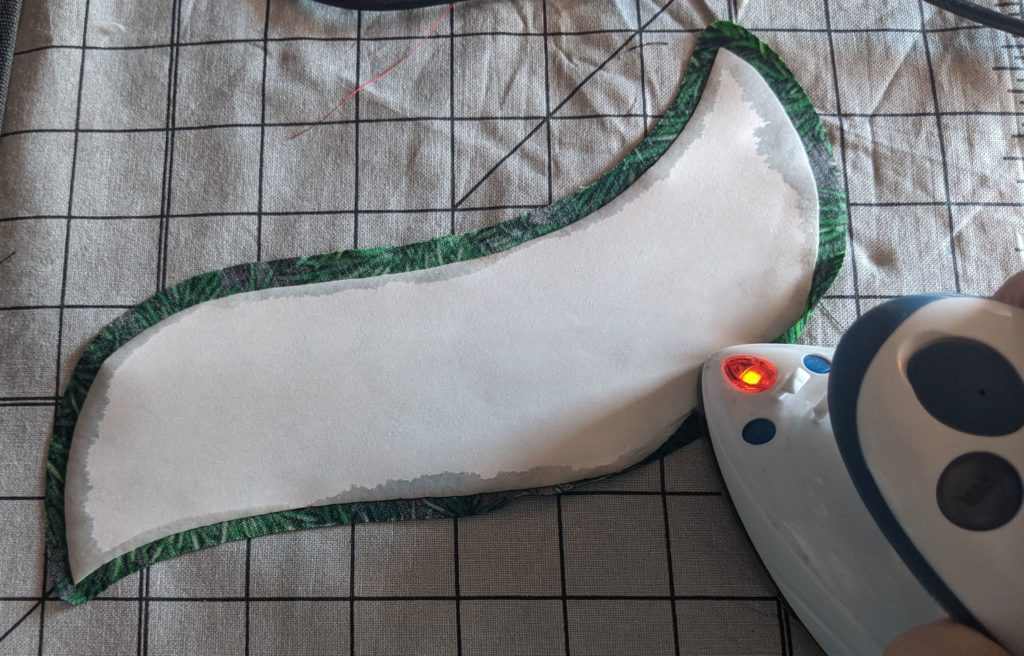
I love using spray sizing, especially Mary Ellen’s Best Press. You’ll also might need a mini iron to allow you more precision when pressing small edges under.
Remove the lid from the sizing and pour some sizing into the bottom of the lid, or some other small container. You don’t need much.
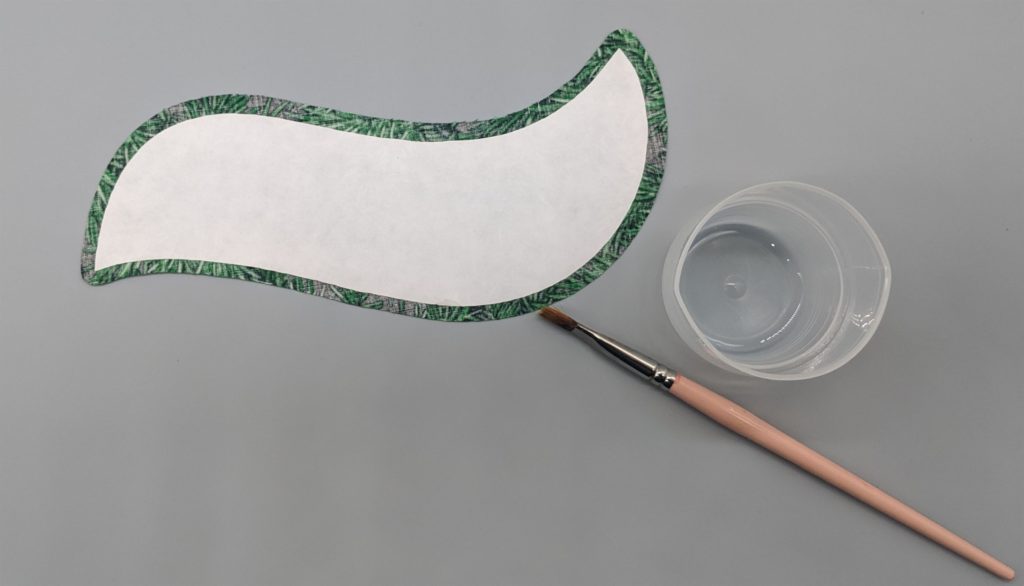
Wet a small paint brush with sizing and dab it around the edges of your appliqué piece.
Continue to wet the edges and turning the edges with the mini iron. This is precise work, but you get a rhythm quickly.

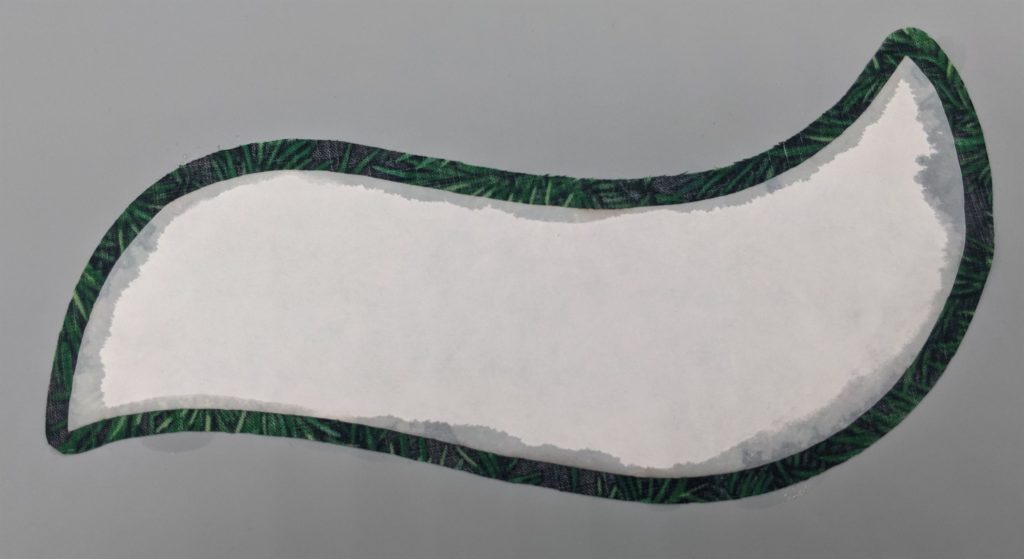
Allow the sizing to dry a bit. Then, use the mini iron and turn the edges folding the fabric over the edge of the freezer paper. You might find a bamboo stick or other stiletto useful in turning the edges.
Be sure any points are crisp and trim away excess fabric is necessary.
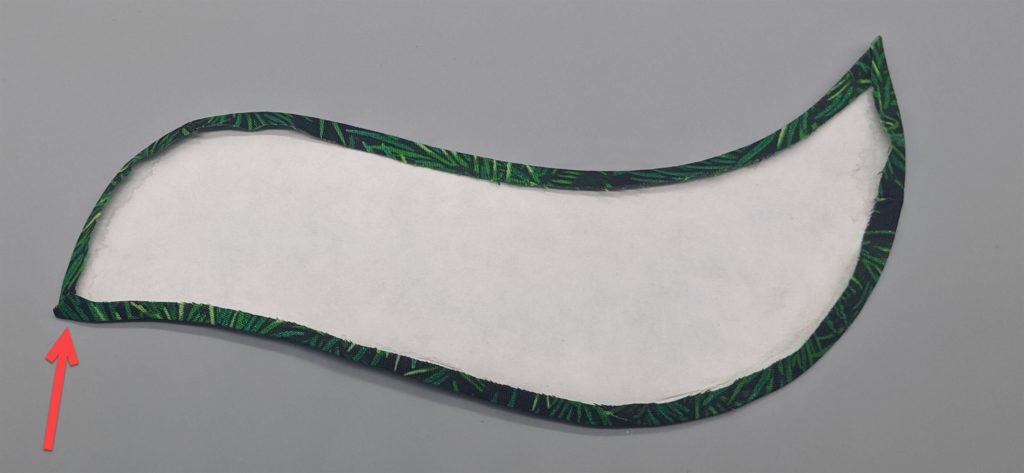
Turn the piece over and make sure all edges are smooth and corners are sharp. If necessary turn the piece back over, add a little more sizing and correct as necessary.

After the piece has cooled, feel the piece to decide if you have enough sizing for it to hold it’s shape. If not, spritz a little more and steam one last time. Once secure, simply remove the freezer paper.
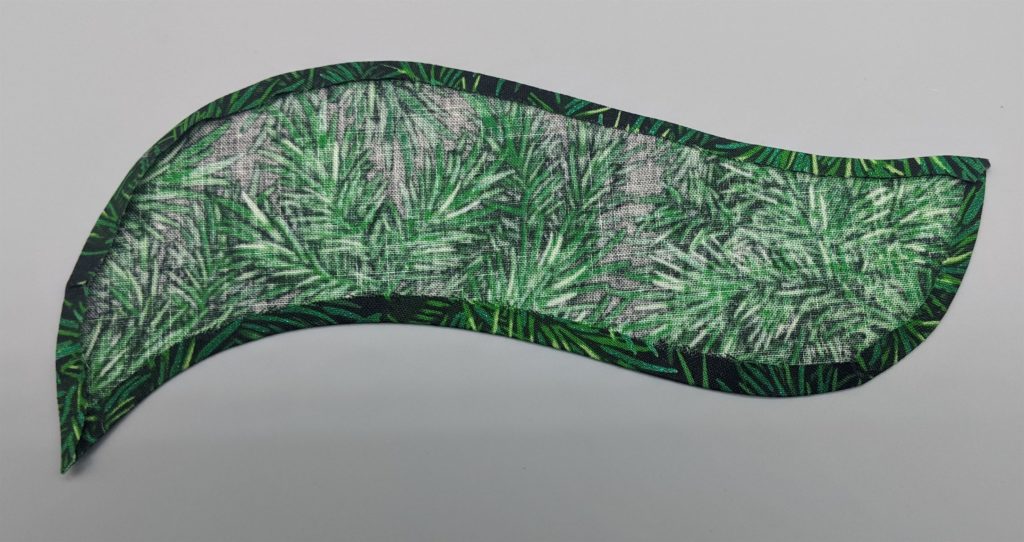
After the paper is removed, give it an overall spritz of sizing and press with a steam iron.
This turned edge appliqué is now ready to be placed on the project, and, unlike method of secure the edges with a glue stick, there is no need to remove the freezer paper after the appliqué has been stitched down on the project.
Foiled Again!
I ran across this method for folding fabric around a circular template from Anna Maria Horner . Since the Oh Christmas Tree pattern has a large circular appliqué at the top of the tree, I thought I’d try it, and really like how simple it was, and how well it turned out.
As above, iron a piece of heavy freezer paper cut in the exact size of the circle needed to the wrong side of the fabric.
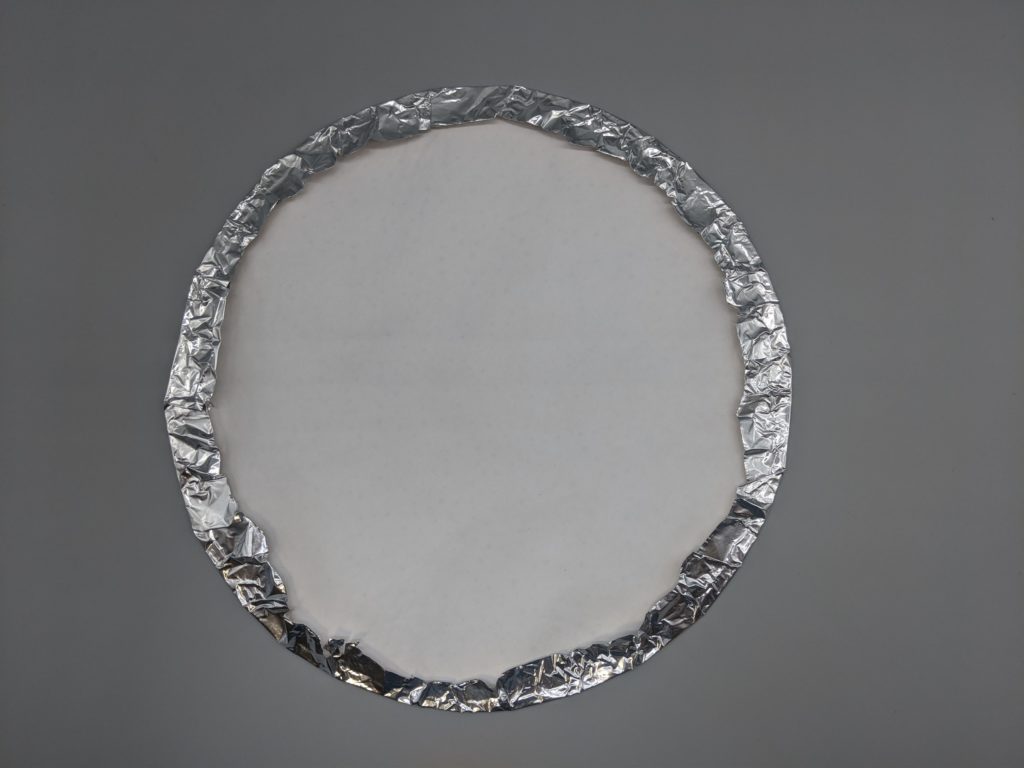
Place the fabric circle right side down centered on top of a piece of aluminum foil larger than the circle. Although you don’t have to trim around the foil, I did so that there is less foil to fold.
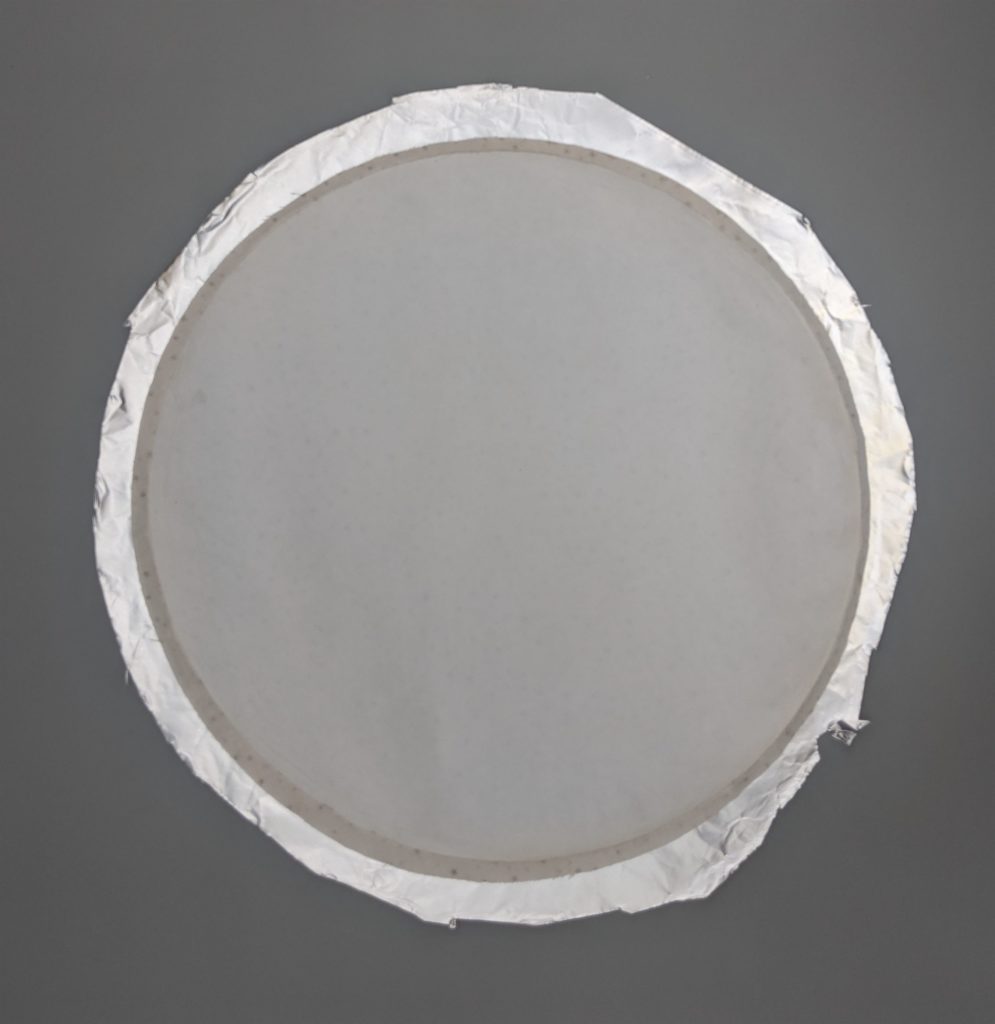
Spritz the circle with sizing.
Fold the foil towards the center of the circle all the way around, letting the fabric fold in tightly with it. Smooth the edges of the circle with your fingers to get out any bumps.
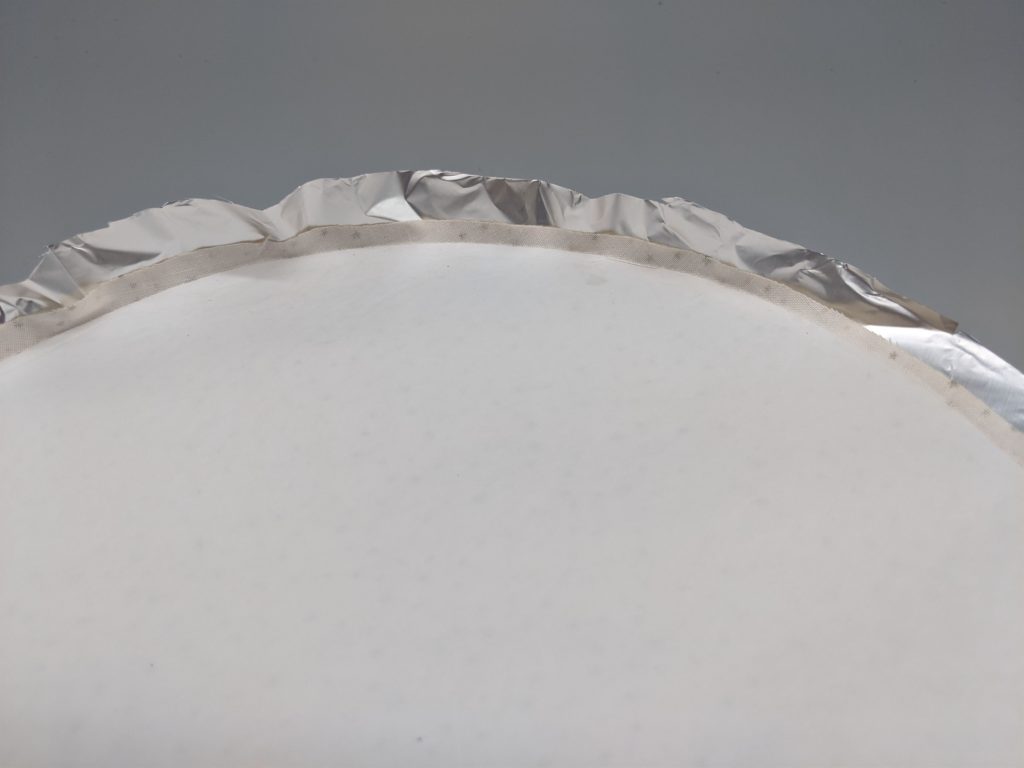
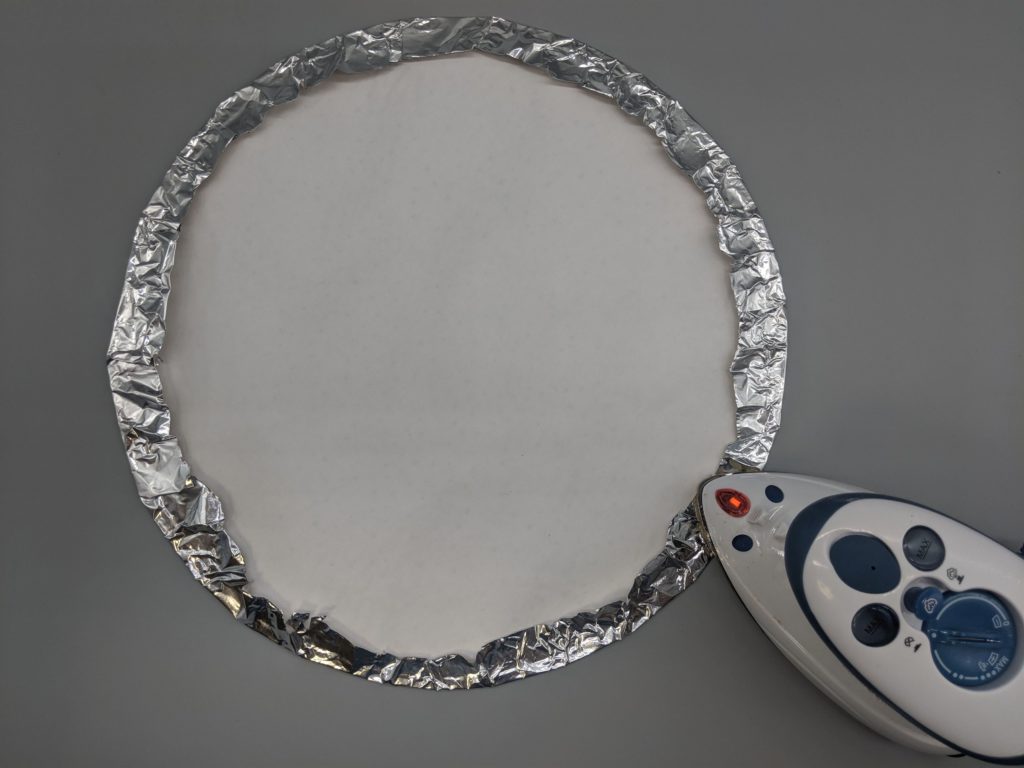
Press the the foil down all along the outer edges with your iron on a med-high setting. Turnover and press again making sure to get the edges firmly pressed.
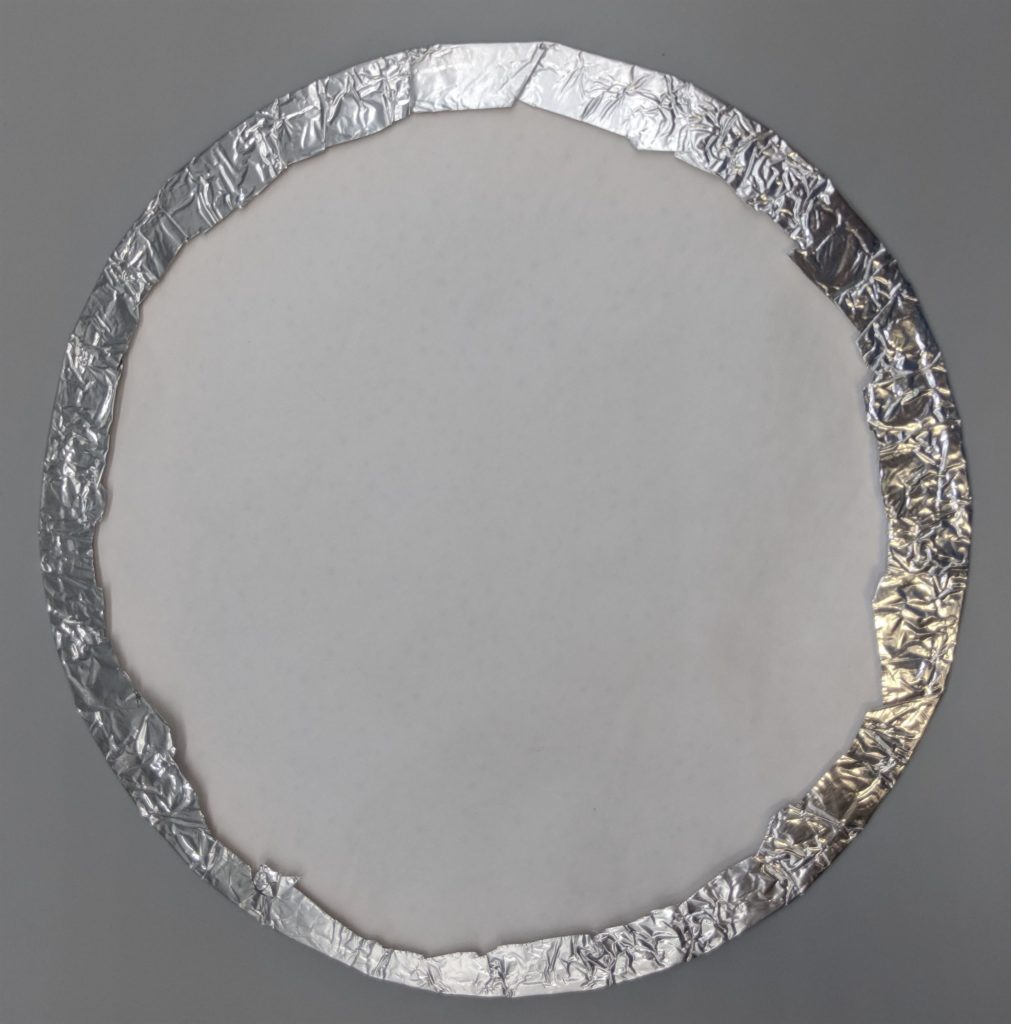
When cooled, peel back the foil and remove it. Gently pull out the freezer paper circle from the newly creased fabric circle.
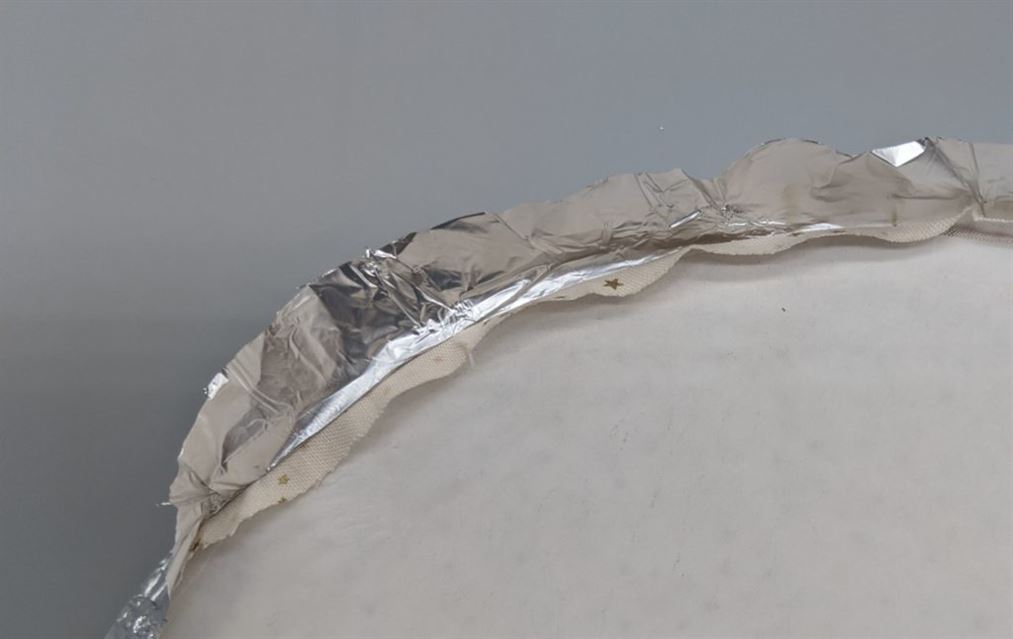
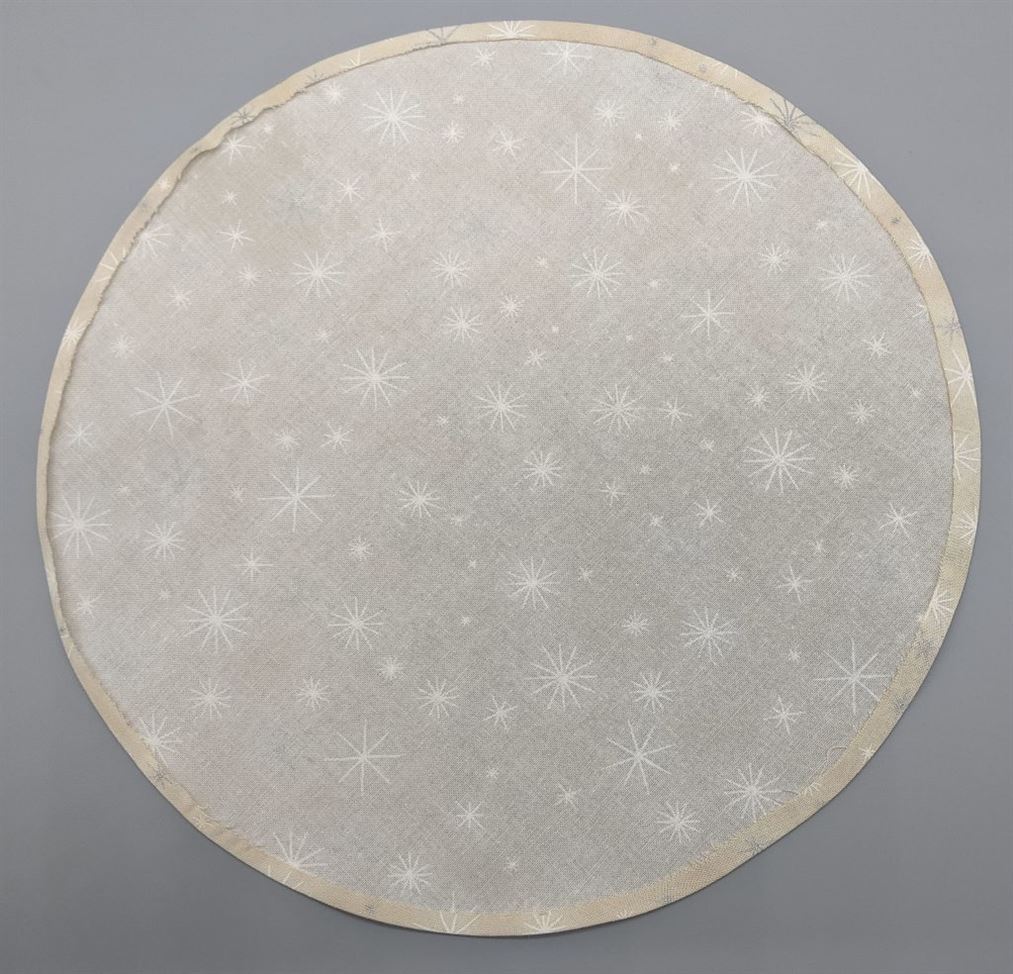
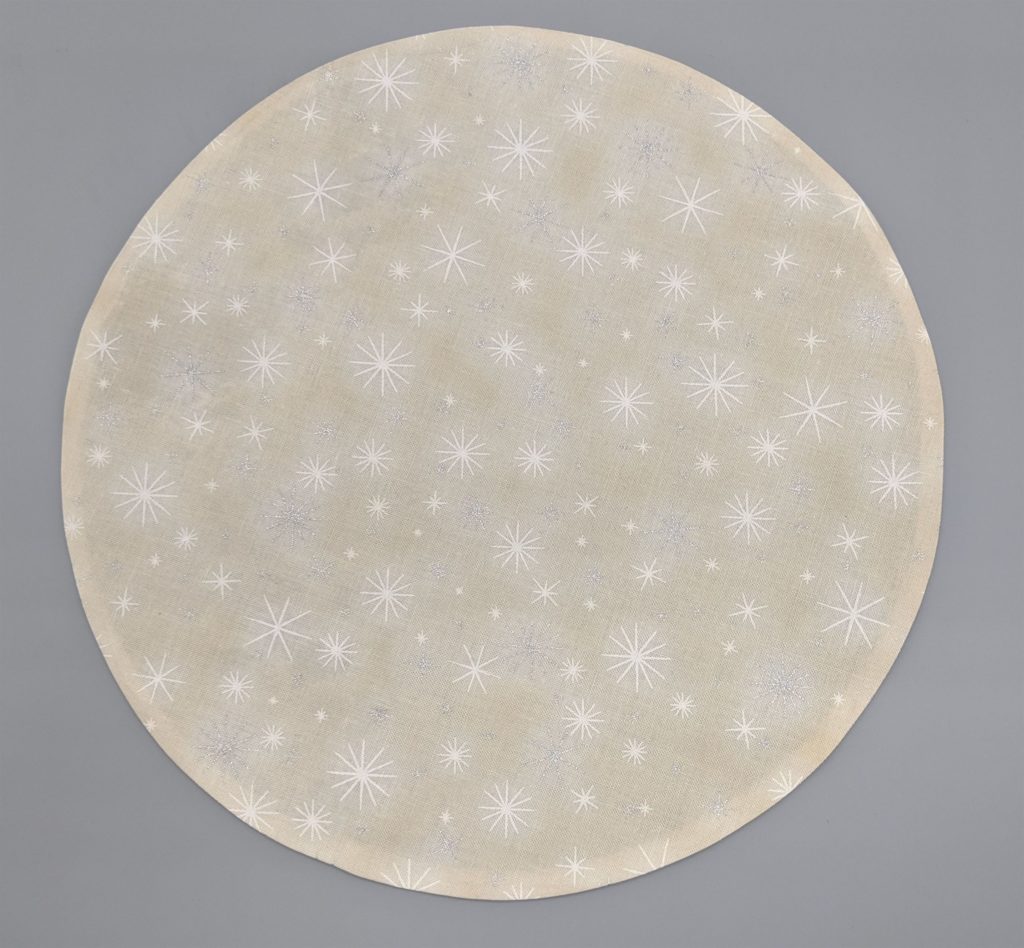
Spritz with sizing and steam press.
Apply Appliqués to Project
Once all of the appliqués are ready apply them to your project. For this blog, I applied them with Misty Fuse to the panel for the wall hanging.
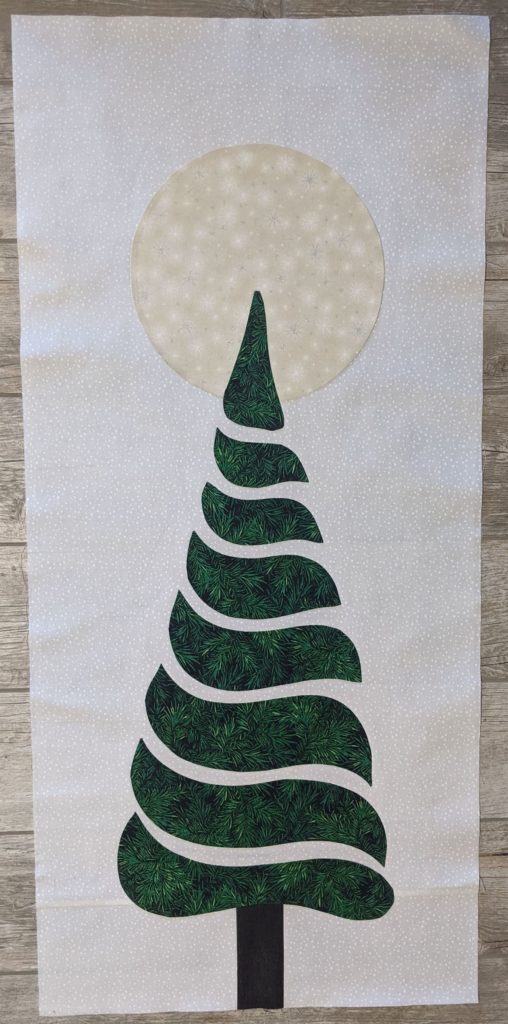
Cliff Hanger!
So, the photo above of the appliqués fused to the fabric for the wall hanging is all you’ll get for now! Come to October Sew Fun to see the finished project. If you can’t make it to Sew Fun, don’t worry, I’ll update this blog with a picture of the completed project. So check back after October 21, 2019.
Coupon
If you want to do some turned edge appliqué, you’re going to need some sizing. Here’s a coupon for 30% off Mary Ellen’s Best Press. You can get it at any of our store locations.
