In my previous blog, The mySewNet Blog on the PFAFF Icons, I showed some of the cool things available on the mySewNet Blog on the PFAFF Performance and Creative Icons. One of the projects that really caught my eye was the headband embellished with triple ribbon stitches. The braided look of the triple ribbon stitches is beautiful. I just know that my granddaughters will love one or two of these. Why, I might even make one for myself!
Built-in Tutorial for Triple Ribbon Stitches
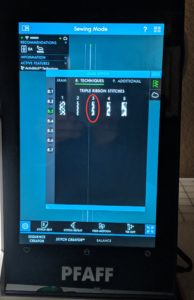
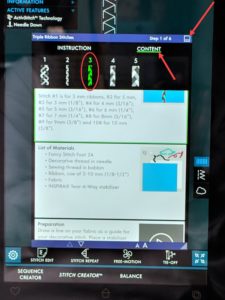
On the mySewNet Blog, the instructions for the headband mentioned that the ribbon stitch is found on Menu 8, Techniques. The triple ribbon stitches are menu 8.3.
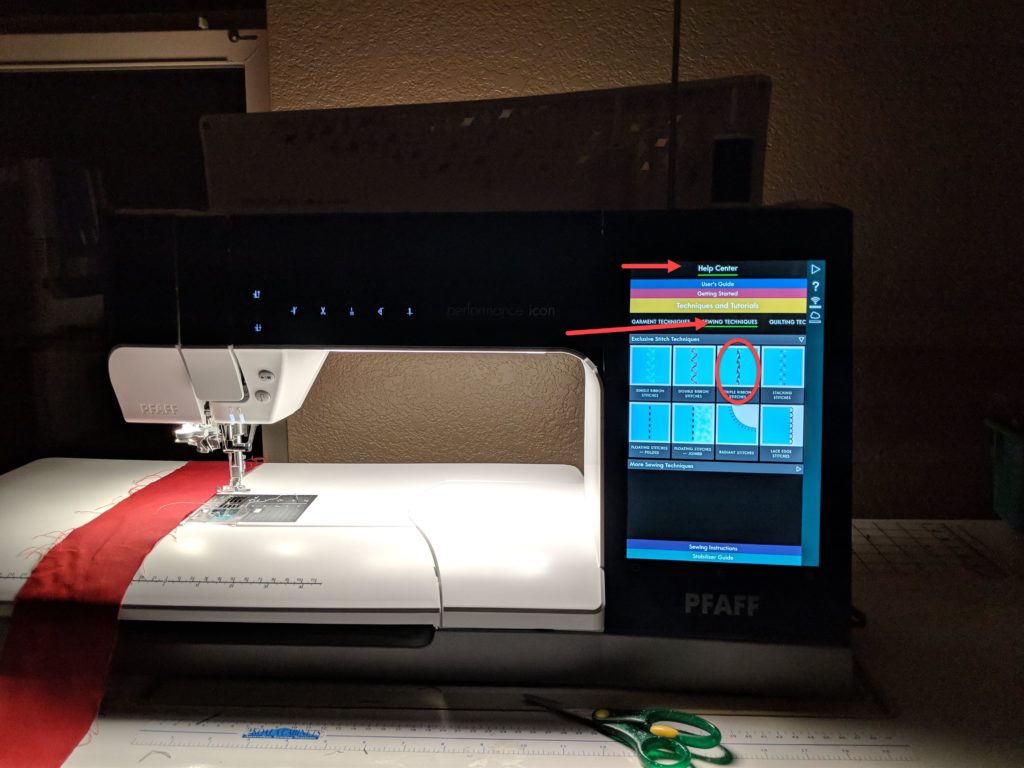
Go to the Help Center screen to view instructions and a video on how to do the triple ribbon stitches or many other built-in stitches.
For the triple ribbon stitches, from the Help Center screen select Sewing Techniques and then Exclusive Stitch Techniques.

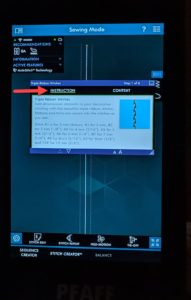
Select the Triple Ribbon Stitch instructions.
View the written instructions on how to do the Triple Ribbon Stitch.
As you scroll through the instructions, there are various graphics describing the process and, in the case of Ribbon Stitches, an animation to show you the steps.
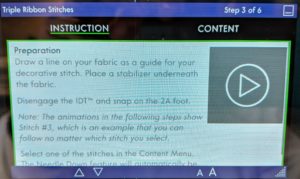
Select from the available stitches by touching the word “Content” on the screen. Then touch the stitch you wish to use. Minimize the tutorial screen by touching the dash in the small square at the top left of the panel to begin sewing.
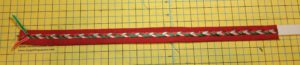
Christmas Headband
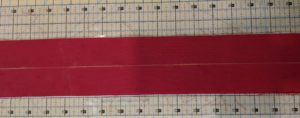
I chose some 1/8″ Christmas ribbon for the triple ribbon stitches.
Prepare Fabric
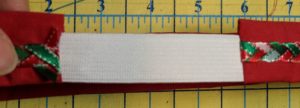
- For the headband, cut a piece of fabric about 22″ long and twice the width you want the headband to be, plus the seam allowance. I am using a 3″ wide piece of fabric for a 1.25″ wide headband with a ¼” seam.
- Mark a line down the center of the headband. This serves as a guideline to keep the ribbon stitches straight down the middle of the fabric. It is completely covered up by the triple ribbon stitches after they are sewn.
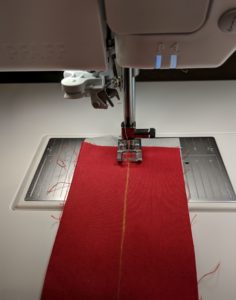
- Cut a piece of tear away stabilizer the size of the fabric, and place it under the fabric.
- Place the stabilizer and fabric under the presser foot 2A, centering the midpoint line under the center mark of the foot.
Place Ribbons
- Start the stitch sequence with the appropriate ribbon stitch selected. The machine will stitch a small diagonal line to indicate where to place the first ribbon, and then stop for ribbon placement.
- Align the edge of the first ribbon along the stitches.
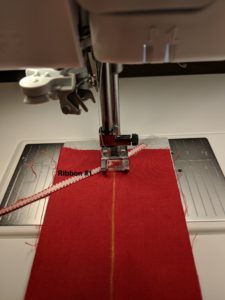
Be sure to keep the center mark of the presser foot aligned with the center line of the fabric. - Press the start button and the machine will tack down ribbon #1 and then stitch the placement for ribbon #2.
- When the machine stops, align the edge of ribbon #2 along the stitches.

- Start sewing to tack down ribbon #2 and stitch out the placement for ribbon #3.
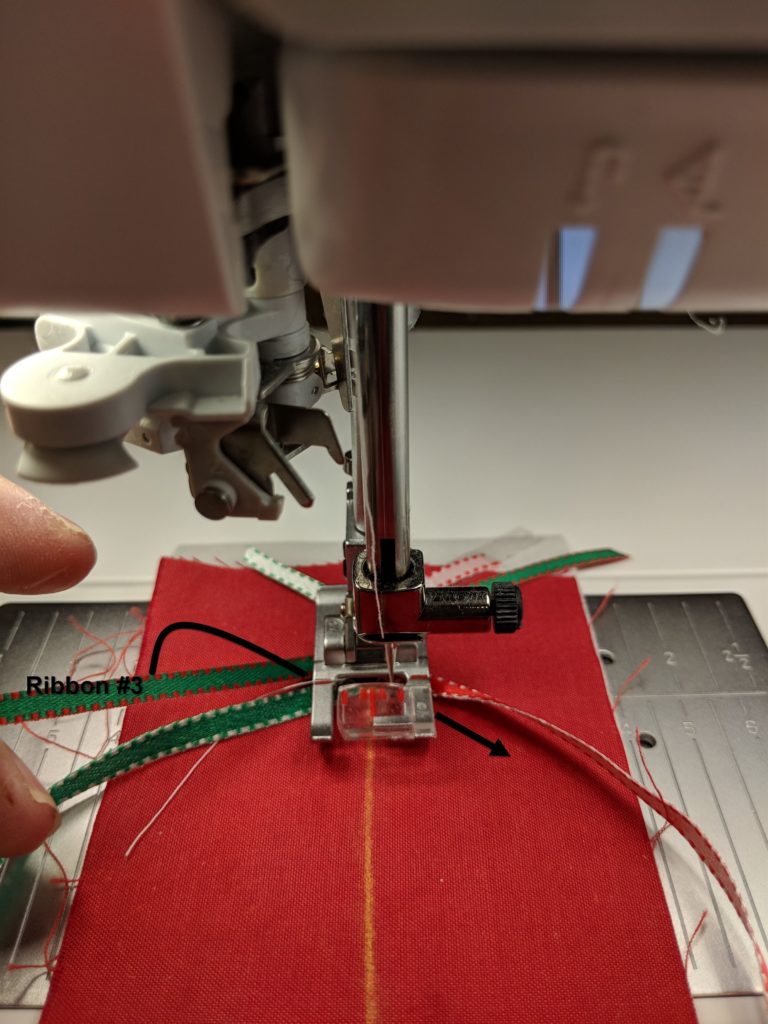
- When the machine stops, align the edge of ribbon #3 along the stitches. It will be parallel to ribbon #1.
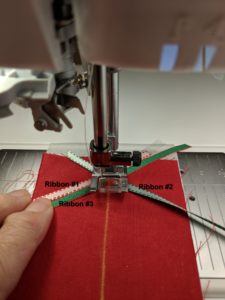
- Start sewing to tack down ribbon #3 and stitch out the placement for ribbon #1 the start of the braid.
Braid Ribbons
- Bring ribbon#1 up, fold it over, tuck it under the presser foot and bring it to the other side of the center line. It should be somewhat parallel to ribbon #2 and in front of the needle. Pull it slightly taut around the needle.
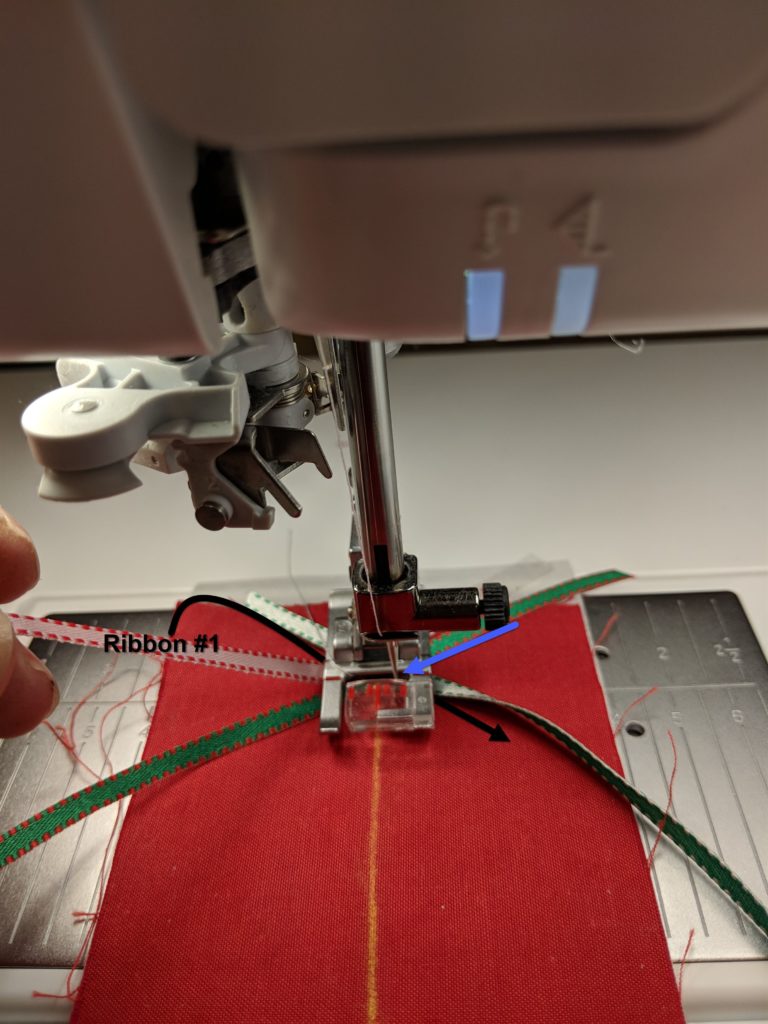
Ribbons #1 and #2 are now both on the right side of the needle. - Start the machine to tack down ribbon #1 and sew placement for ribbon #2.
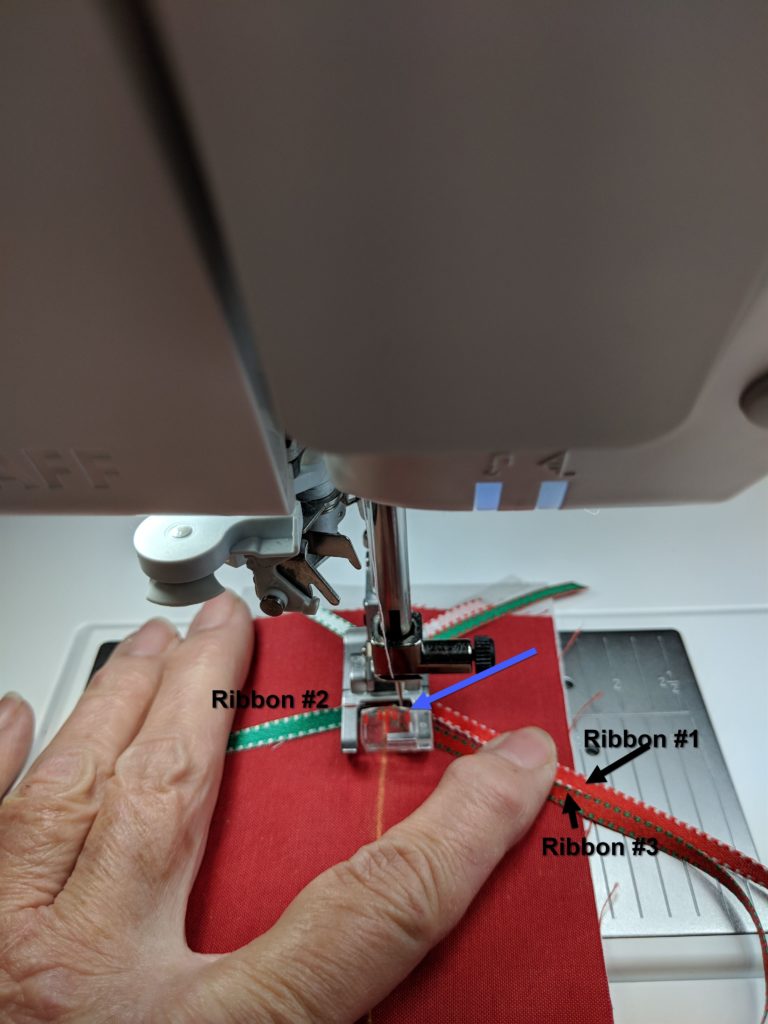
- When the machine stops, as with ribbon #1, lift ribbon#2 up, fold over, tuck under presser foot in front of the needle and lay it on the other side of the center line approximately parallel with ribbon #3.
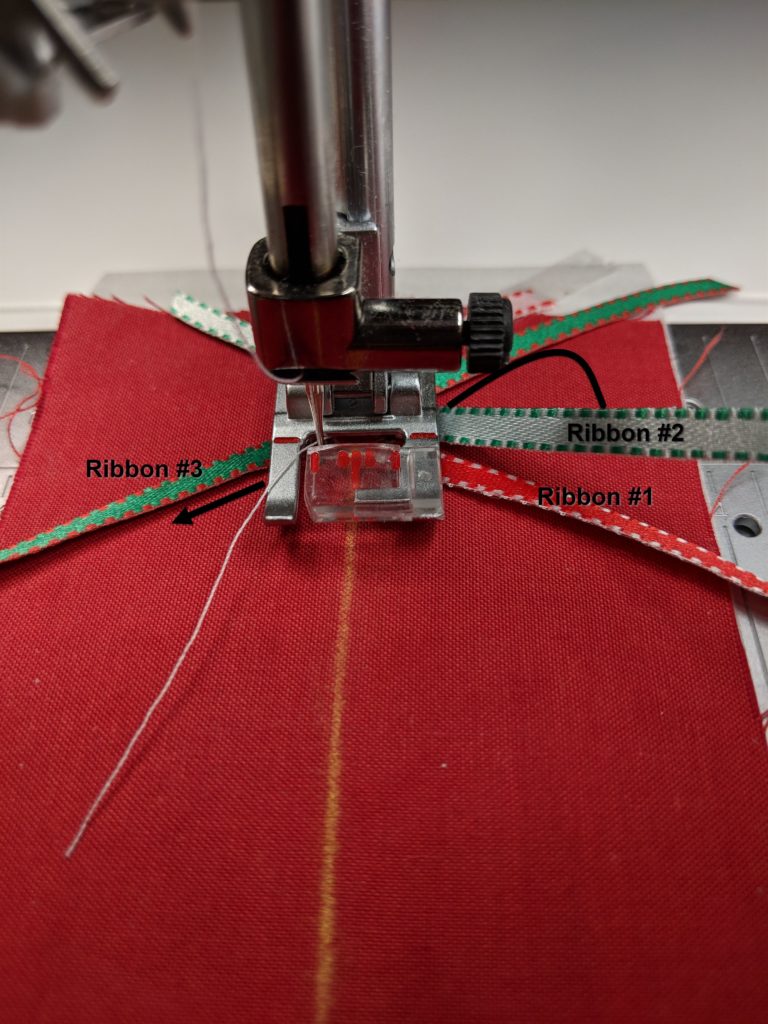
Ribbons #2 and #3 are now both on the left side of the needle. Note in the photo below how ribbon #2 is in front of the needle, somewhat taut up against it (blue arrow).<
- Start the machine to tack down ribbon #2 and sew placement for ribbon #3.
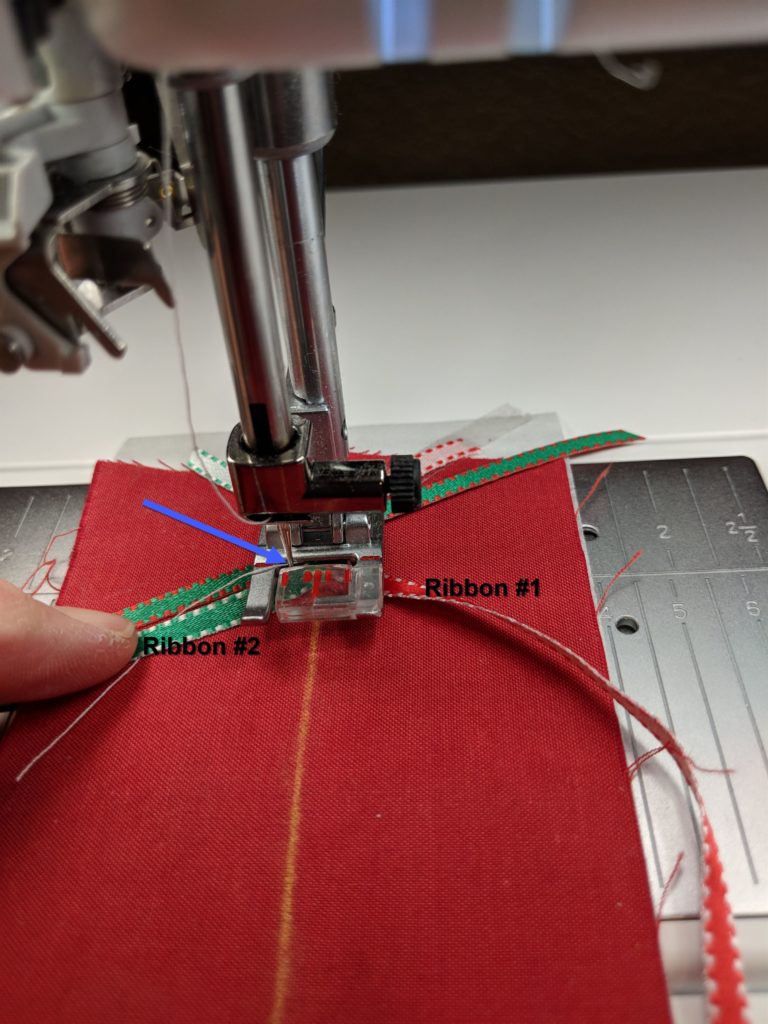
- When the machine stops, as with ribbon #2, lift ribbon#3 up, fold over, tuck under presser foot in front of the needle and lay it on the other side of the center line approximately parallel with ribbon #1.
Now, ribbons #1 and #3 are on the right side of the needle.
- Start the machine to tack down ribbon #3 and sew placement for ribbon #1.
- Continue braiding the ribbon, always bringing the back ribbon on the side with two ribbons over to the other side. You should never end up with three ribbons on one side.
- Braid ribbons until you reach the length desired.

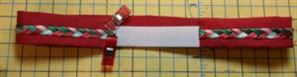
Make the Headband
- Tear away stabilizer.
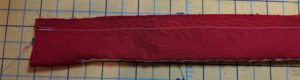
- Fold fabric right sides together, matching edges, and sew a ¼” seam along the length.
- Flatten the fabric so that the seam is centered on one side and the ribbon stitching on the other.
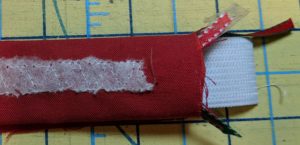
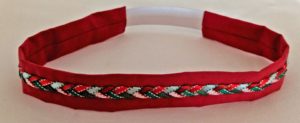
- Place a piece of 1″ elastic into one end of the headband, sliding it inside until there is just enough at the end to catch in a seam.
- Stitch across the end of the headband catching the elastic.
- Turn the headband right side out. On one end the elastic will be sewn into the seam.
- Determine the length of elastic needed for a good fit of the headband and trim if necessary.
- Place the loose end of the elastic into the other side of the headband and tuck the raw edges of the end of the head band in around the elastic.
- Stitch in place.
Voila! A beautiful Christmas headband adorned with triple ribbon stitches. So easy and so quick!
PFAFF Performance and Creative Icons
Ribbon stitches are exclusive to PFAFF. Triple ribbon stitches are only found on the Performance and Creative Icons. Check out a couple of our previous blogs for more information on these amazing machines.
PFAFF® Unveils the New Creative Icon Sewing and Embroidery Machine!
PFAFF Performance Icon is Here!
If you’re thinking about one of these beauties, now is the time as PFAFF is running an October promotion with 72 month, interest free financing. Stop into one of our stores, take a “test drive” and talk to any of our knowledgeable staff. If you’re not thinking about one of these beauties, maybe you should! Stop in for a test drive and see.