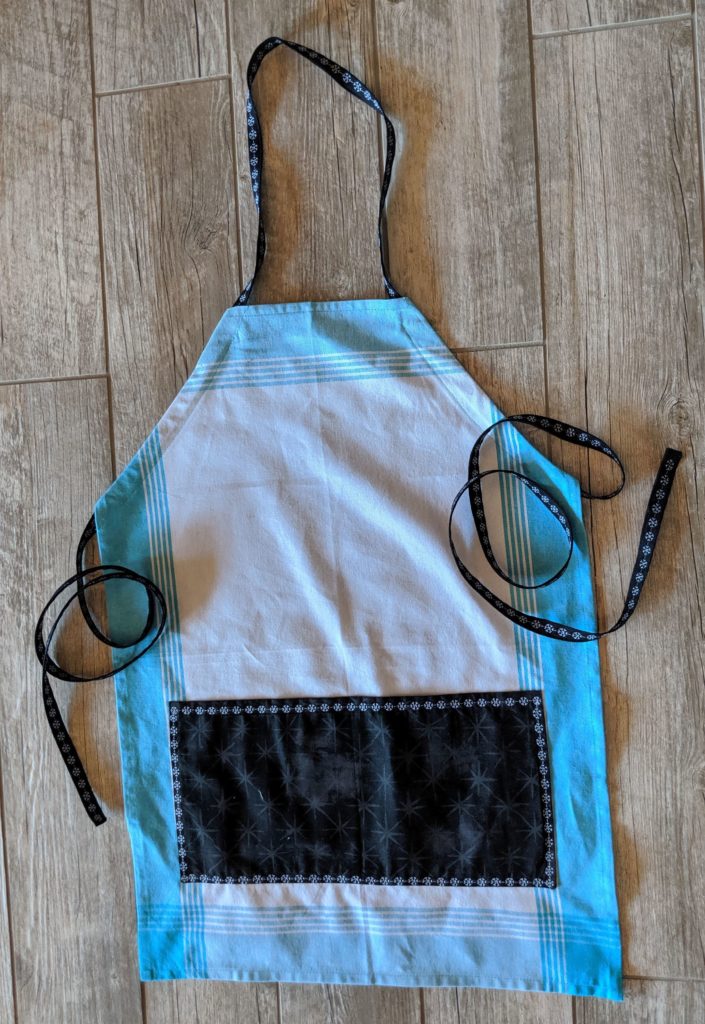
Make a tea towel apron with this quick and easy pattern and instructions from Missouri Star Quilt Company. With the adjustable neck strap this apron is ideal for people of all sizes. Read on to see how cute you can make this simple apron by adding embroidery and a contrasting pocket.
Tea Towel Apron
Tea Towel
Choose a tea towel that is at least 18″ x 24″. The tea towel I used is 20 x 28″.
Pre-wash and iron if desired.
Casings
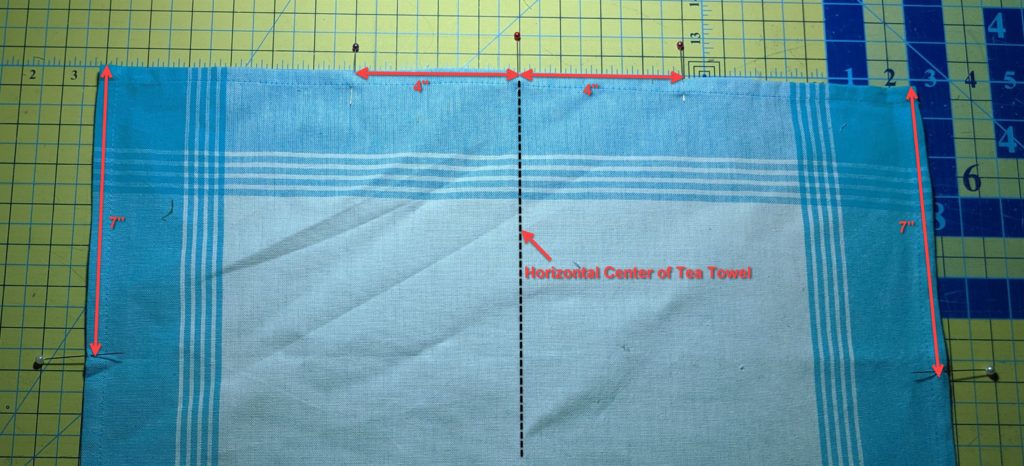
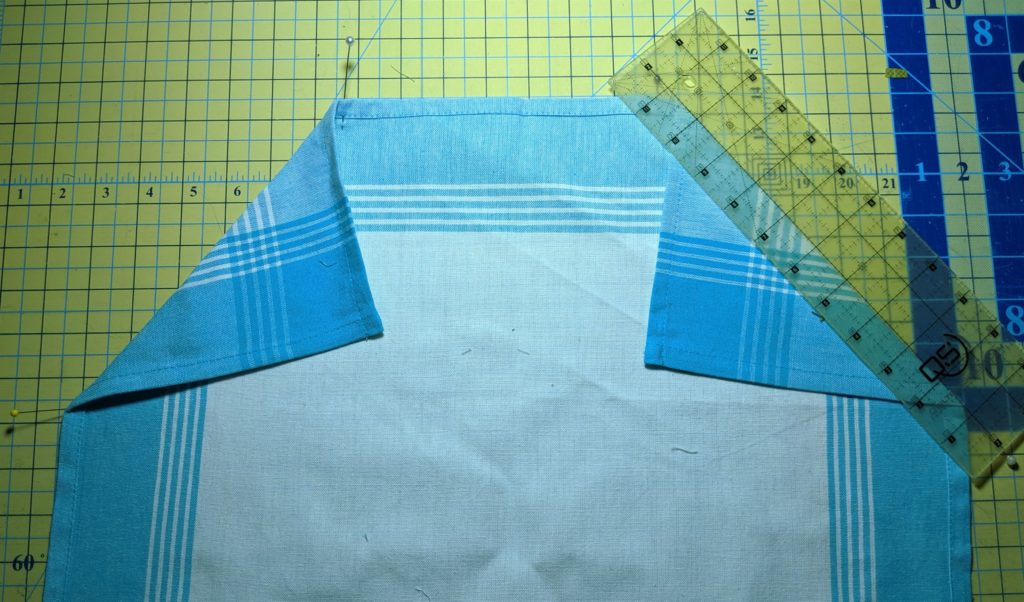
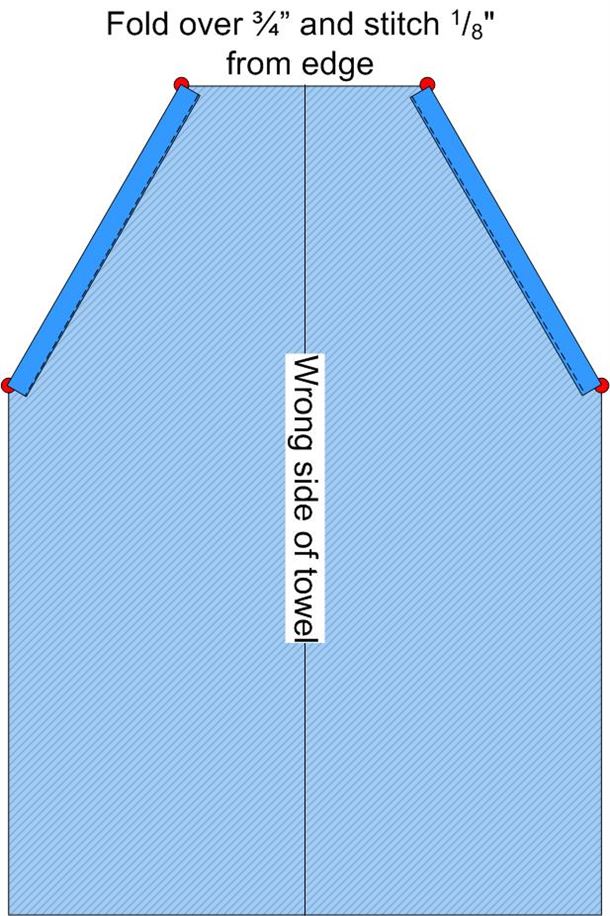
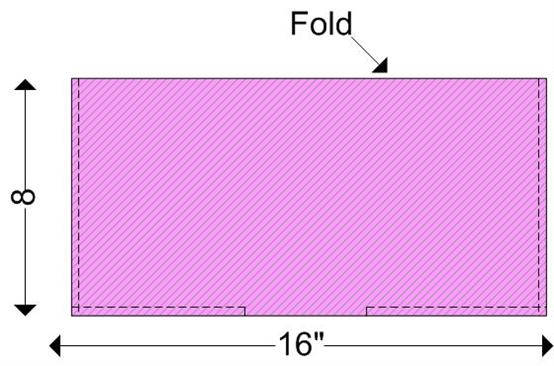
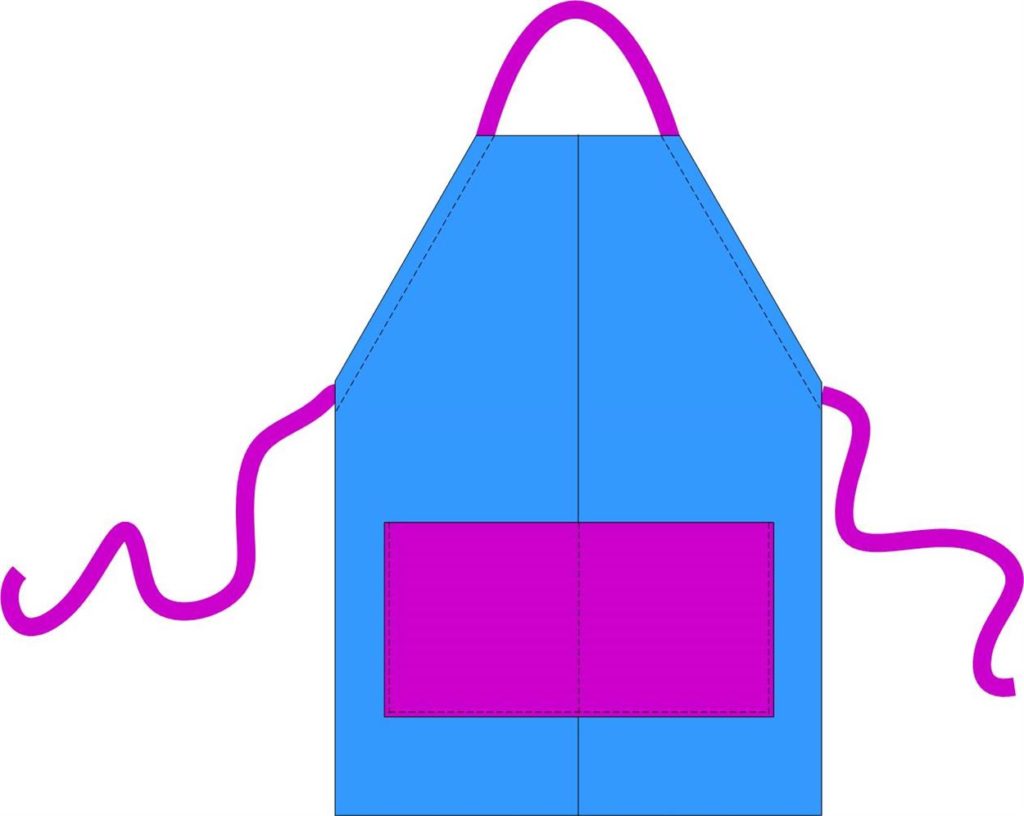
Lay tea towel flat on a table and mark the horizontal center of the the towel.
Measure 4″ on either side of the the horizontal center and mark.
Measure 7″ down from the top edge on both the right and left sides of the towel and mark.
Note: The on-line instructions indicate to mark 10″ down from the top. I am short-waisted and only came down 7″. Do what is best for your height.
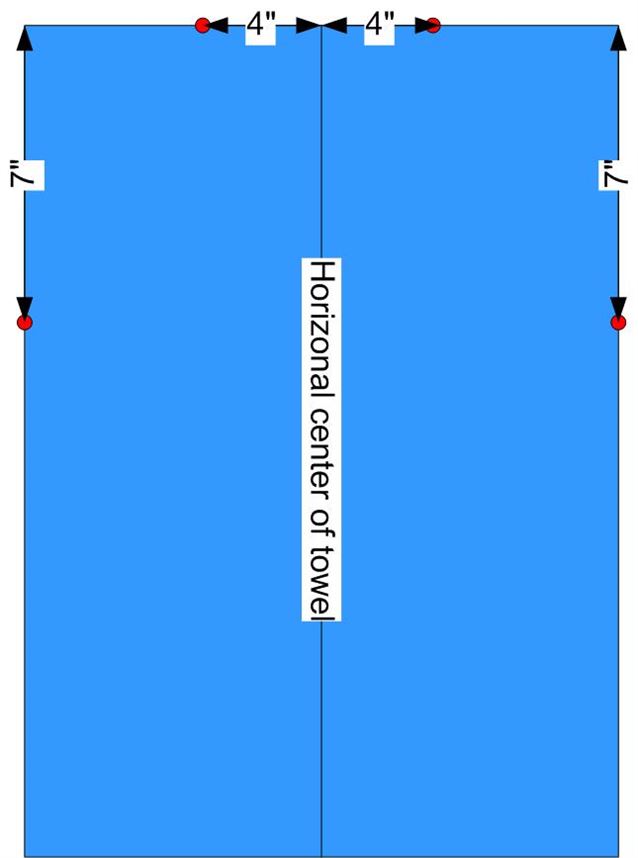
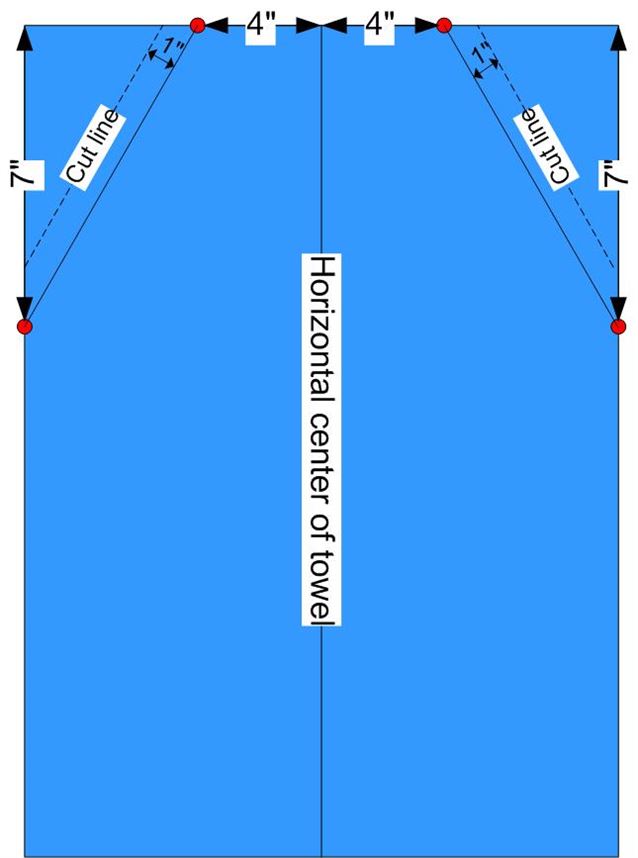
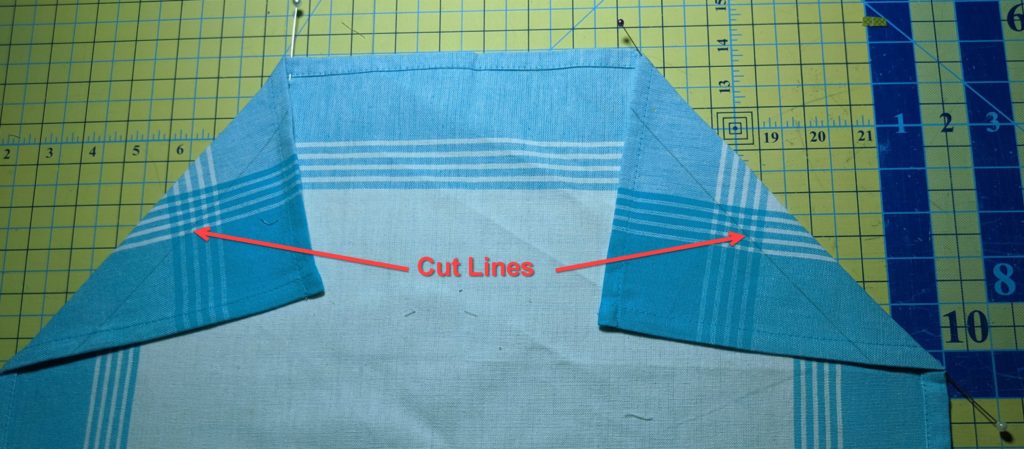
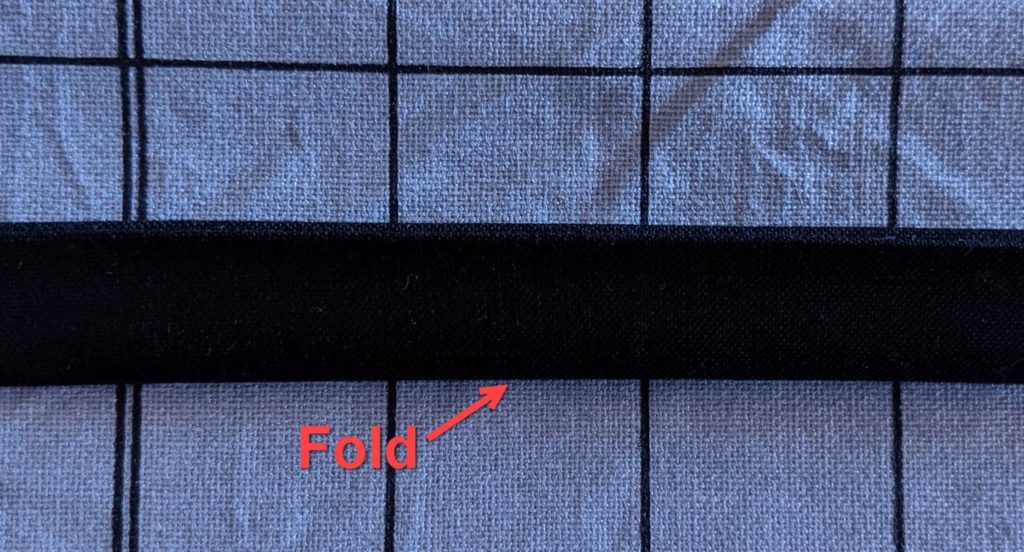
Draw a chalk line between the 4″ mark and the 7″ mark on both sides on the wrong side of the tea towel.
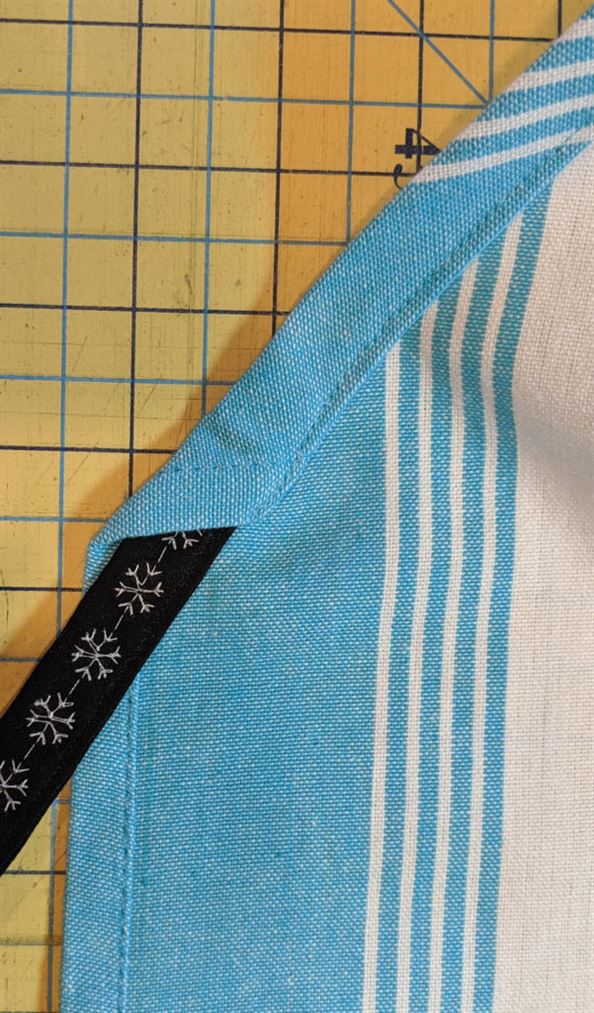
Using a transparent ruler, place the edge of the ruler 1″ on the corner sides of the chalked lines. Mark cutting line. Cut along the cutting lines with a rotary cutter.
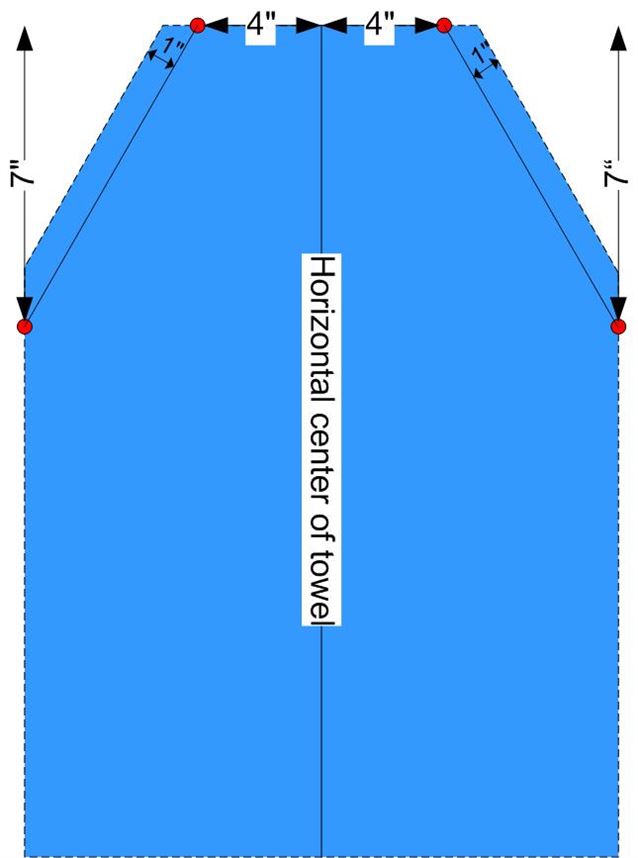
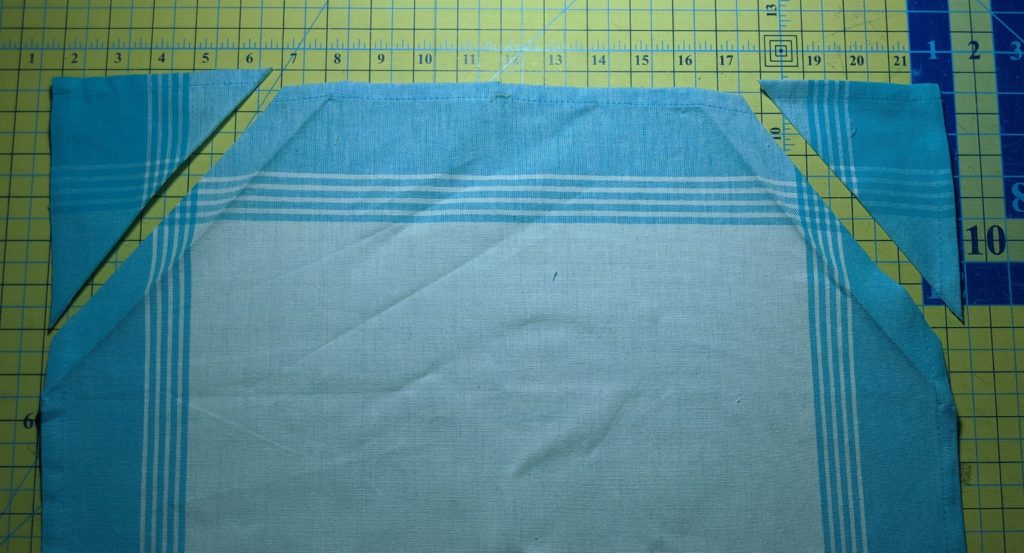
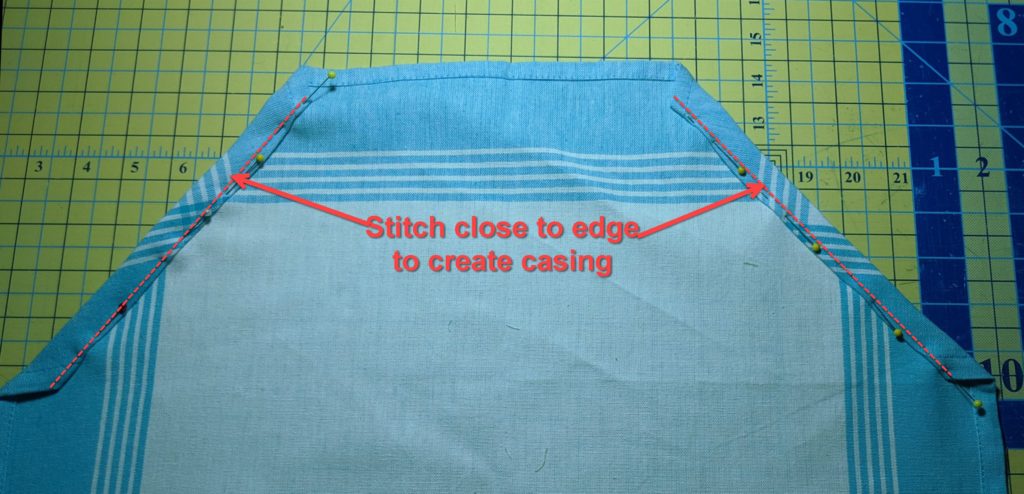
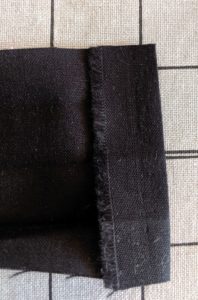
Press raw edge of cut line over 1/4″ (WST) and inch and press.
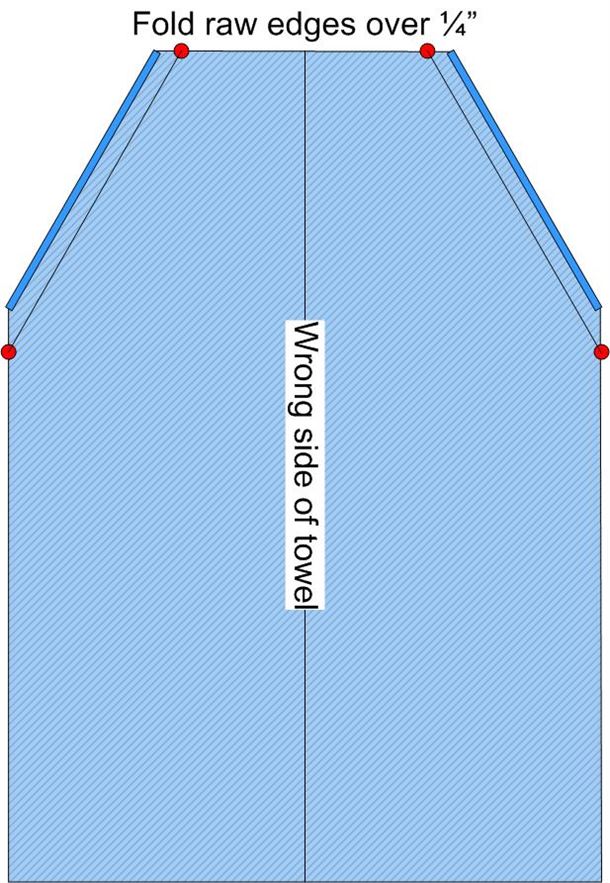
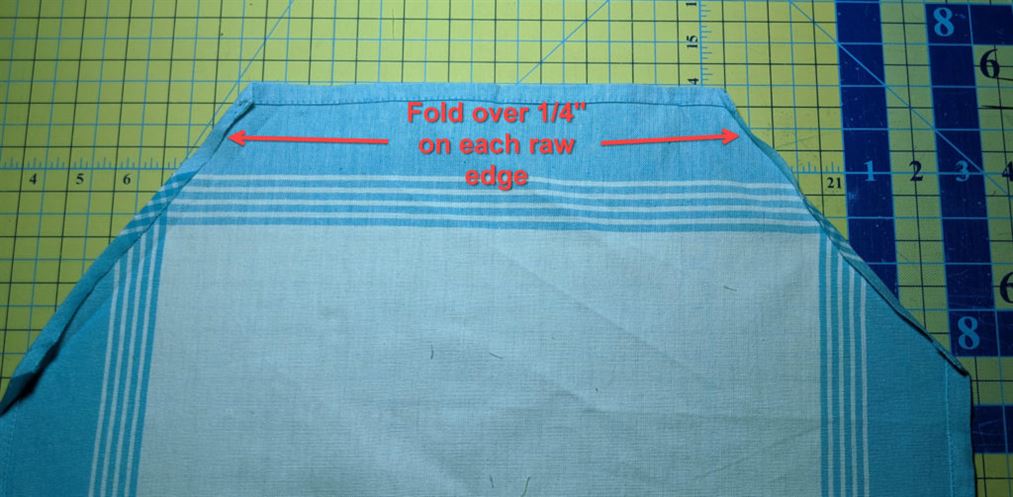
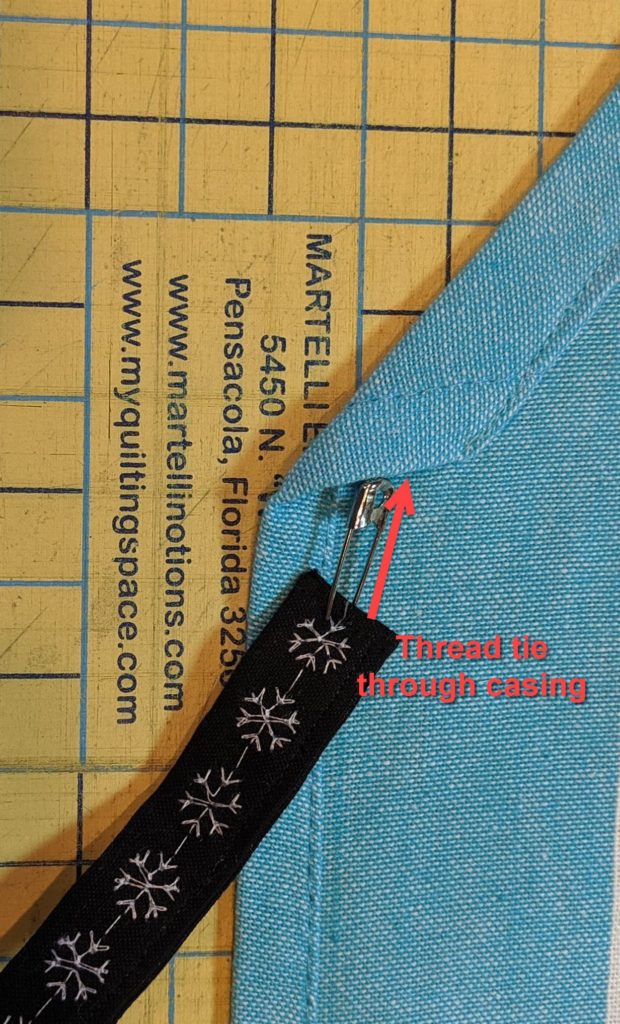
Fold WST over again along the chalk line to form the casing for the strap. Stitch along edge of casing. Back stitch at beginning and end of casing.
Ties
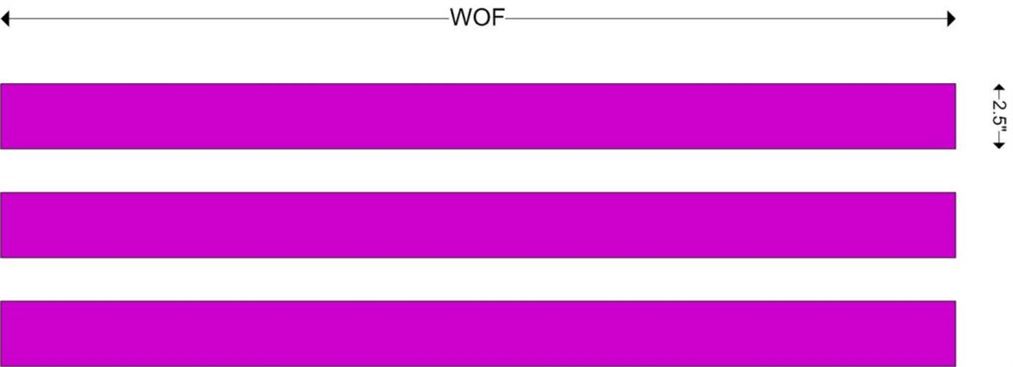
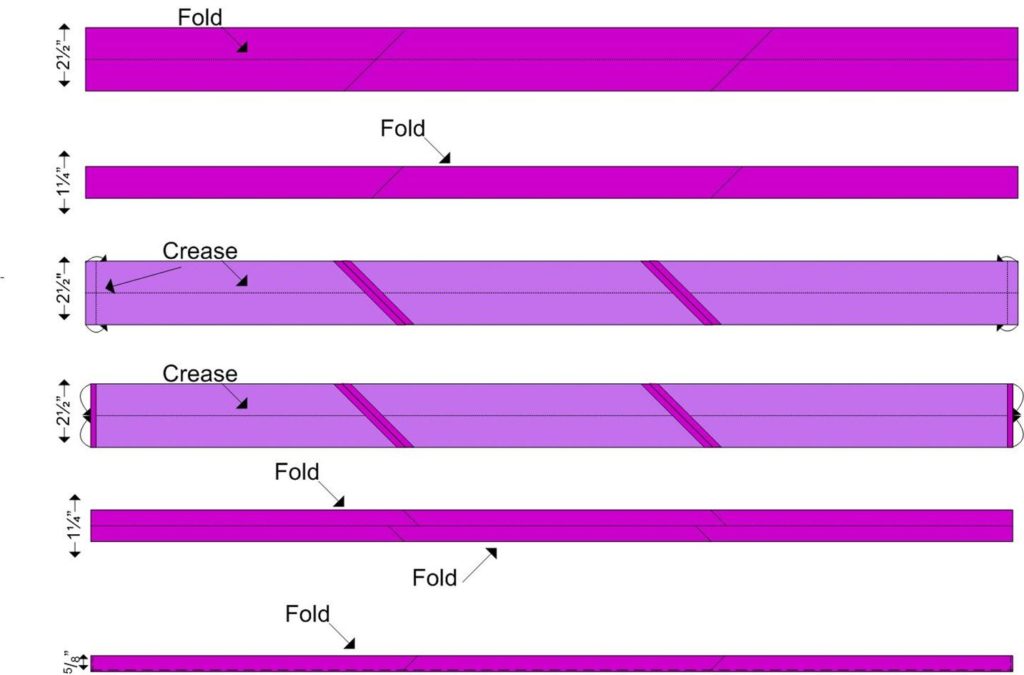
Cut two or three (depending on how long your ties need to be) 2 1/2″ x WOF strips of fabric for neck strap and ties . Sew the lengths together, end to end, on a diagonal.
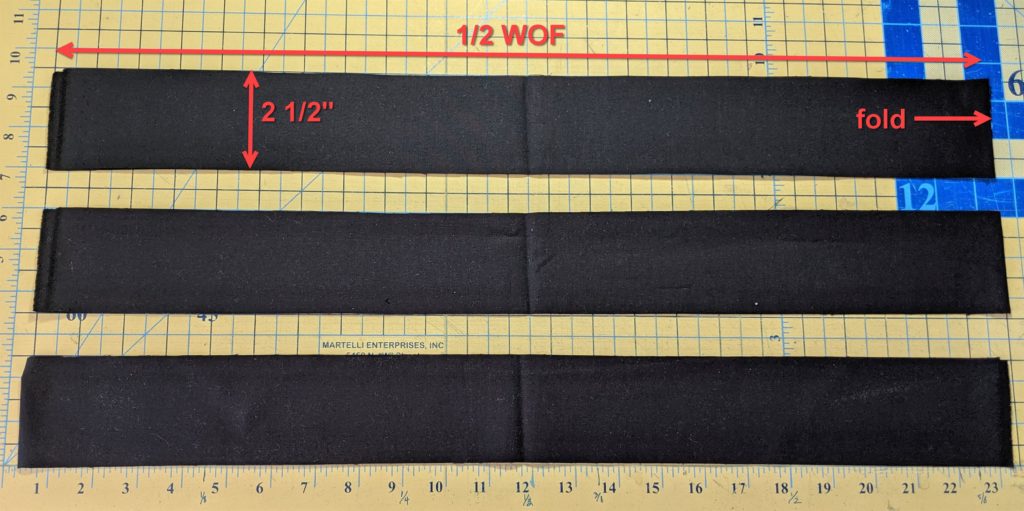
On the 2 1/2″ ends, fold fabric in 1/4″ (WST). Press.
Fold the long strip of fabric in half lengthwise and press.
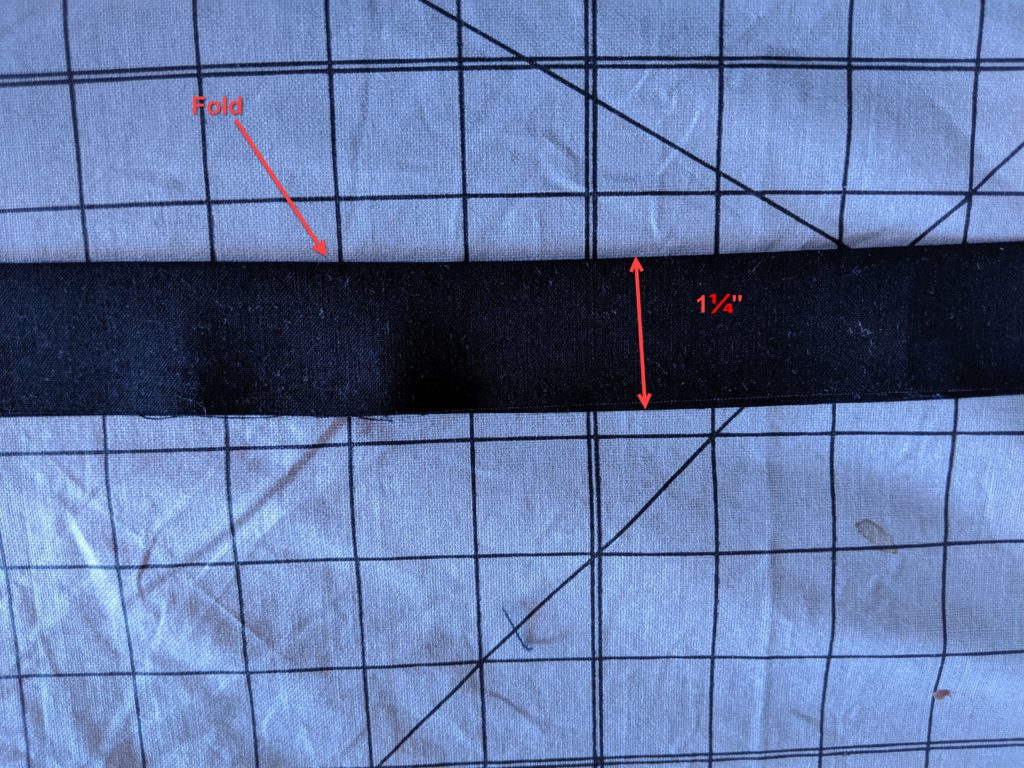
Open the pressed strip back up and fold each long edge so that the raw edge of the strip abuts the middle crease. Press
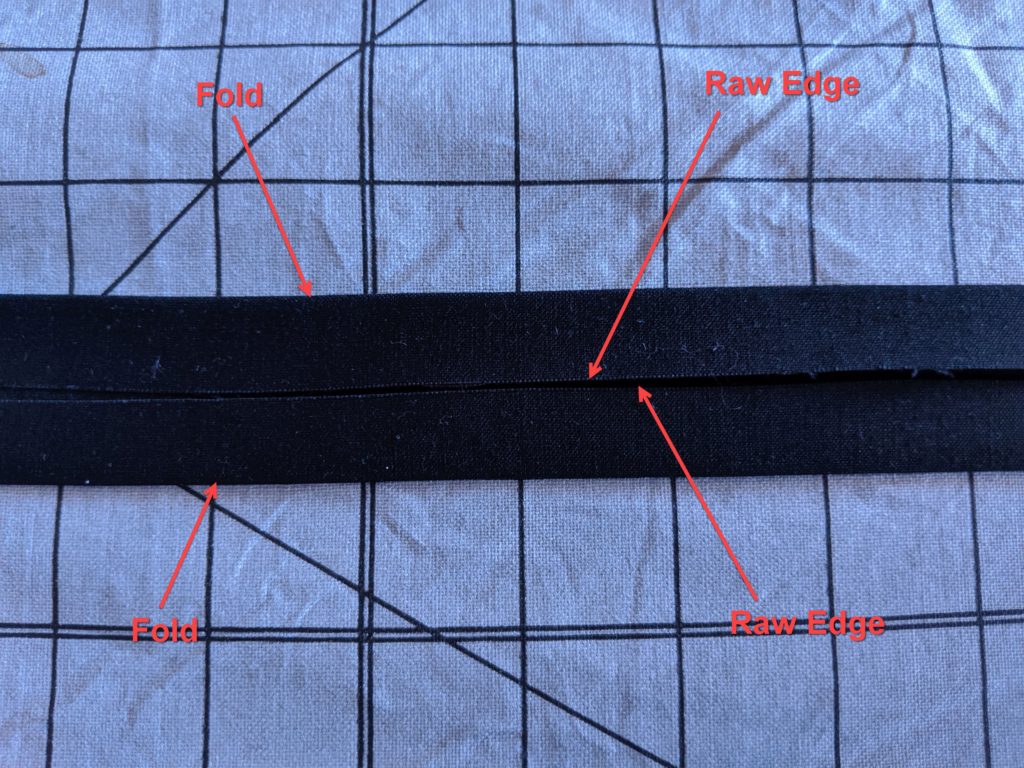
Fold the long strip in half again and press.
Stitch along edge.
I decided to add a decorative stitch to the ties I made, but this certainly isn’t necessary.
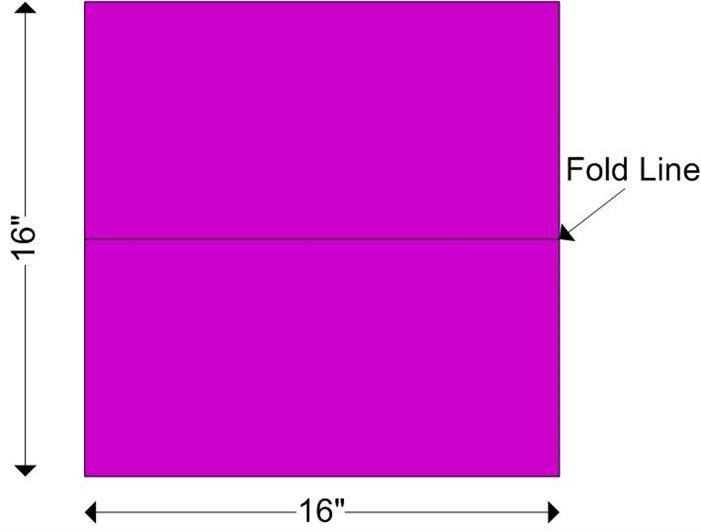
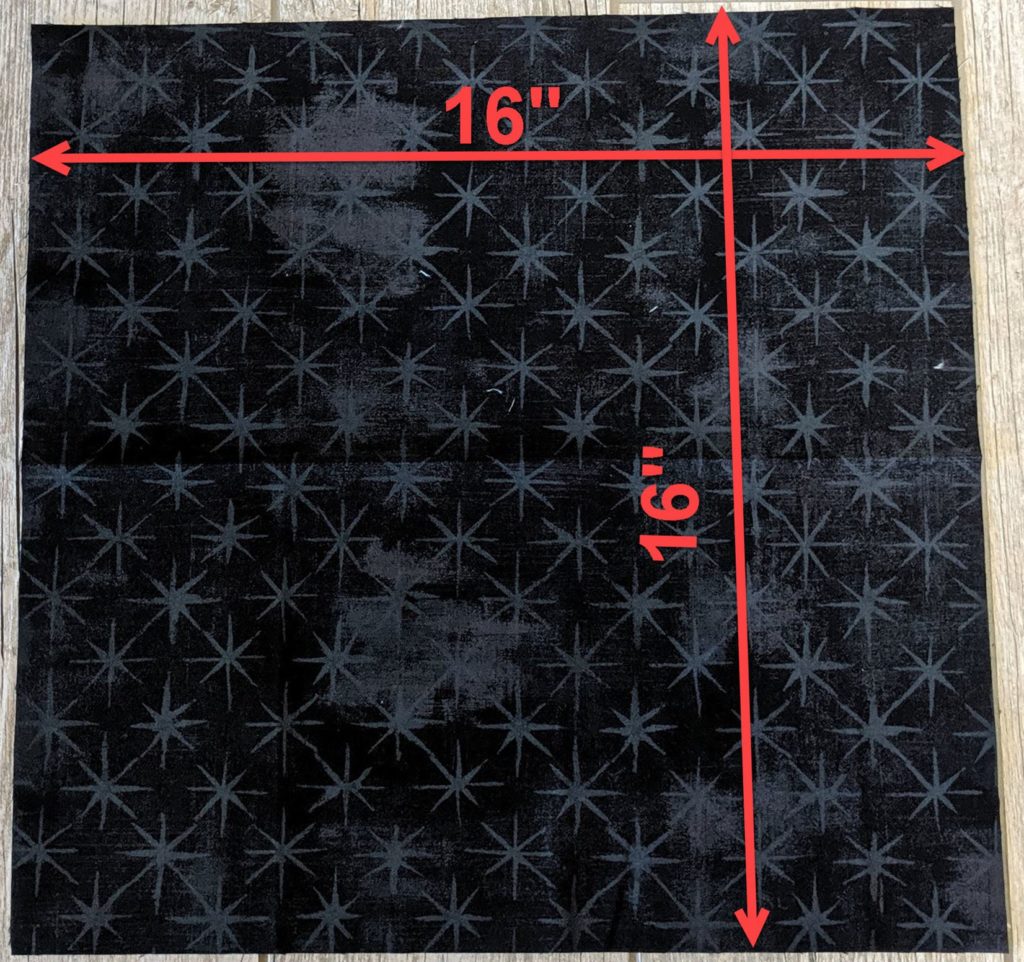
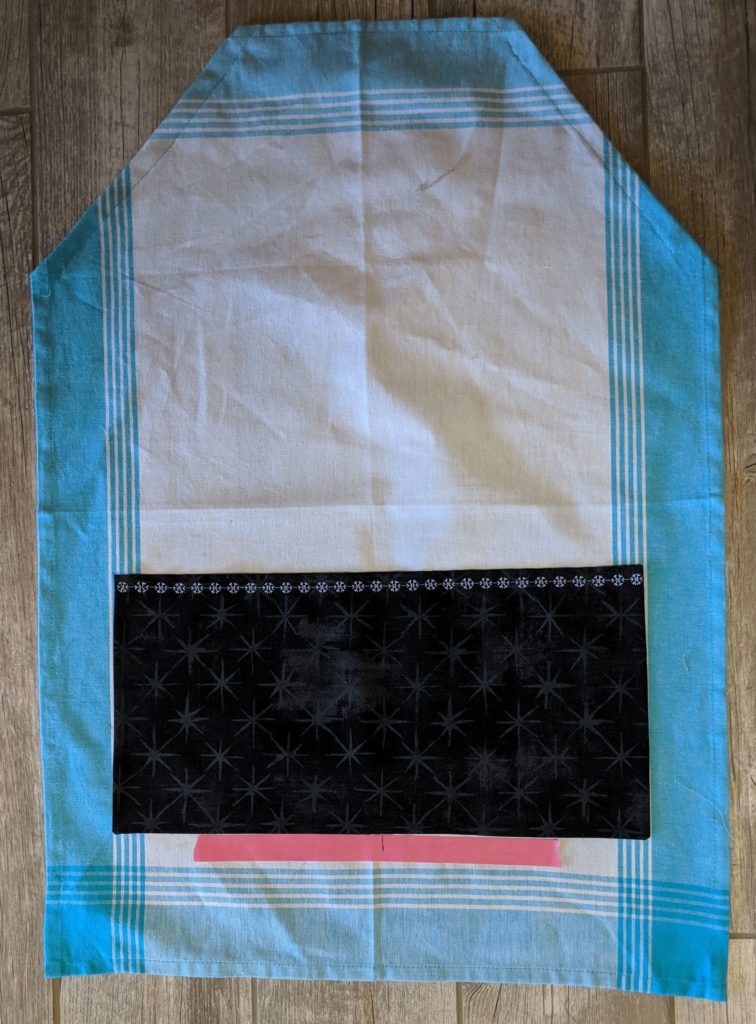
Cut a 16″ square of fabric for the pocket.
Fold the square in half, right sides together, and stitch a 1/4″ seam around the raw edges, leaving a 3-4″ opening along the bottom of the pocket. Stitch down into the seam allowance where the stitching ends on both sides of the opening. This helps the seam allowance go inside the pocket when the fabric is turned right side out.
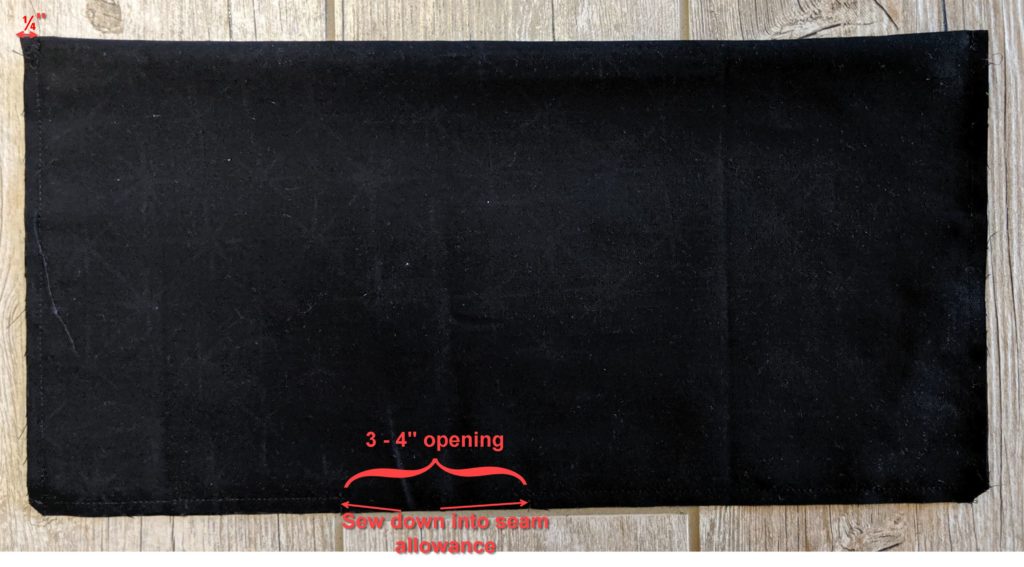
Clip corners of the pocket and turn right side out.
Press, folding the seam allowance of the opening into the inside of the pocket.
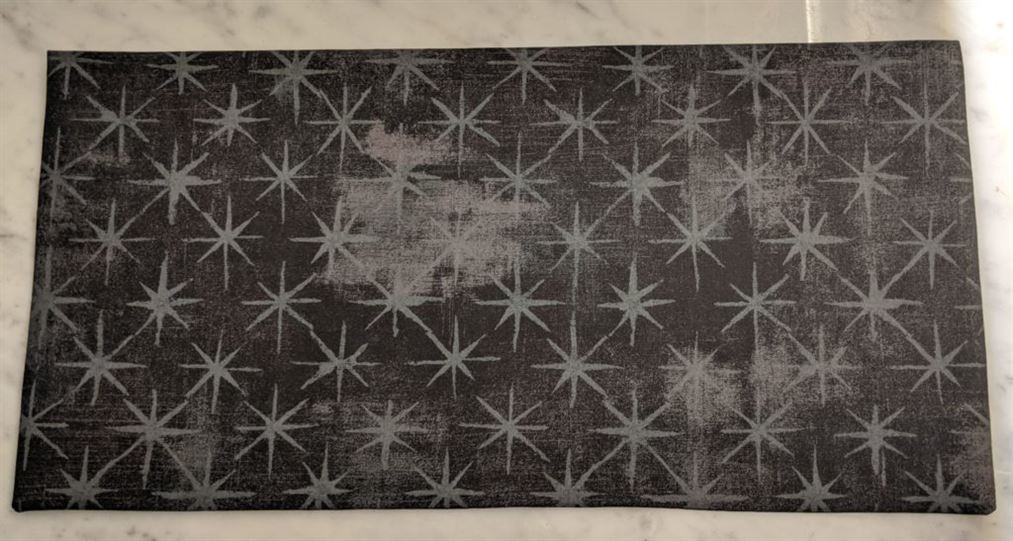
If you wish to use decorative stitching to attach the pocket, sew any such stitch along the top of the pocket before sewing the pocket to the apron. (I added the same decorative stitch I used on the ties to the border of the pocket.)
Make a mark 4″ from the bottom of the tea towel apron and align the bottom of the pocket with the mark, making sure the pocket is centered left to right on the apron. Stitch the sides and the bottom of the pocket to the apron.
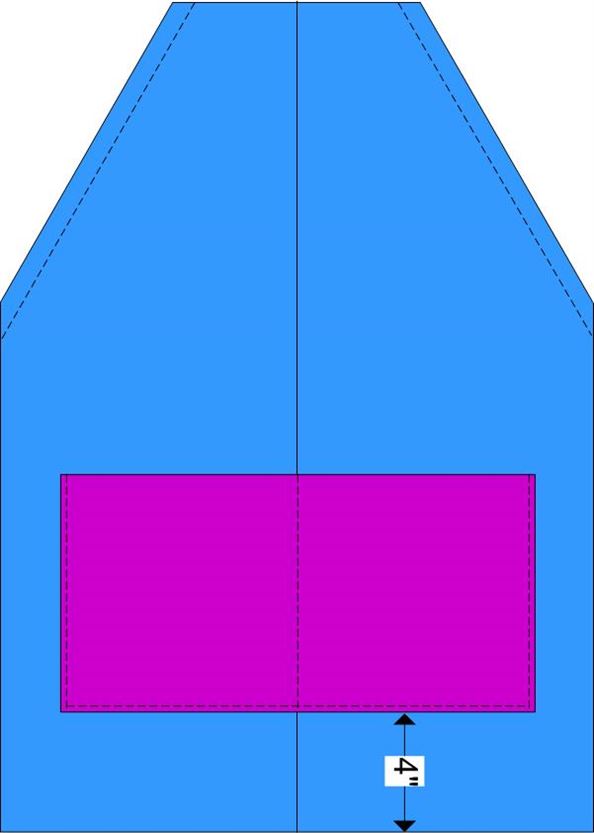
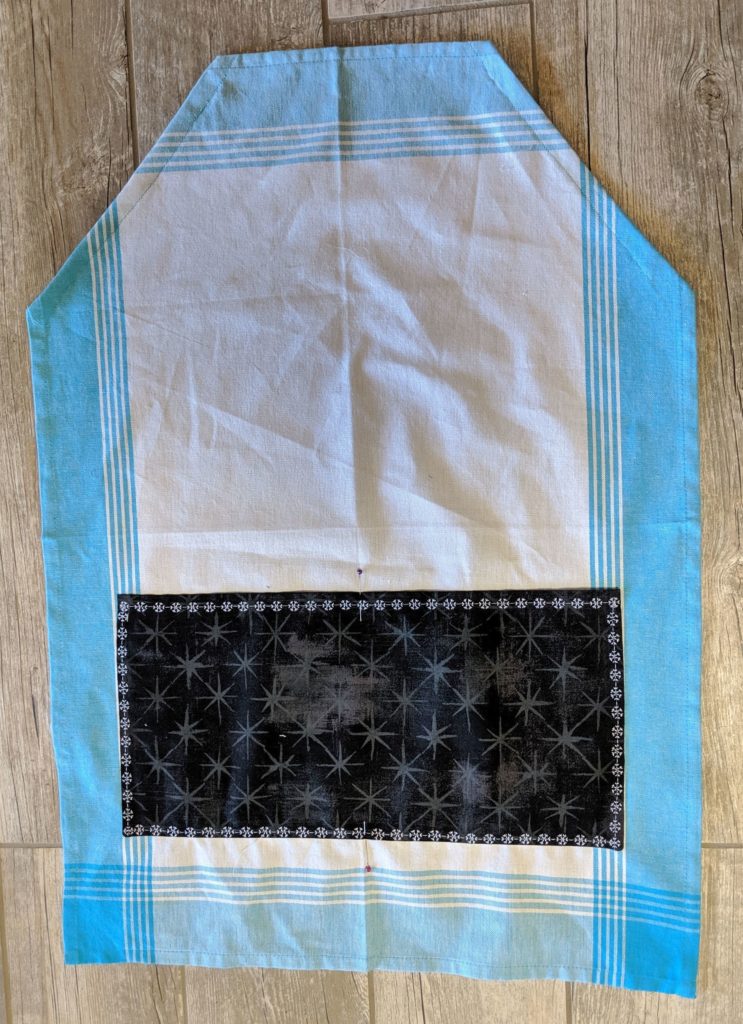
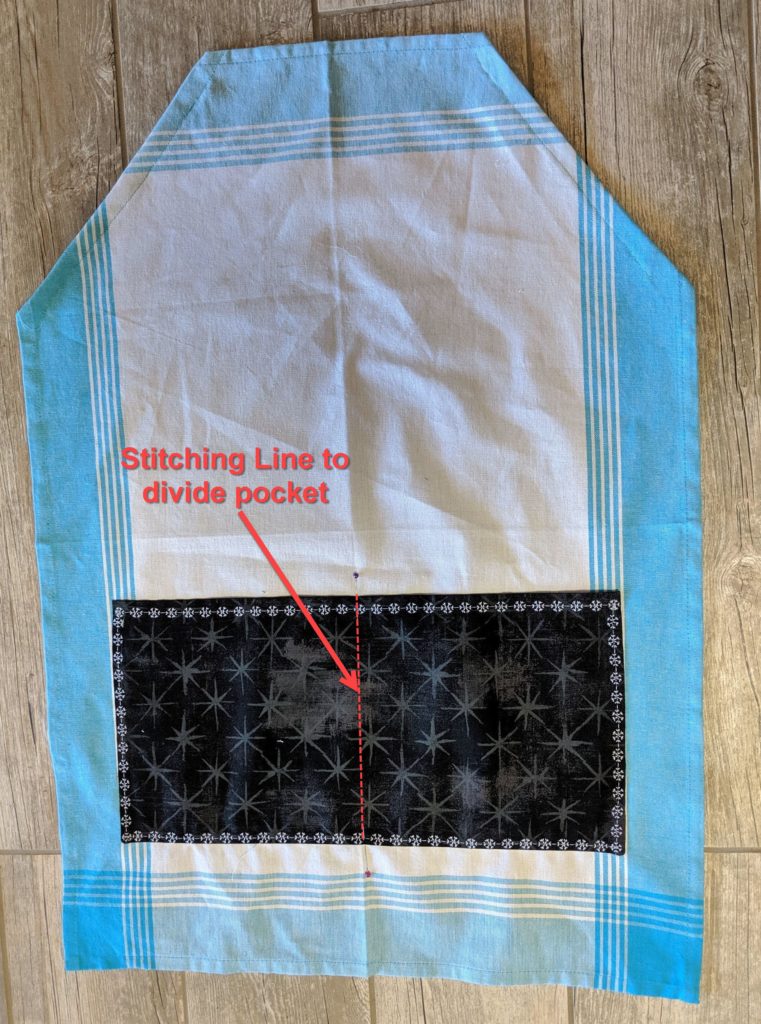
Mark the horizontal center of the pocket and stitch along the line to subdivide the pocket into two.
Insert Ties into Tea Towel Apron Casing
Place a safety pin on one end of the long tie and thread the tie through the casing on the apron. Start at the bottom of the casing on one side, thread the tie through it, and then down from the top of the other casing on the other side. Leave enough of the tie in between the casings to serve as the neck strap for the tea towel apron. Adjust the tie so that an equal amount falls below the right and left casings.

Embellish as Desired
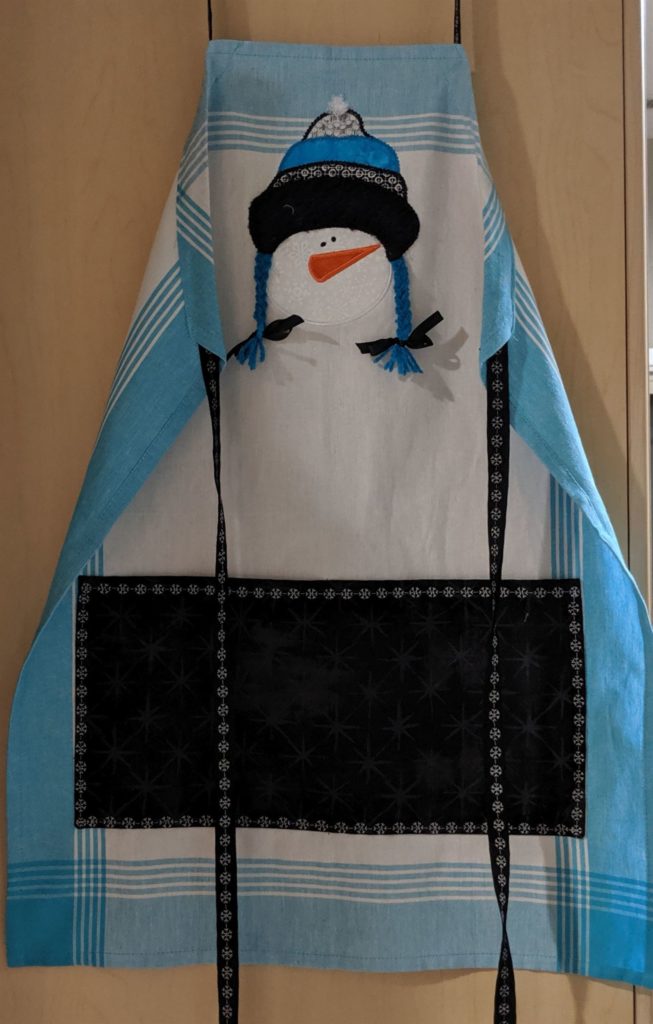
You can certainly stop at this point and have a cute simple apron to give as a gift or to wear when doing all your holiday cooking. But look how cute the apron is when you add a design to the top of the apron.
I added an appliqué embroidery from Kimberbell’s That’s Sew Chenille: Christmas Hotpads collection. The embroidery doesn’t have to be on a pot holder. You certainly can add any of the designs on the CD to towels, shirts, bags, or whatever you choose.
To get a better look at some of the cute designs included on the CD be sure to attend October Sew Fun where I’ll show you some more of the designs in different applications.
Coupon
We have some nice tea towels at our stores. Stop in and see. If we don’t have the style/color you’re looking for, we can probably order something for you. Here’s a coupon for 30% tea towels to help you get just what you want!

Comments
Cathy Ellsaesser
Good catch! I corrected the post. Thanks for letting me know!
Thanks, too, for reading our blog. Happy sewing!
Doe Keen
In the directions on how to make the pocket,it says to fold the square in half WRONG sides together. I think you mean right sides together
Print Britannia
Your content is really good. I have learned many things from your content. I hope you will provide this type of helpful content in the future. Good job!!
https://www.printbritannia.com/