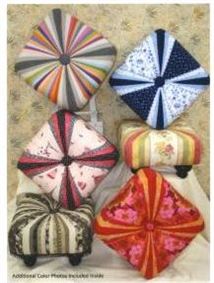
I always try to make something for my grandchildren for Christmas. This year I decided to make tuffets for them. I saw the tuffets at the Sew Expo, and I really liked the square tuffet with a focal fabric in the center of each side. The pattern is from Quilters Cocoon based on a design by Myra Mitchell.
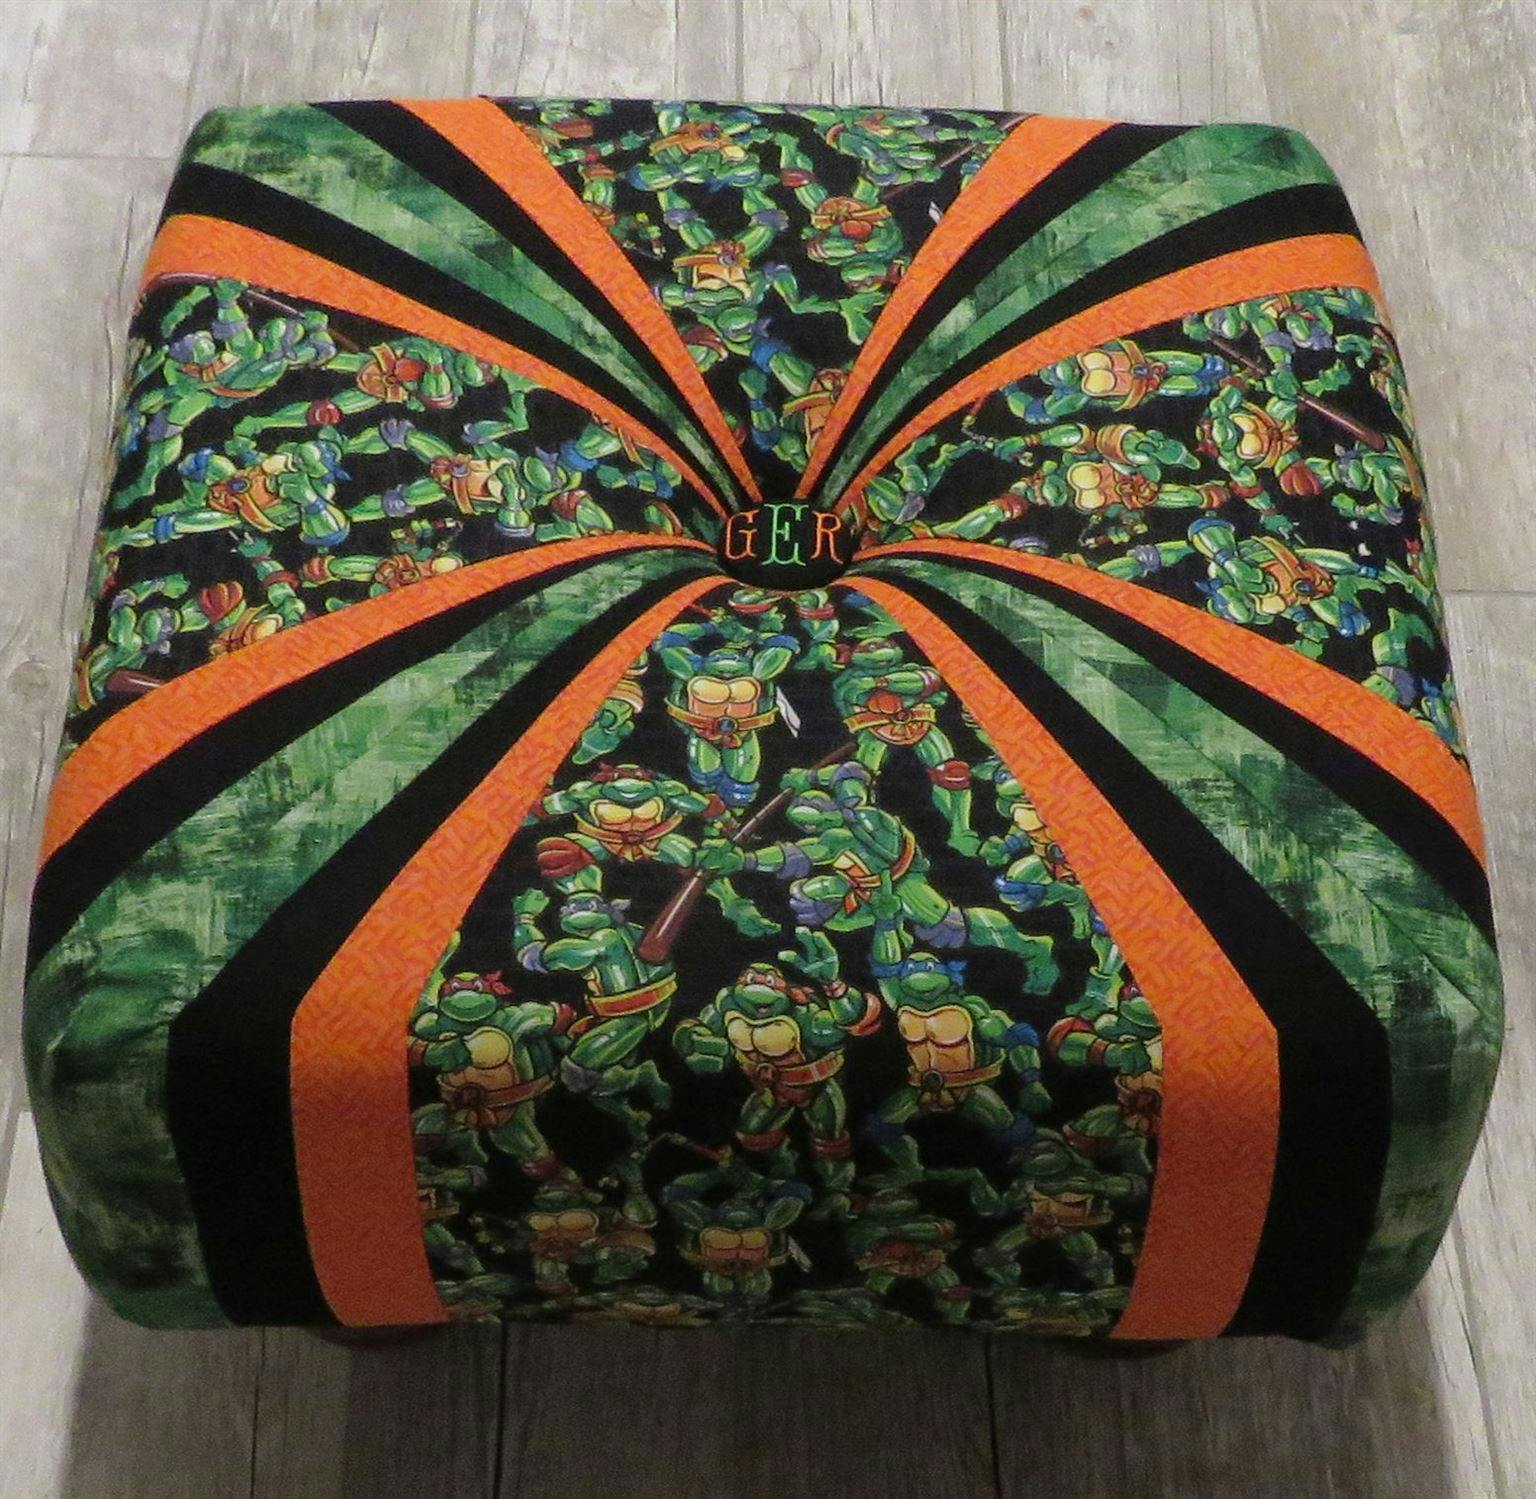
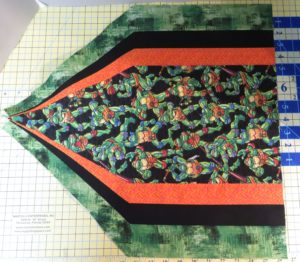
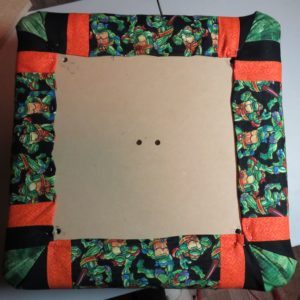
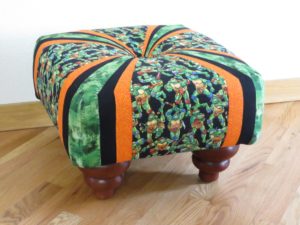
Since my youngest grandson loves Mutant Ninja Turtles, I decided that was just the ticket for his tuffet. So I purchased some licensed fabric featuring Ninja Turtles for the focal fabric. I then picked out some complementary fabrics to use in the corners of the square tuffet.
The Square Tuffet Kit
At the Expo, I purchased an entire square tuffet kit which includes the instructions, pattern printed on interfacing, foam, upholstery batting, square board with installed t-nuts, button, and tuffet legs. You can just purchase the instructions and printed pattern, and then buy your own board, legs, etc. The instructions tell you what you need to purchase to make one with your own components. They also show you how to install the t-nuts needed to attach the legs. Check with your local Rocky Mountain Sewing and Vacuum store to order a kit or just the instructions and pattern printed on fusible interfacing.
Supplies Needed
- Tuffet kit
- Fabric
- 3/4 yard of the focal fabric. You need the same yardage whether the fabric is directional or not.
- 5/8 yard of each of the 3 coordinating fabrics for the corners. I would avoid directional fabric for these fabrics.
- 18″x 18″ piece of fabric for the bottom of the tuffet
- 15″x 15″ batting (like Warm and Natural) for the bottom of the tuffet.
- 6″ square of fabric for button
- 6″ square of batting for button
- 12″ upholstery needle
- PVC pipe 3-4″ in diameter for tufting
- Awl
- Electric or air-powered staple gun with at least 3/8″ staples
The Square Tuffet Cover
The Pattern
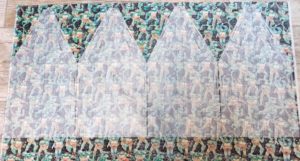
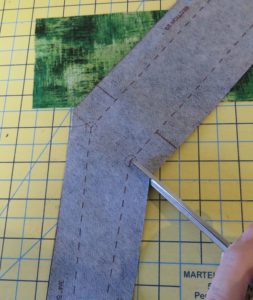
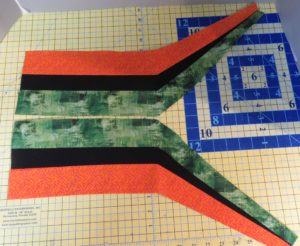
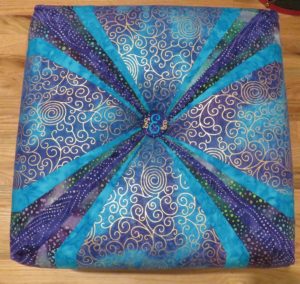
The pattern for the square tuffet is printed on fusible interfacing. There are four identical sections, one for each side of the tuffet. The photo below is for one section of the tuffet.
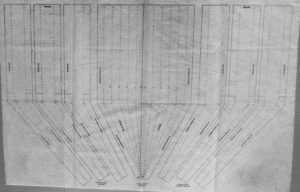
There are two sections to the pattern. Section 1 is the pattern piece for the focal fabric (Ninja Turtles) on each side and section two consists of the six pattern pieces for each corner. The section 2 pieces are numbers 2A, 2B, 2C and 2AR, 2BR and 2CR. The “C” pattern pieces are the corners and the “A” pattern pieces are next to the focal fabric. The “B” pattern pieces are sewn in between the A and C pieces. The “R” pieces are the reverse of the other corner pieces.
Cut the Fabrics
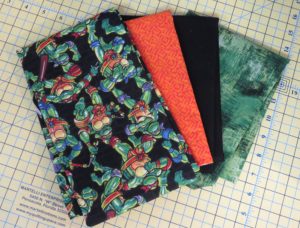
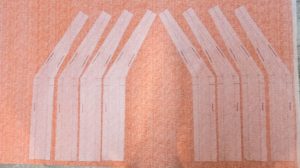
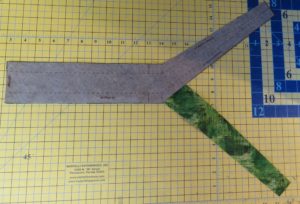
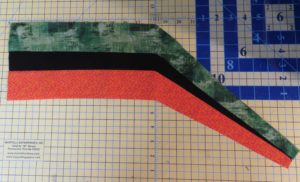
I decided to make the corners green (pattern pieces 2C and 2CR), the fabric next to the focal fabric orange(pattern pieces 2A and 2AR) and black in between the green and orange (pattern pieces 2B and 2BR).
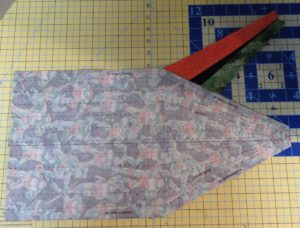
The first step is to cut out all the pattern pieces, and then iron them to the correct fabric. (From left to right below: Ninja Turtle focal fabric, orange fabric “2A and 2AR”, black fabric “2B and 2BR” and green fabric “2C and 2CR”. Use Mary Ellen’s Best Press or other starch to give some crispness to the fabric before ironing on the interfacing. Use medium heat with a dry iron to adhere the interfacing to the fabric. Be sure you do not scorch or distort the fusible interfacing.
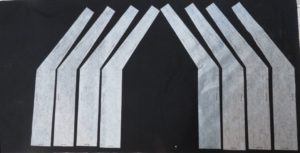
Sew the Corners
The first step in creating the sides of the square tuffet is to make 1/2 of a corner.
- Snip the inside (concave) corners of all section 2 pieces. Snip in to just before the pivot points.
- With right sides together, match pivot points on fabric 2A and 2B and pin together.
- Start sewing at the top until you reach the pivot point. Use a small 1.5 stitch. Stop just at the pivot point and backstitch.
- Leave the needle down at the pivot point. Raise presser foot to adjust fabrics so the lower sections can be lined up right sides together. Be sure there are no pleats or wrinkles at the corner.
- Take a couple of stitches and backstitch.
- Continue sewing to the bottom and backstitch again.
NOTE: you may have to stretch one of the fabrics a little to get the sections to come out even at the end. - Trim seam to reduce bulk.
- Press seam toward fabric 2B.
- Add fabric 2C to 2B using above instructions.
- Sew remaining 2A. 2B and 2C sections.
- Complete all corner sections by sewing 2AR, 2BR, and 2CR sections the same way.
You now have 4 regular 1/2 corner pieces (Section2) and 4 reverse 1/2 corner pieces (section 2R)
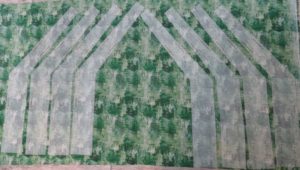
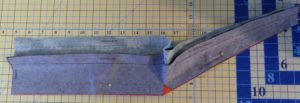
Make the Square Tuffet Sides
- With right sides together, pin section 2A to Section 1 (the focal fabric).
- As with the corner sections above, using a small stitch, sew from the top to the pivot point.
- Leave needle down at pivot point and raise presser foot to adjust fabrics so the lower sections are lined up right sides together.
- Continue sewing to the bottom and backstitch at the end.
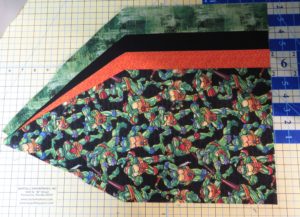
- Press.
- Trim seam.
- With right sides together pin section 2AR to the other side of section 1.
- Sew seam, pivoting at pivot point as above.
- This completes one side of the square tuffet.
- Repeat with the 3 remaining sides.
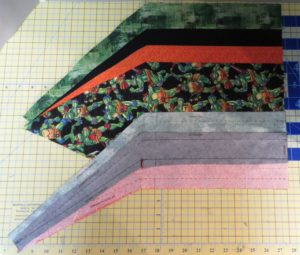
Put the Sides Together
To complete the square tuffet cover:
- Place two completed side sections right sides together.
- Pin at pivot point and then to the top and bottom, easing as necessary.
- Sew the seam, following the curved dotted line, pivoting at the pivot point.
- You now have one half of the square tuffet cover.
- Repeat for the other two side sections.
- Finish the square tuffet cover by sewing the two halves together.
- On the bottom, fold up ¾” and press.
- Sew along the folded edge to hold in place.
Your tuffet cover is complete!
Upholstering the Square Tuffet
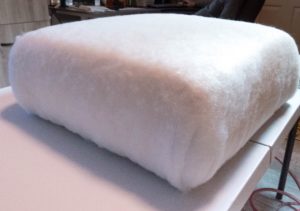
Cover the Foam with Batting
- Place upholstery batting on a sturdy table.
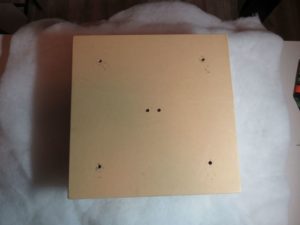
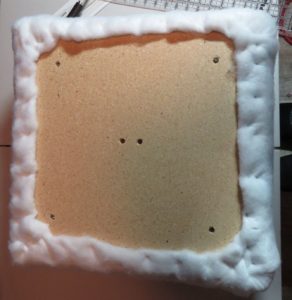
- With the foam side down, place the wood base in the center of the batting.
- Starting at the corners, pull the batting snug and staple to secure.
- Pull the sides snug and staple to secure.
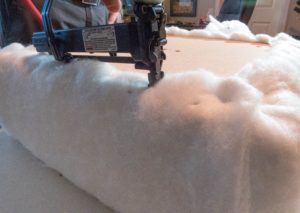
- Trim the excess batting leaving ½” from the staples.
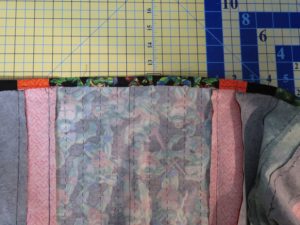
Place Tuffet Cover on Foam
-
- Flip wood base over so that the foam is right side up.
- Insert an awl into the center of the tuffet cover.
- Line the tip of the awl up with the center mark on the foam and insert into the foam.
- Pull the tuffet cover over the foam tightly.
- Remove the awl and make sure the tuffet corners line up with the corners on the wood base.
- Flip tuffet over.
- Starting in the corners, pull taut and secure with staples. (Staple along the hem of the cover, where the fabric is doubled over).
- Once the four corners are secure, move to the sides and secure with staples.
The Button
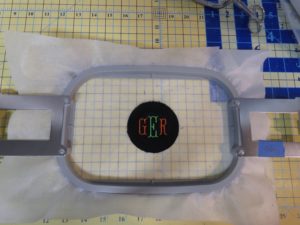
Embroidered Covered Button
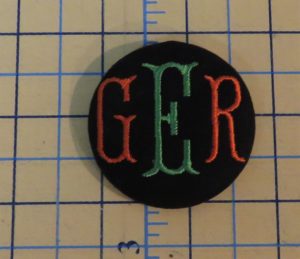
The kit comes with a 2½” button and a quite involved way to sew the cover on it. I decided to just use a 1 7/8″ covered button kit and make one a little easier. After embroidering my grandson’s initials on a piece of black fabric that had a piece of batting under the fabric, I used the button cover kit to snap it all in place.
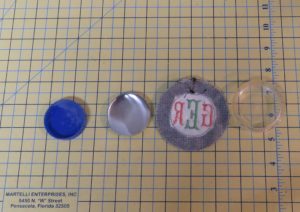
You can make a button or use a pre-made button for your tuffet. Just be sure it’s at least 2″ in diameter.
Attach the Button to the Tuffet
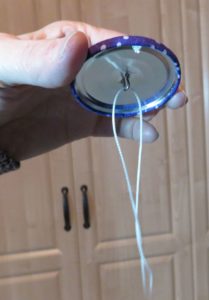
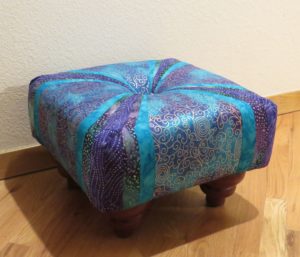
I forgot to photograph these steps when I was making the Ninja Turtle tuffet. So the pictures of the button attachment are from another tuffet I made for my granddaughter.
- String a long piece of nylon cording through the shank of the button. Cording should be at least 24″ long.
- Place a rat tail file in one of the center holes in the wood base of the tuffet. Pierce the foam until you can feel the end of the file through the tuffet cover hole at the top. (This creates a path for the 12″ upholstery needle.)
- Repeat for the other hole in the center of the wood base.
- Insert the eye side of the 12″ upholstery needle through the hole from the bottom of the wood base until the eye is sticking out of the tuffet cover hole.
- Thread one end of the nylon cording through the eye of the needle and pull through the foam through the hole in the wood base.
- Repeat for the other end of the thread.
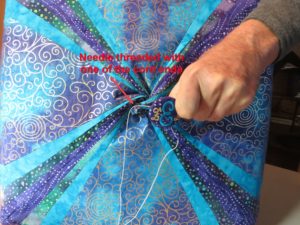
- Pull the strings tight from the bottom of the tuffet.
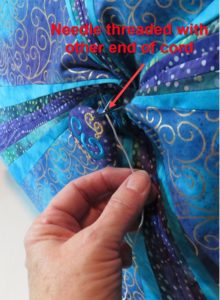
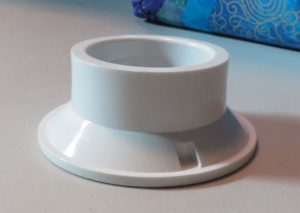
- Place a 3-4″ PVC pipe on the table. I used a PVC drain assembly.
- Place the tuffet upside down, centering the button in the center of the PVC pipe.
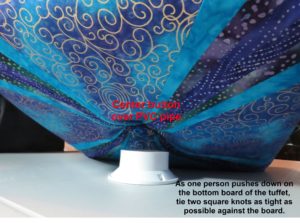
- Have someone press down on the wood base of the tuffet as you pull the cording tight and tie a square knot as close as possible to the board.
- Tie a second square knot.
- Trim excess cord and staple cord ends to the bottom of the board.
Finish the Bottom of the Tuffet
- Cut a piece of thin batting (such as Warm and Natural) approximately 15″ x 15″ for the bottom of the square tuffet.
- Cut a piece of bottom fabric 16½” x 16½”.
- Using Best Press, fold over ½” and press each side.
- Mark position of leg hole and make holes at those locations in the batting and fabric.
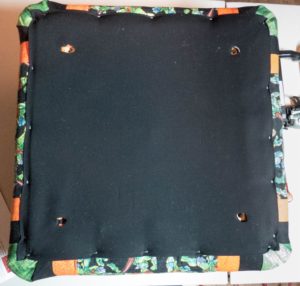
- Secure edge of fabric around the holes with a couple of staples.
- Screw legs into each t-nut.
That’s it! You have created a one-of-a-kind tuffet. I think my grandson will really like this one. No curds or whey for him, though.
This one is for my granddaughter. She likes purple and teal. Two tuffets down, two to go!
If you think you’d like to make a tuffet, I recommend buying the entire kit for the first one and then you can see how you would create a tuffet from materials you can get at the hardware store and fabric store. Check with your Rocky Mountain Sewing and Vacuum store and have them order a kit for you.
Comments
Eileen Anne Simms
we are doing this tuffet in class so excited