In my earlier blog, I described how to Gather Fabric and Create Ruffles using thread or elastic. These are tried and true methods of gathering fabric for creating fullness or making ruffles. However, there are special sewing machine feet for gathering fabric that can make that job even easier.
Sewing Machine Feet for Gathering Fabric
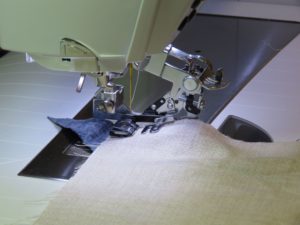
The Gathering Foot
 The gathering foot’s is one of the sewing machine feet for gathering fabric. Its main function is to gather and attach at the same time. The presser foot acts together with the feed dogs underneath the fabric and creates the small gathers in each stitch while sewing it to the “base fabric”.
This foot only gathers at a set rate and isn’t adjustable. However, you can change the stitch length to change the amount of gathering as the stitch length determines the size of the gathers. A longer stitch length results in more fullness in the ruffle because each stitch draws up more fabric.
The gathering foot works best with light to medium-weight fabrics.
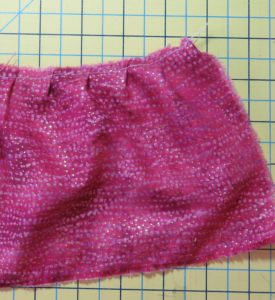
It is quite simple to make a ruffle with this type of gathering foot.
- Place the fabric that will be the ruffle right side up underneath the foot.
- Slide the fabric you want to sew the ruffle to right side down in the slot on the left side of the foot .
- Move your needle position to as far left as possible.
- Start to sew, but do not hinder the bottom fabric (the ruffle) in any way.
- Continue to adjust the top fabric (the “base fabric”) so that it stays to the right under the foot. It will have a tendency to move to the left and out from under the foot.
- Sew slowly.
Place both fabrics right side down if you want to attach the ruffle to the top of the base fabric with seams even and face up.
Click here for a short video of using a gathering foot. You’ll find that most manufacturers will carry some sort of gathering foot, and they aren’t that expensive.
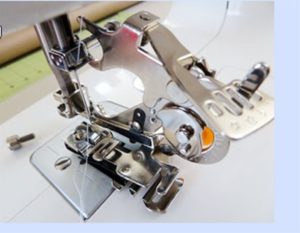
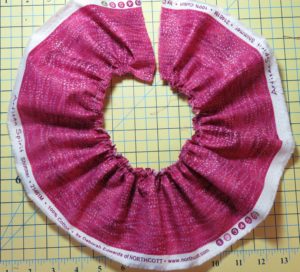
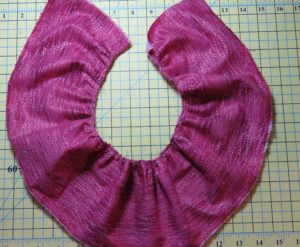
The Ruffler Foot
 Another one of the specialty sewing machine feet for gathering fabric is the ruffler. I do love my ruffler foot. I like the precision and even spacing to the gathers that the ruffler foot gives me. In addition, I can adjust how much fabric is in each ruffle and how many ruffles there are per inch. That’s the ultimate in flexibility. Unlike the gathering foot, the ruffler foot does work well with heaver fabrics.
With the ruffler foot you can gather the fabric first or you can gather the fabric and attach it to the base fabric at the same time. It is your choice. If you are attaching the ruffle to the base fabric as you make the ruffle, sew a ruffle beforehand. That way, you know how much fabric is taken up by the ruffling. Then you can calculate how fabric you need for the ruffle to cover then length of the base fabric you are sewing it to. It never hurts to have more ruffle that you need, but you sure don’t want to be short of ruffle!
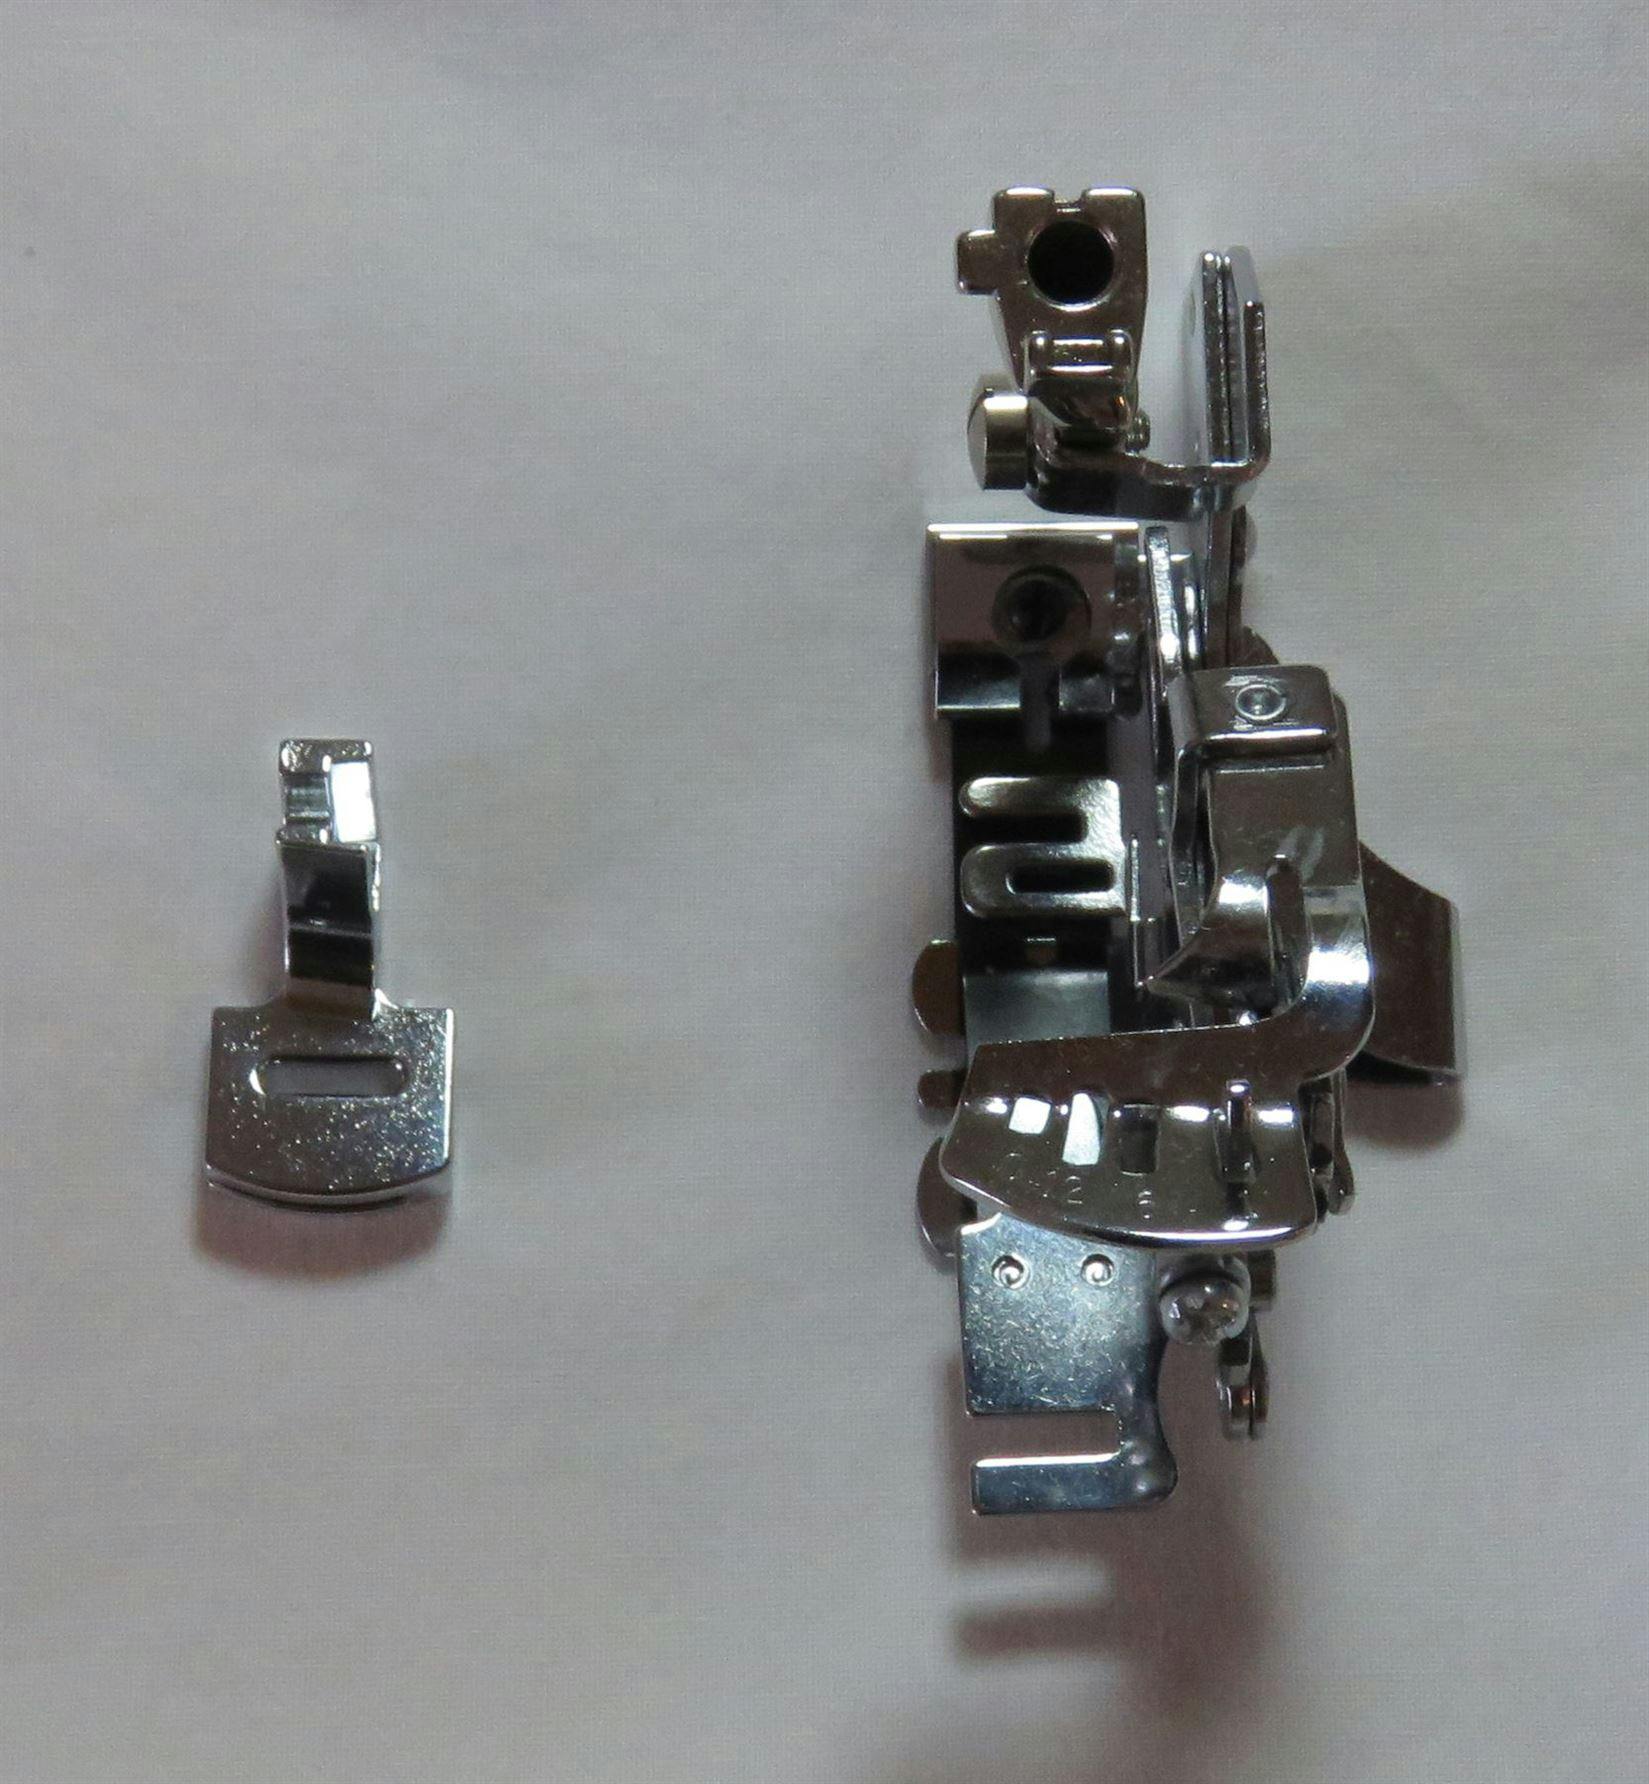
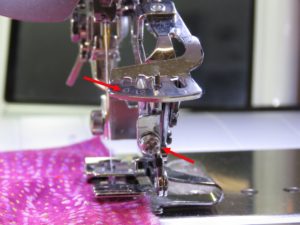
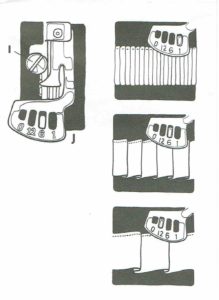
Diagram of Ruffler Foot
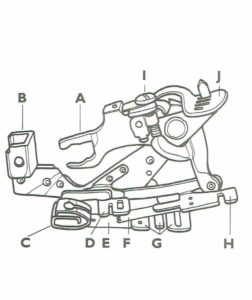 A. Fork
B. Ankle clamp
C. Foot
D. Upper Fabric Guide
E. Separator Blade
F. Feed Teeth
G. Lower Fabric Guides
H. Fabric Guide
I. Depth Adjustment Screw
J. Stitch Adjustment Bar
Attaching the Ruffler Foot to Your Machine
 Remove the ankle/shank.
- Place the ruffler on the machine ankle/shank with the fork (“A” in the above diagram) over the needle clamp screw. (You may need a longer needle clamp screw.)
- Secure the Ruffler on the ankle. (“B” in the above diagram or as appropriate for your machine).
- Set machine for straight stitch only.
- Reduce presser foot pressure as needed.
Placing Fabric in the Ruffler
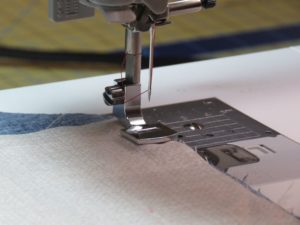
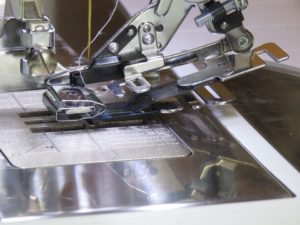
Loading the ruffling foot can be a little frustrating at times, but here’s a trick that I learned. First, place the fabric you are gathering between “E” and “F” as shown in the diagram below. Route the fabric under the foot “C”. Make sure the fabric is under the feed teeth (“E”) then loop under the little finger (“G”). That’s all there is to it if you are just sewing the ruffle and not attaching it to another piece of fabric.
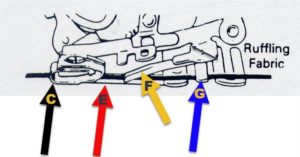
Lower the presser foot and slowly begin sewing. As you sew, the teeth will push the fabric and make a pleat. The needle will lock the gather.
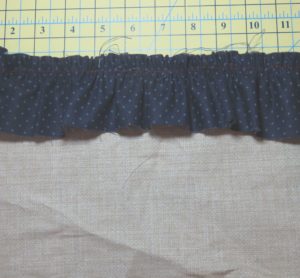
Sewing the ruffle to the base fabric
As with the gathering foot described above, you can make the ruffle and sew it to the base fabric simultaneously.
- Place the base fabric right side up under ruffler.
- Position the ruffle fabric right side down into the guide slot and blades as above.
- Sew. The feed dogs move the flat fabric as the top fabric is ruffled and stitched to it.
Some ruffler manufacturers recommend that you place the base fabric on top of the ruffle fabric. In this case you would:
 Insert the fabric to be gathered right side up between “E” and “F’ as above.
- Insert the base fabric face down into the slots of fabric guide “G” above, then under the ruffler.
- Let the edges of the fabric run evenly in the fabric guides.
Adjusting the amount of ruffling
There are several ways to change the amount your fabric is ruffled.
The ruffler foot has an adjustable bar (“J” in the diagram above) on the top of it. It is numbered 1, 6 12 and 0 (or perhaps, a star). Each number tells you how many stitches are between each pleat/ruffle and the 0 or star is for straight stitching.
There is also a knob or screw (“I” in the diagram above) that adjusts the depth of each pleat by adjusting how much fabric is pushed as the pleat is made. When you tighten the knob or screw you get really small, tight pleats. When you loosen the knob or screw, the pleats are fuller.
Finally, the stitch length setting on your sewing machine will also vary the density of the pleats. When you set the adjustment bar at 1 (one pleat per stitch) and the stitch length is short, the gathers are tighter than they are with a longer stitch length.
The diagram below illustrates how the different setting on the adjustment bar will look once you’ve sewn the ruffle. Here, too, are some samples of gathers done at the different settings.
 Click here for a great video demonstrating the Bernina ruffler foot
How to Estimate Gathering Fullness
Whatever method you use to gather fabric, the type and/or weight of the fabric plays a huge role in influencing how much fullness will look best in a project. For items using lightweight fabrics, gathering looks best with a greater multiple of fullness (up to three-fold). In contrast, heavier weight fabrics, such as many materials used for drapes, a lesser multiple of fullness is sufficient (perhaps just one-and-a-half-fold. You can find a quick way to see how your specific fabric will look when gathered by checking out this tutorial on Craftsy.
Tips
- When you cut your fabric for the ruffle, give yourself at least an inch or two extra at the beginning. It is useful to have an extra bit of fabric to grip while you’re working the fabric between the blades. Just trim it off once the ruffle is complete.
- Do a test ruffle first, to determine what settings to use. Measure a set length, say 10 inches , plus an inch or two to grip. Once sewn, measure your finished sample ruffle (minus the extra inch(es)) to see how much it’s gathered. Now determine how much fabric you’ll need to get the final effect. For example, if your fabric was 10 inches long, and your finished ruffle is 5 inches, you’ll need twice as much fabric as your finished ruffle.
- If you only have a certain amount of fabric and need to make sure it’s gathered to size, then experiment with the settings and make several test ruffles until you find a combination that provides the ruffle length you need.
- Adjust your machine’s tension settings and stitch length, as well as the attachment foot itself. Play around with it to find the best combination for your fabric.
- Don’t forget to put your presser foot down before you begin! This may sound obvious, but once the ruffler foot is attached, it barely moves when you shift the presser foot up and down. Because of this, it’s very easy to forget and try to sew with the presser foot up, but this will cause problems. So, if you’re having difficulty getting it to gather—check your presser foot lever to make sure it’s down.
Using a Serger to Gather Fabric
In an upcoming blog, I’ll get out my serger and show you how to use a serger to gather fabric.
Until then, check out your local Rocky Mountain Sewing and Vacuum store to see what feet they have for your machine so that you can create beautiful gathers and ruffles. Happy sewing!