So, by now you have probably figured out that I have grandkids and like to make gifts for them. I love the old saying that “If I’d known how great grandkids were, I would have had them first!” At Christmas, I always try to make something for them, especially while they’re still young enough to love the gifts in lieu of money. So this year it’s personalized stamps. If you have a ScanNCut you, too, can easily make a reusable stamp with a name or design. All it takes it the ScanNCut Stamp Starter Kit and your imagination.
Updates
ScanNCut Firmware
There is a firmware update for the ScanNCut 650. Click here to go to the download page a select your PC’s operating system. If you have a different model of ScanNCut, search on your model number at this web page and follow the prompts from there. The same method as described in our blog, Scan N Cut2 Firmware Update, can be used to update the firmware on your ScanNCut. Although, I was very pleased when I turned on my ScanNCut 650 to see that it automatically knew there was a firmware update, and installed it for me over the internet. So, be sure to register your ScanNCut. The wireless features of the machine are really useful!
ScanNCut Canvas
Brother has updated the ScanNCut Canvas online and desktop software so that you can use some of the new add-ons that they have developed. The current desktop version is 2.0. So if you have a prior desktop version of Canvas Workspace, be sure to download and install the update. Check out my previous blog, The Brother Rhinestone Kit Part 1: CanvasWorkspace for more information on registering a premium function and Canvas Workspace.
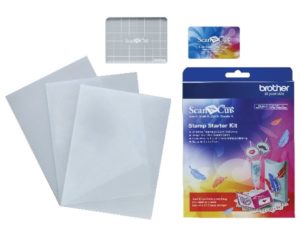
ScanNCut Stamp Starter Kit
The starter kit includes everything you need to get started making a personalize, reusable stamp. The kit comes with three 6″ x 8″ sheets of stamp material, an acrylic block to place your stamp on, instructions and an activation card. As with other ScanNCut add-ons from Brother, you will need to purchase the ScanNCut Stamp Starter kit to activate the stamp feature in Canvas Workspace.
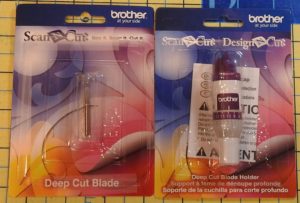
Not included in the kit is the deep cut blade and deep cut blade holder for the ScanNCut. You also need these to cut out a stamp. You can get these at any of our stores.
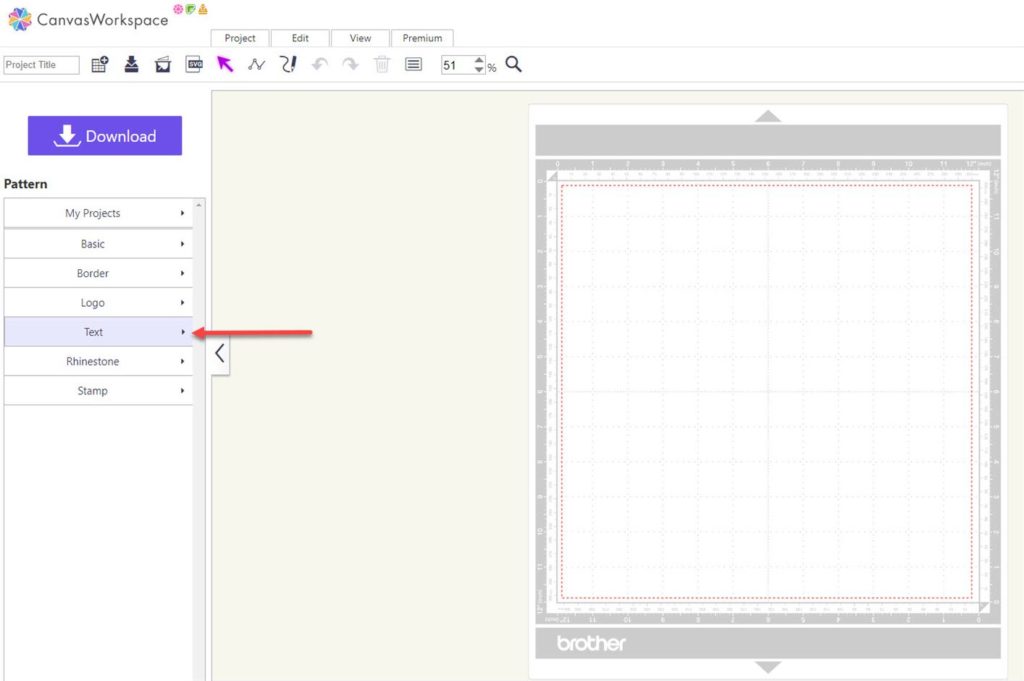
Create the Stamp in Canvas Workspace
To keep this blog as simple as possible, I am only going to show you the steps to create the stamp in Canvas Workspace online. If you use the desktop version of the software, you’ll find the method to be very similar.
Login to Canvas Workspace

Select New Project under the Canvas Project tab.

Add Text
- Select the Text option on the left side of the screen.
- Select the font you want to use for your stamp. In subsequent steps I’ll show you how to join the letters together to make a continuous stamp, so pick a font that can be “welded” together. Serif fonts, that is fonts with short lines stemming from and at an angle to the upper and lower ends of the strokes of a letter, make it easy to weld letters together.
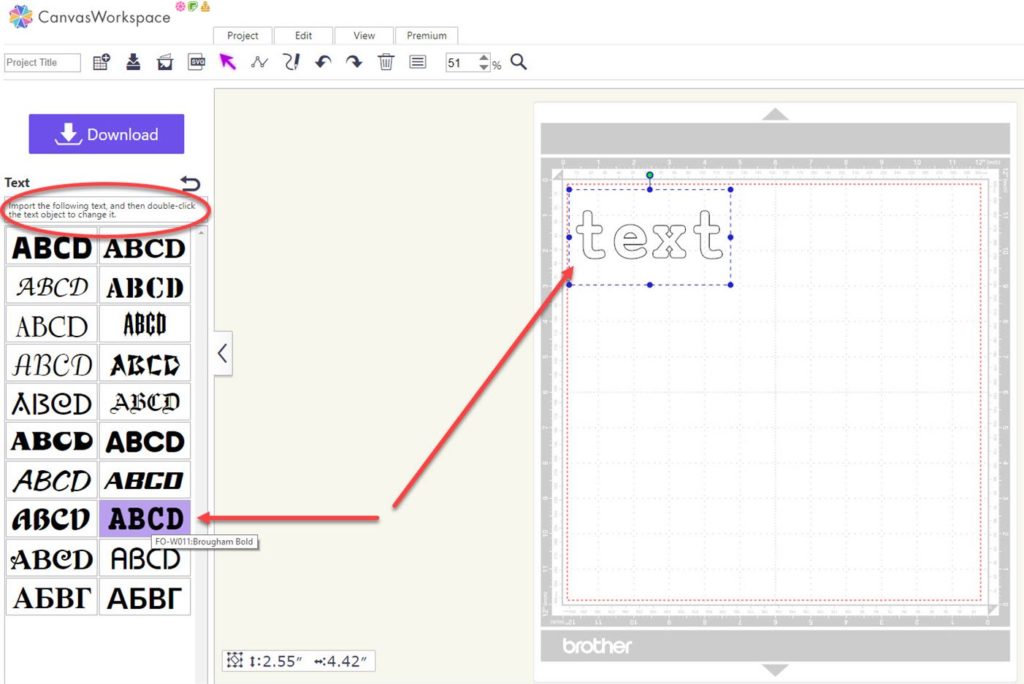
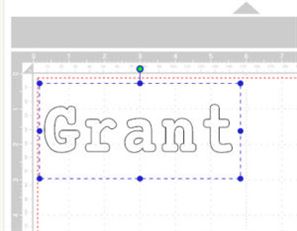
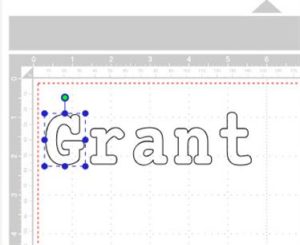
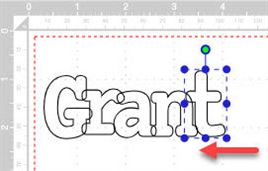
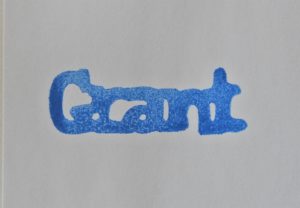
- Replace the word “text” in the font box on the screen with the name you want to use for your stamp. I’m making a stamp for my grandson, Grant.
Divide and Conquer
If you cut the text without welding them together, you will have to place each letter separately on the acrylic block for stamping. If you want the ScanNCut stamp to be all one piece, weld the letters together. Do this in such a way that you can still read the individual letters.
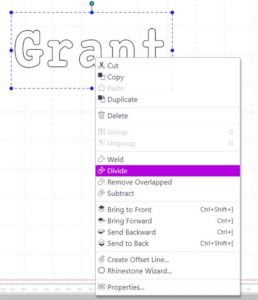
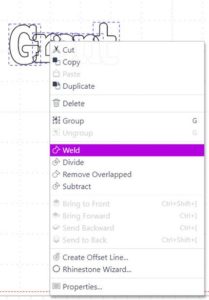
- Divide the letters by selecting the text and then Edit/Process Overlap/Divide from the tabs at the top of the screen.
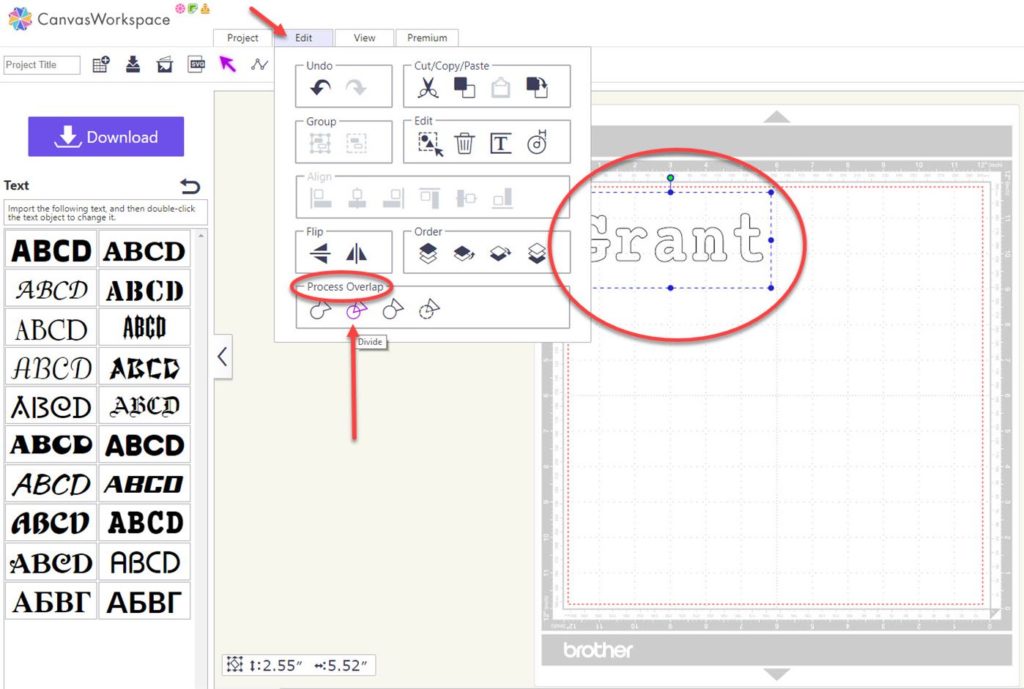
Note: you can also right click with the text selected and choose Divide.
 .
.
This makes each individual letter movable and editable.
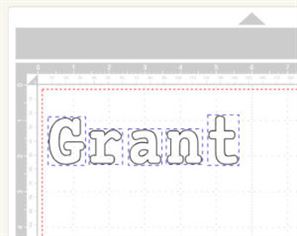
- Move each letter so that they overlap each other slightly.
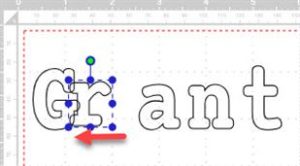
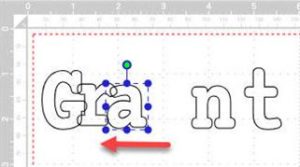

Fine Tune Overlap
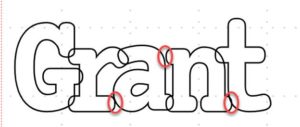
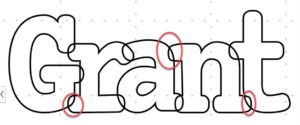
In order to get a good, one piece stamp, use the serifs of the letters to increase the area the letters join.
Modify those areas that are not overlapped enough. The areas circled in red below can be edited so that they overlap.
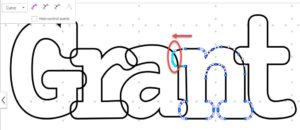
- Double click on the letter “r” to reveal control points that shape the letter.
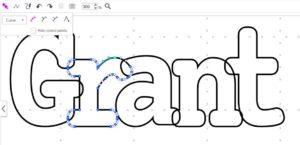
- Select the control points at the bottom right serif of the letter r by holding down the left mouse button and drawing a box around the control points.
Drag the selected control points to the right so that they overlap the “a” a little.
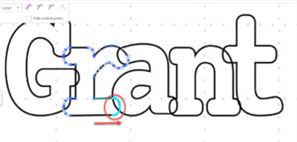
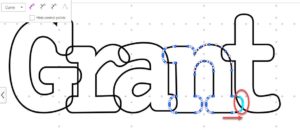
- Repeat the process for the top left serif of the letter “n”.
- As well as the bottom right serif of the letter “n”.
- Completed adjustment of serifs.
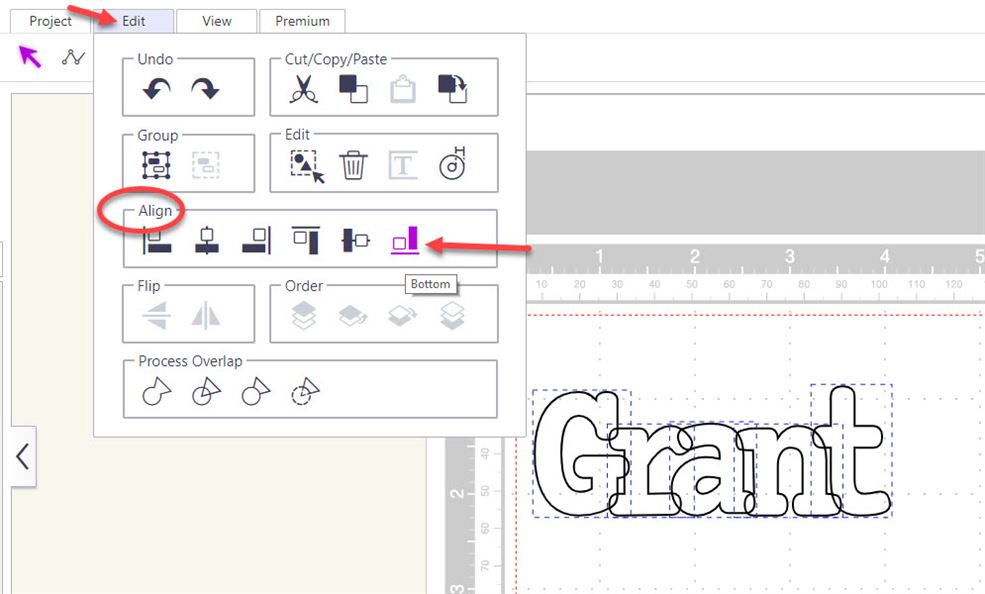
- Make sure the text is straight by aligning the bottoms of all letters.
Select all letters, select Edit/Align and then the icon to align the Bottom from the tabs at the top of the screen.
Weld
- Once all adjustments to the letters are complete, select all letters. Then select Edit/Process Overlap/Weld from the tabs at the top of the screen.
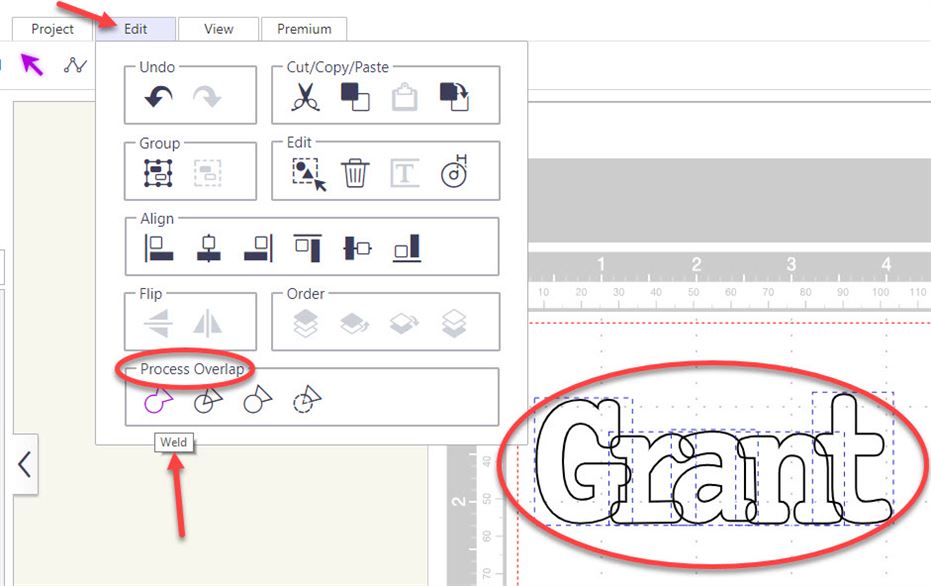
Note: you can also right click with the text selected and choose Weld.
- The lines of overlap will be removed and the letters will be welded together.

Resize
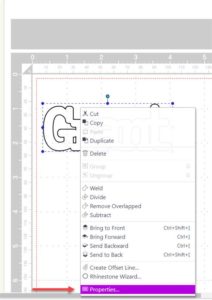
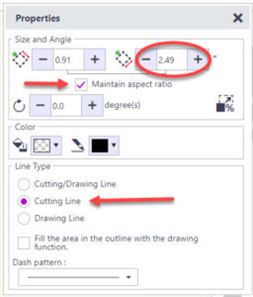
If you want your stamp to be a different size, select the stamp, right click, and select Properties.
The current properties of the stamp are displayed.
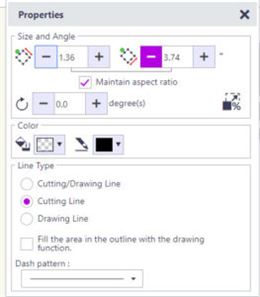
Adjust the size and any other property to your liking. Note: Be sure to select Maintain Aspect Ratio if you want the design to maintain the same ratio of length to height. Also be sure to select Cutting Line as the Line Type.
Send to ScanNCut
You can either save your design to your computer or USB stick or send the design directly to the ScanNCut if it is wireless ready.
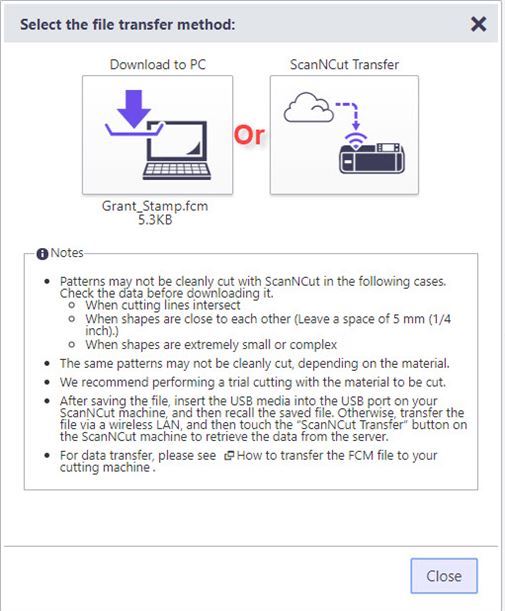
I chose to send my design directly to the ScanNCut
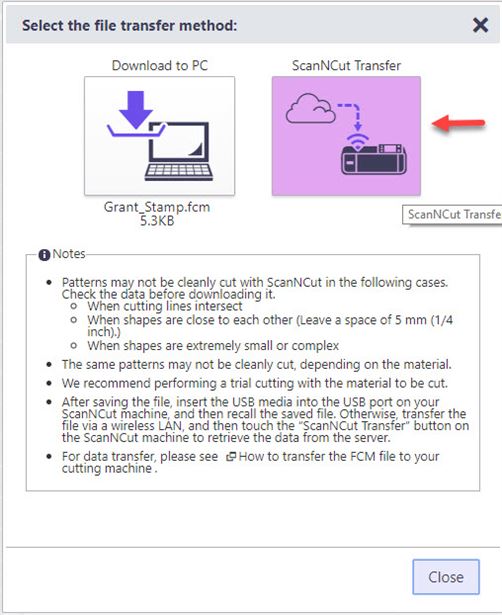
Once you click on the ScanNCut Transfer option the design will be prepped to send to your ScanNCut wirelessly.
Note: You can only transfer one design at a time to the ScanNCut. Only the last design sent to the ScanNCut will be available when you choose the ScanNCut Transfer button on the ScanNCut machine.
The ScanNCut Machine
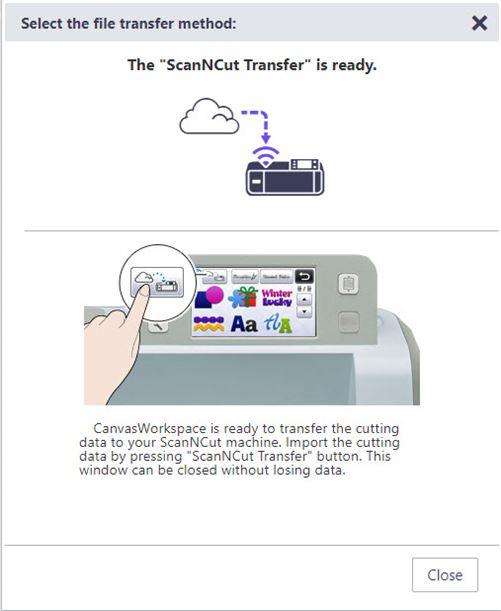
Download ScanNCut Stamp from Canvas Workspace
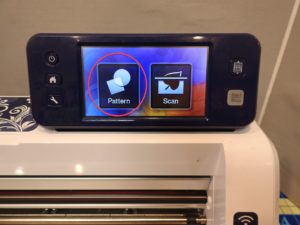
- From the ScanNCut startup page, select Pattern
- Select the ScanNCut Transfer Icon.
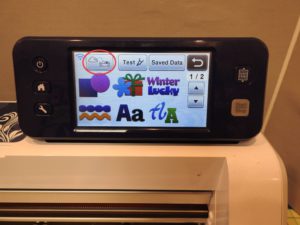
- In a few moments, depending on your internet speed, the last file uploaded from Canvas Workspace will be downloaded to the ScanNCut.
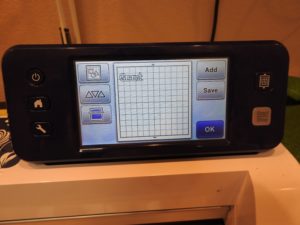
- As with any ScanNCut design you can move it, size it, rotate it as needed. However, be sure you design will fit on the 3″ x 4″ acrylic block that is used as a carrier for the stamp. (See below)
Load Mat
- The ScanNCut stamp material has a piece of clear vinyl backing on each side.
- Remove the backing from one side of the material and place the stamp material on a standard mat. (The clear ScanNCut stamp material is hard to see, but is outlined in red in the photo below).
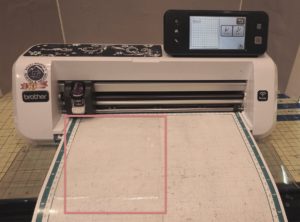
- Stretch the sheet so that no bubbles remain under the sheet.
Note: Leave the backing on the side facing up. Bubbles between the stamp sheet and the vinyl backing do not affect cutting, but I’d smooth it out as much as possible.
Cut Stamp
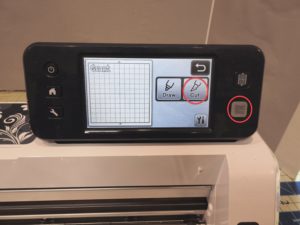
Once the mat is loaded with the ScanNCut stamp material, click okay until you get to the cut or draw screen. Select Cut and then the Start/Stop button to cut the stamp.
Apply ScanNCut Stamp to Acrylic Block
- Peel the backing from the cut stamp.
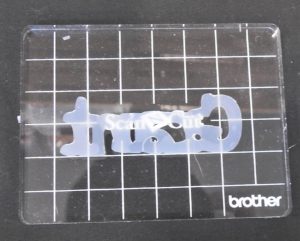
- Flip the stamp over, so that the text is reversed, and place it on the included 3″ x 4″ acrylic block using the grid markings to keep it straight.
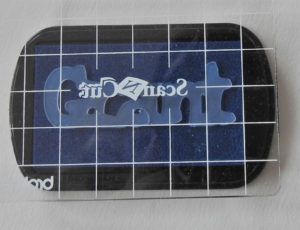
- Ink stamp with a stamp pad and you are ready to use the stamp!
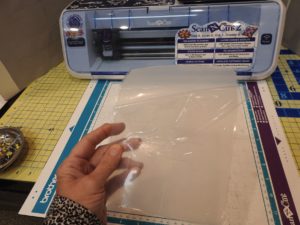
- After use, clean stamp and acrylic block Remove the stamp material from the acrylic block and store the material in a plastic bag.
Lessons Learned
In cutting the stamp material, some things I learned:
- Be sure your mat is sticky! The stamp material really needs to adhere to the mat surface.
- Make a test cut to be sure the cutting blade will cut through the material cleanly.
- Since you can use with ScanNCut stamp material from either side, it really doesn’t matter whether you cut it right side up or reversed. I recommend that you reverse your design before cutting. That way, the side you’ll use to stamp will be face up and protected by the vinyl overlay. If it’s face down, it might pick up adhesive from the mat which prevents the ink from applying evenly on the stamp.
- Press down with some pressure when stamping to make sure all surfaces of the stamp hit the paper.
- When the left over stamp sheet is used, it may curl up in the machine where the previous stamp was removed. This can be alleviated by cutting around the previous pattern with scissors to clean it up.
- Of course, in addition to any text you might want to stamp, there are numerous ready-to-use designs on Canvas Workspace in the stamp section once you have registered your ScanNCut Stamp Starter Kit.
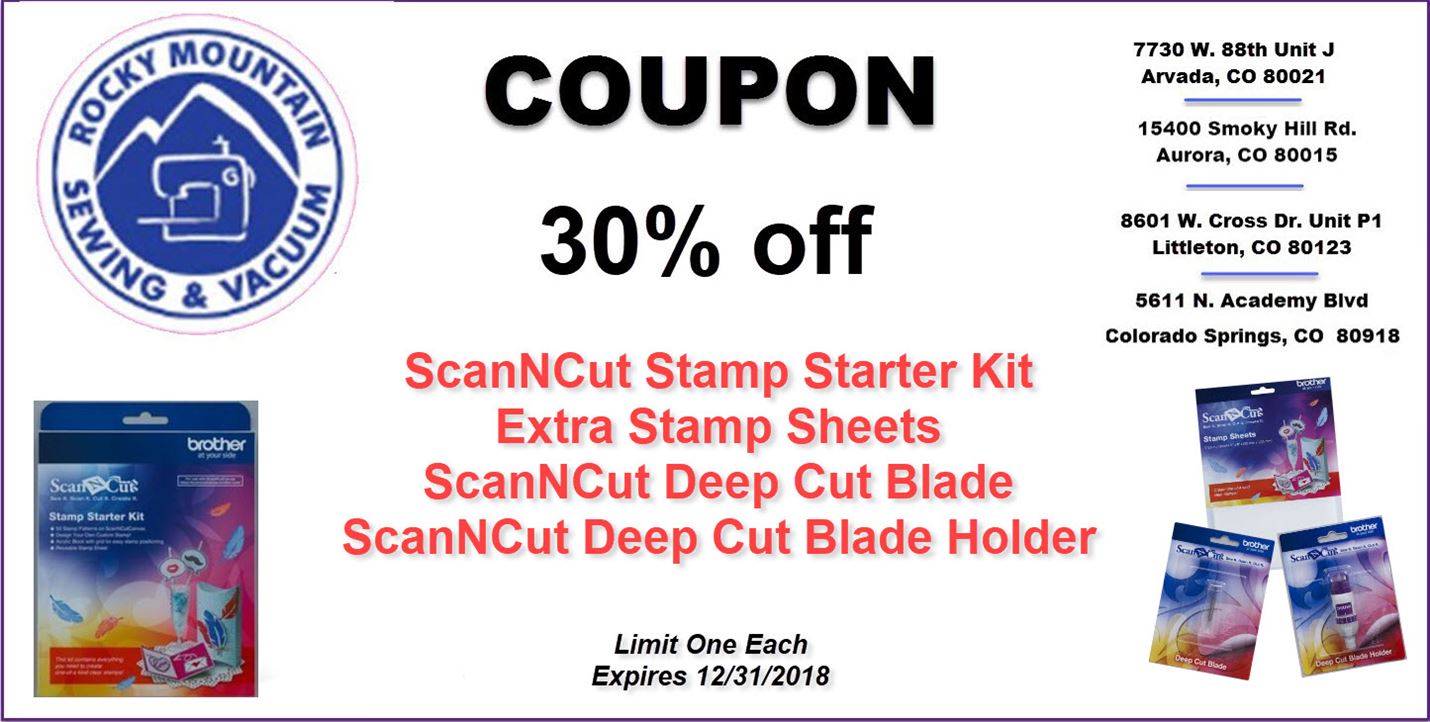
Coupon
So are you ready to start stamping? Here’s a coupon to help get you started. Have fun!