In my last blog, BES4 to ScanNCut: Appliqué Cut File from Placement Stitches, I showed you how to use BES4 Dream Edition to create ScanNCut cut files from the placement stitch sequence of the embroidery design. However, there are times when you want the actual cut fabric to be just slightly larger than the placement stitch. You need to resize the appliqué to make sure the edge stitching of the appliqué covers the fabric edge. As a result, the tack down stitch will catch the appliqué and hold it in place. This is especially helpful if you’re not using a pressure sensitive backing on the appliqué .
Just Resizing Won’t Do!
My first inclination when trying to resize the appliqué was to just increase the size of it by a small amount. This rarely works unless the design is a geometric shape like a square or circle. Just enlarging the design will not cover all parts of the placement stitch evenly. Here’s what I mean:
Geometric Designs
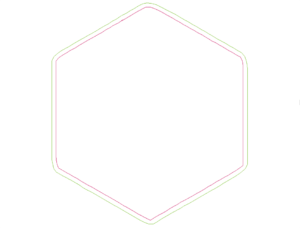
For this example I copied the hexagon, then enlarged the copy by 105%. When you align the centers of the two objects, the outline of the larger one is evenly spaced around the outline of the smaller one. This works perfectly for an appliqué to overlap the placement stitch by a little.
Symmetric Designs
Even if a design is symmetrical, just resizing by increasing the overall size will not always result in an appliqué that will be evenly spaced around the placement line. For example, I enlarged this heart by 105%, but when I align the centers of each heart, the larger one is not evenly spaced around the smaller one. See how the lines converge at the “V” of the heart?

Appliqué Designs
Many if not most appliqué designs are irregularly shaped. So just enlarging them will, most likely, not work well. In fact, the more irregular, the more difficulty in aligning the resized appliqué with the placement stitch.
In this example, I selected a design from Anita Goodesign Butterflies and Bees collection. Let’s see the difference between just enlarging the design and creating a contour around the design with BES4.
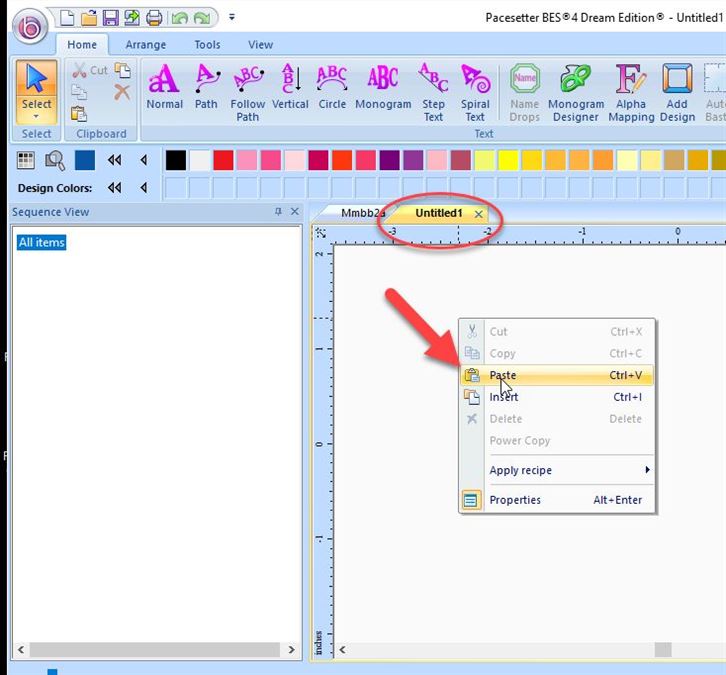
Copy Placement Stitch into New Page
- Select the placement stitch for the flower.
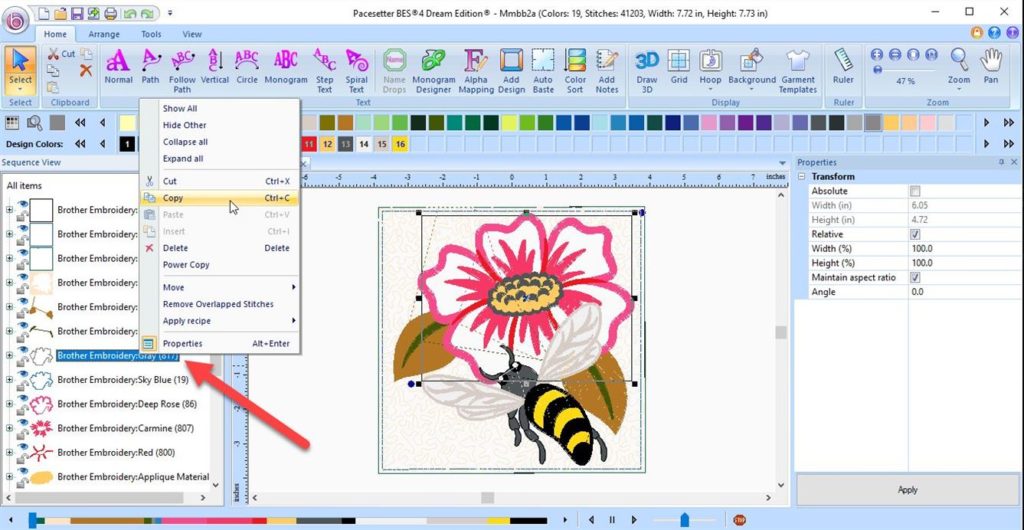
- Right click to copy it.
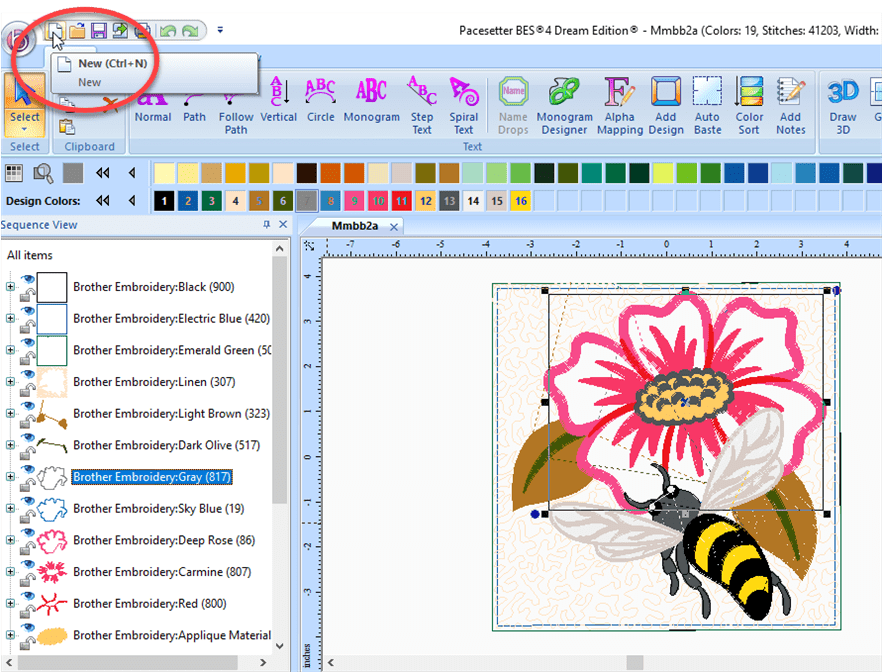
- Create a new page.
- Paste the copied sequence in the new page (Utitled1) in the BES4 software.
Enlarge the Placement Stitch
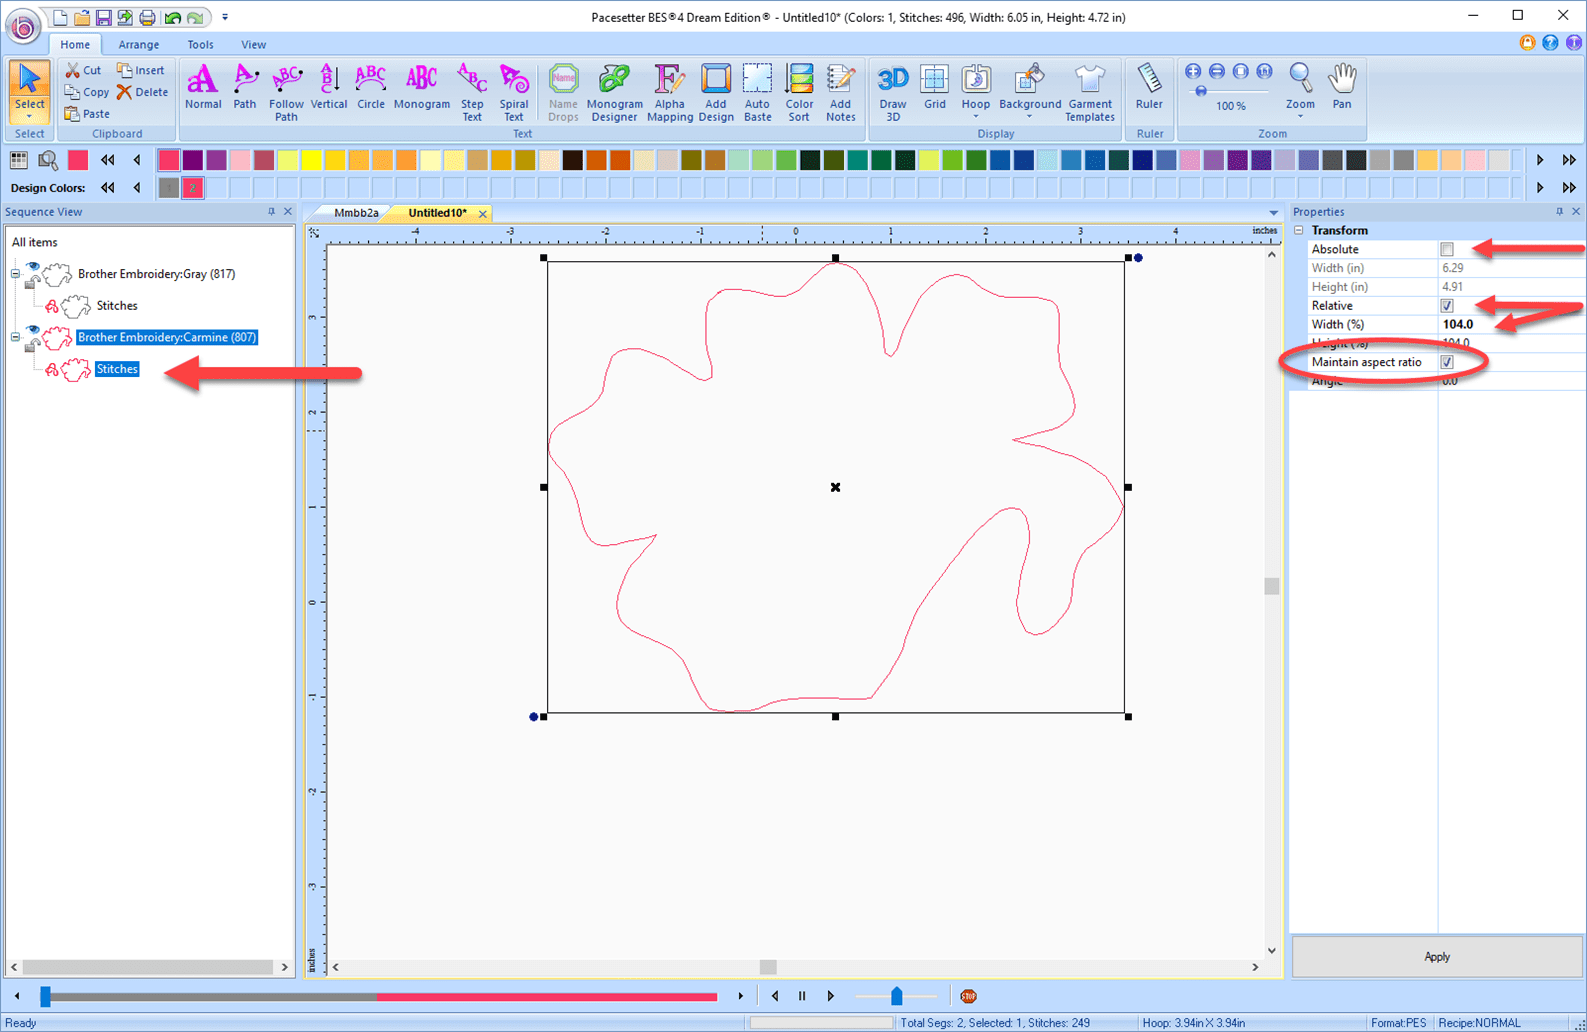
With the stitch file selected in the new tab, select copy, then paste.
Change the color of the pasted sequence so you can tell it apart from the original sequence.
Select the newly pasted sequence and in properties, under transform, type in a new size for it. Make sure that you are changing the x and y size the same amount by checking maintain aspect ratio. You can change dimensions by checking the absolute box and typing in a new width or length, or check the relative box and increase the size by a certain percent. You only have to change either the length or width. The other dimension will be changed as needed to maintain the aspect ratio.
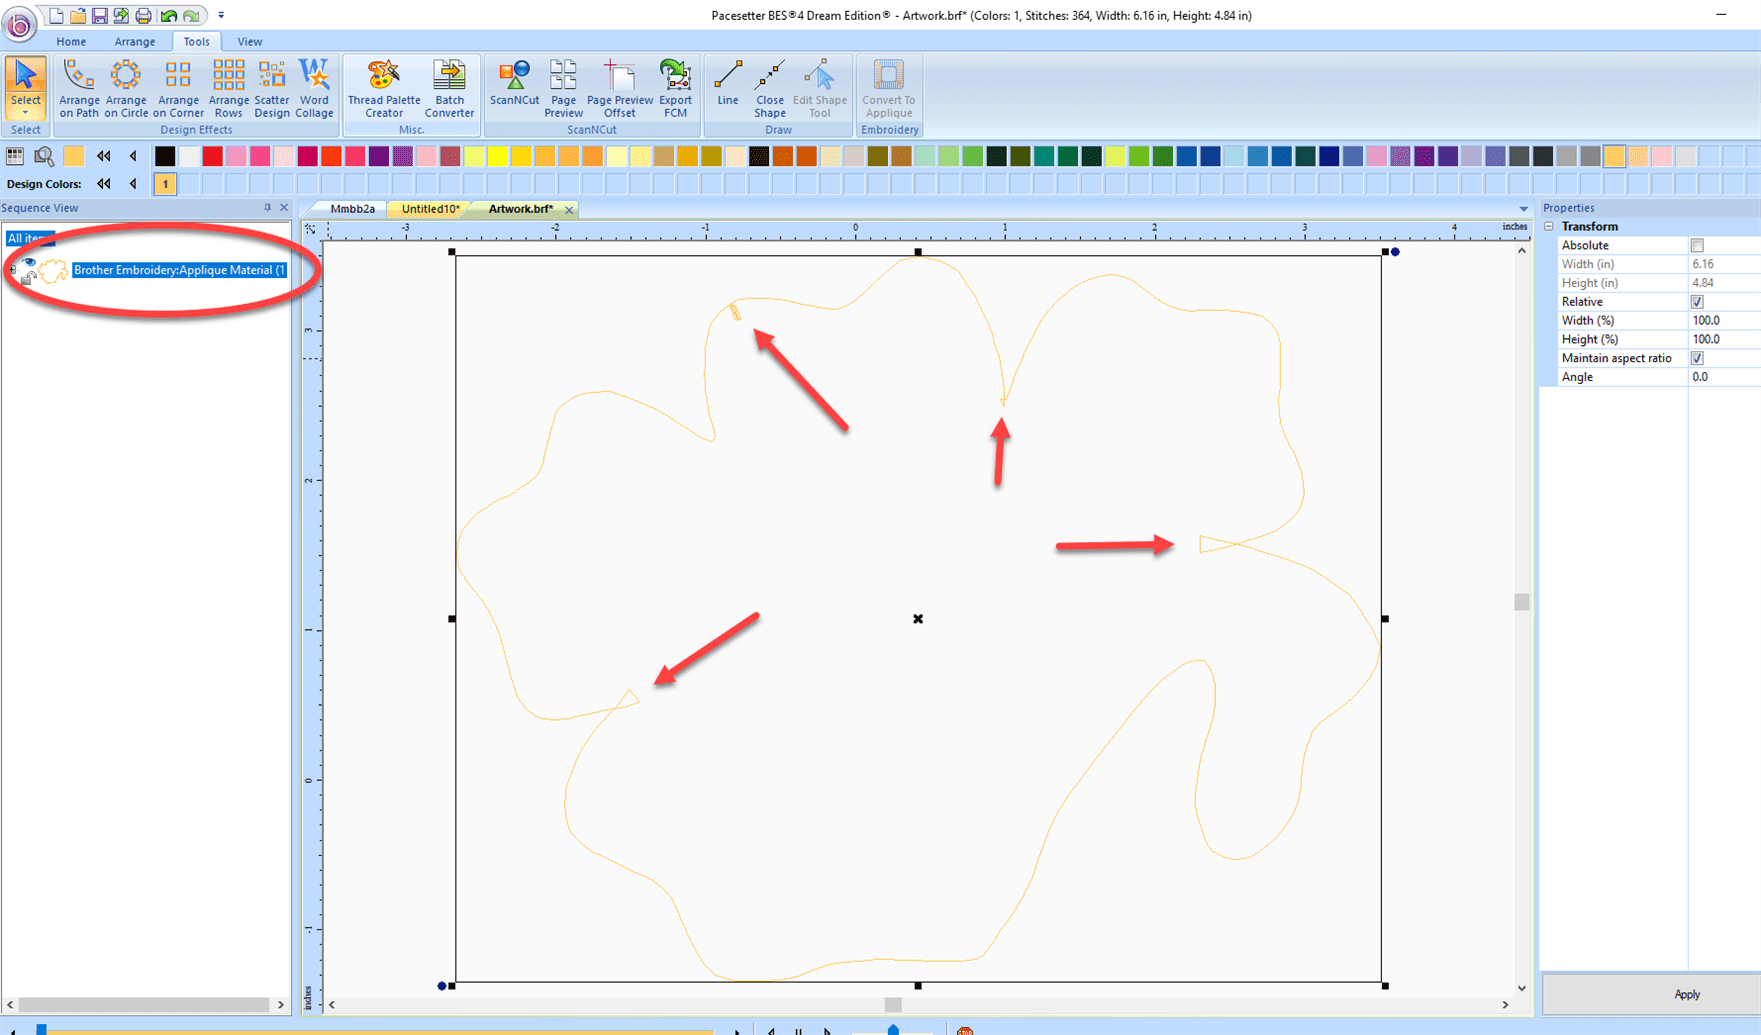
The result of changing the dimensions of the pasted sequence:
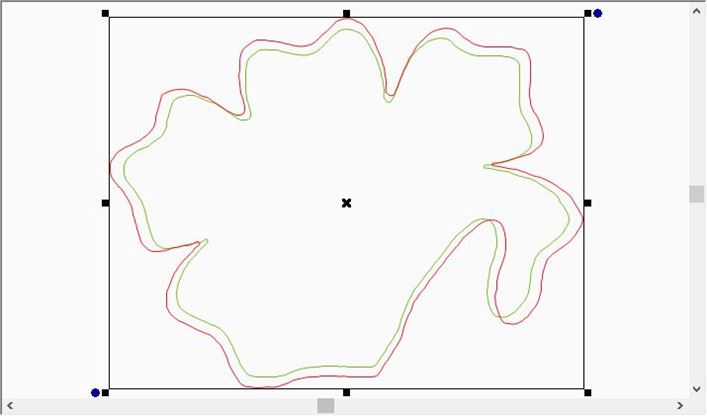
Note that the larger design, the red line is not evenly spaced around the original design, the green line. So if you were to use the red as the cut line for the flower, it would not fit evenly around the placement stitch. In fact, part of the fabric would actually be on the inside the placement stitch.
A Better Way to Resize the Appliqué
With other embroidery editing software there might be a selection to create an outline or a contour around a design, and that would be the way to go to create a new cut line that is slightly larger than the placement stitch. I know that in the Floriani FTCu software there is an outline feature to use.
BES4 requires a few extra steps to make the placement stitch sequence a little larger, but still evenly spaced around the design.
Change Placement Stitch Offset
Create Artwork
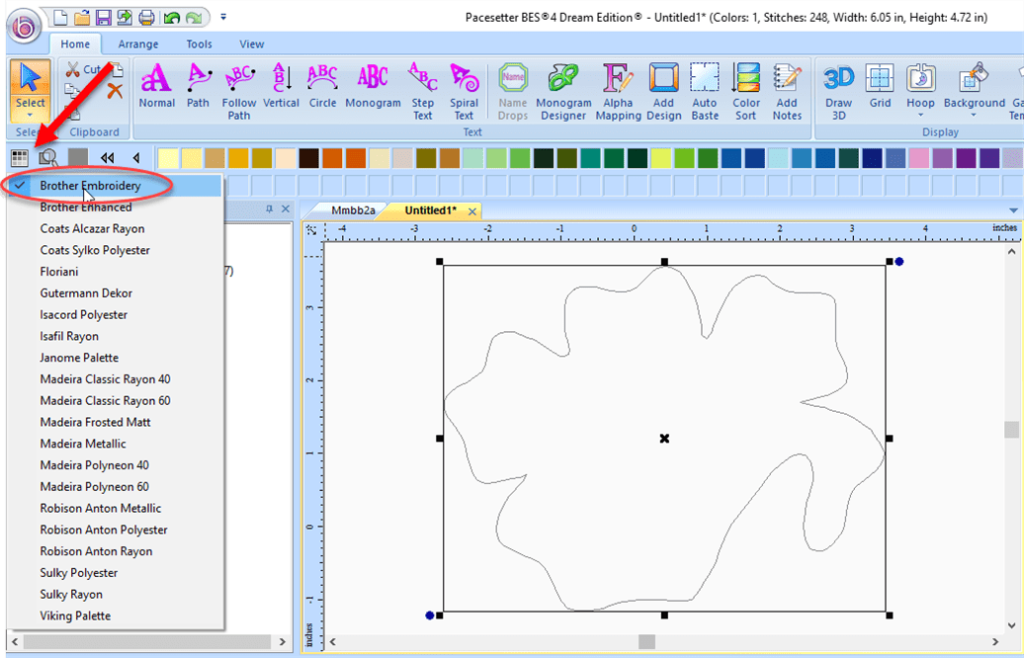
- As above, copy the placement stitch sequence and paste it into a new page.
- As shown in the previous blog, BES4 to ScanNCut: Appliqué Cut File from Placement Stitches , make sure the palette being used is Brother Embroidery and change the color of the outline to Brother Embroidery: Applique Material (100).
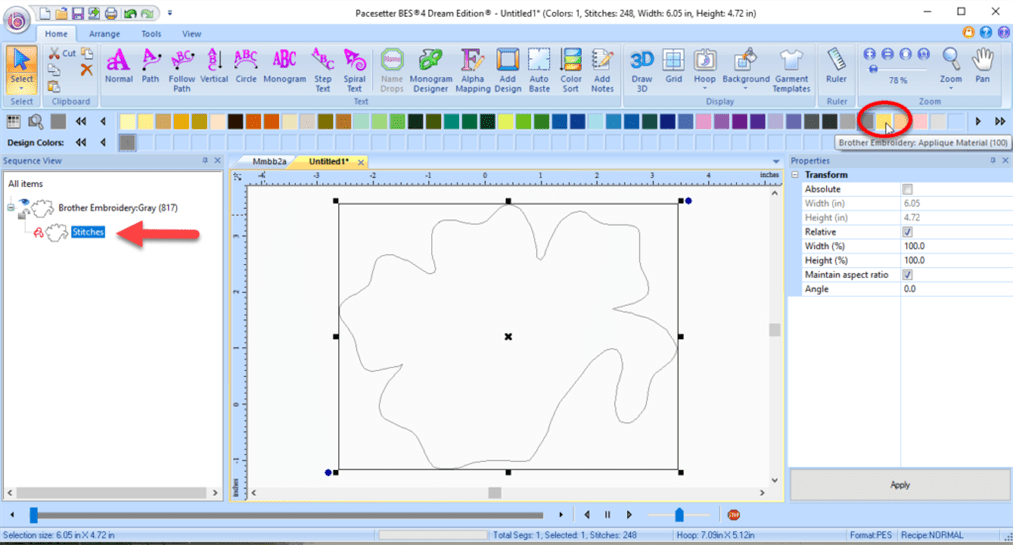
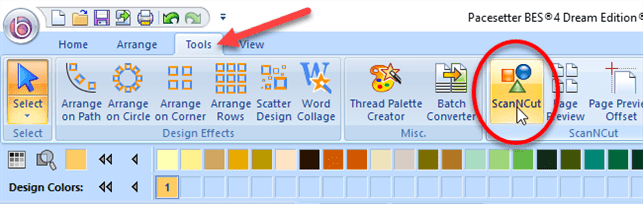
- Select the sequence and then click on the ScanNCut button.
- A new page will open called “artwork” with the design.
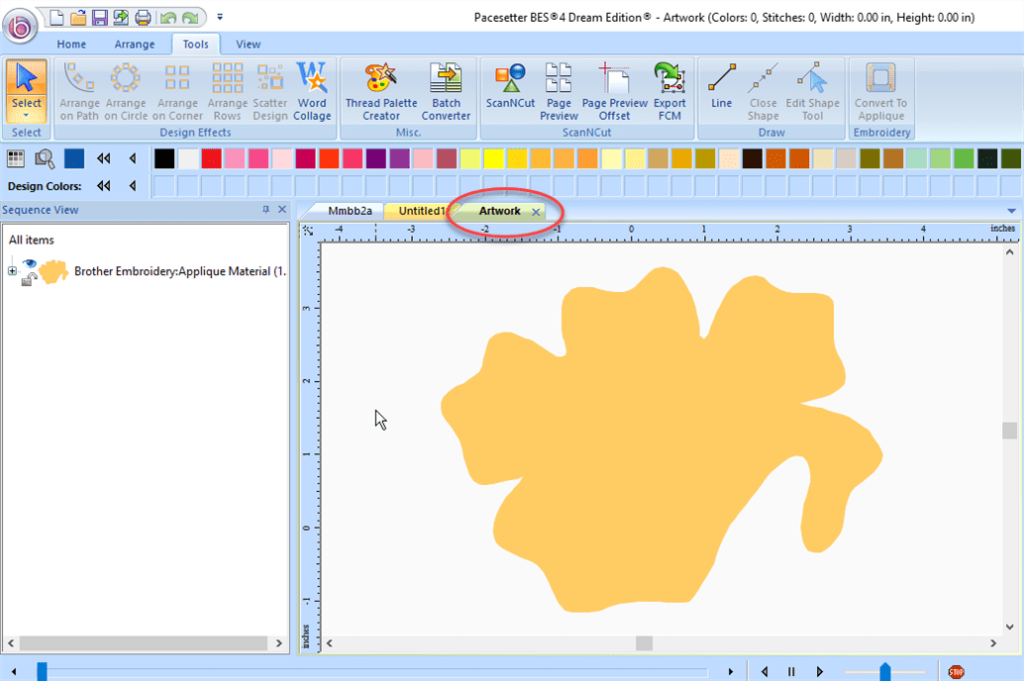
Convert Artwork to Appliqué
-
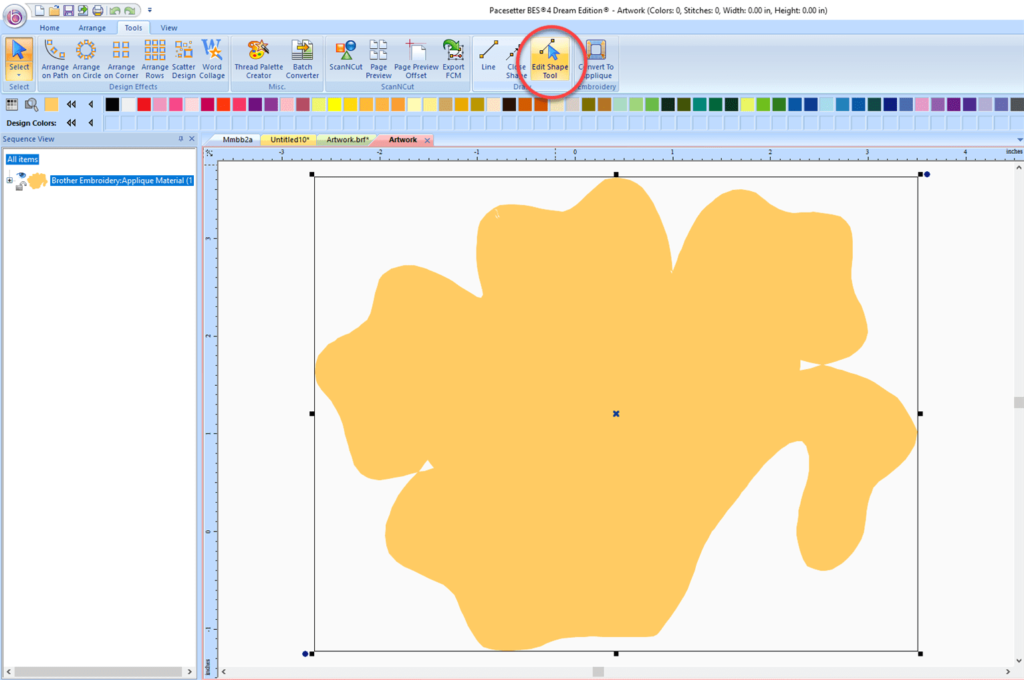
- Select the artwork and click on Convert to Appliqué icon
 .
.
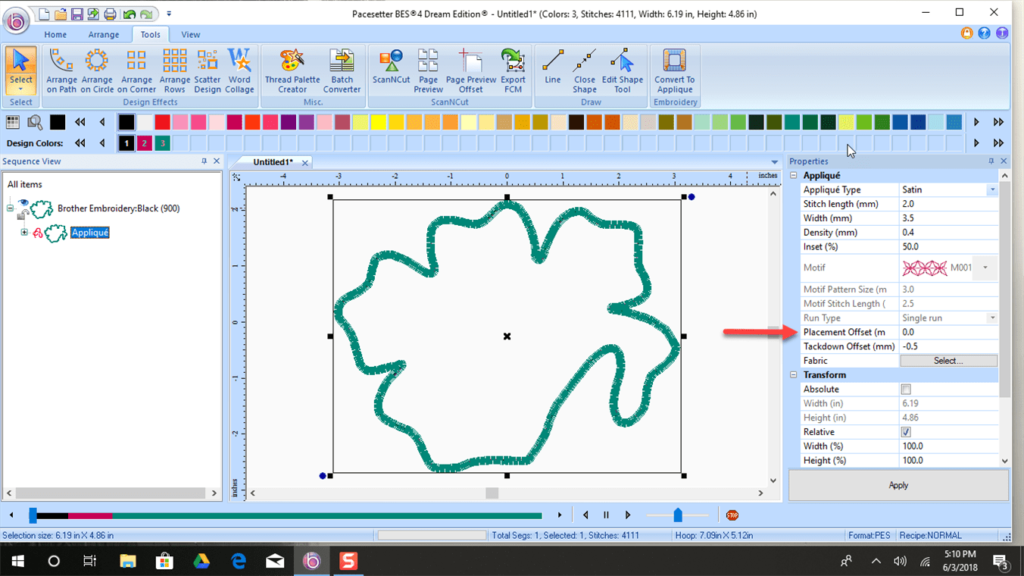
- Note the value for the Placement Offset in the Appliqué properties. (Red arrow above). The default is 0 mm, which means that the placement stitches will run exactly along the segment outline. (The Tackdown Offset is -0.5 mm, which means that the tackdown stitches will be placed 0.5 mm inside the segment outline.)
- Select the artwork and click on Convert to Appliqué icon
Adjust Placement Stitch Offset
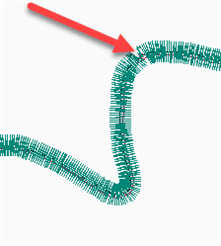
- In the Placement Offset field, enter a new displacement value of the placement stitches from the segment outline. I used -1.5 which brings the placement stitich to just 1.0mm outside of the tackdown stitch.

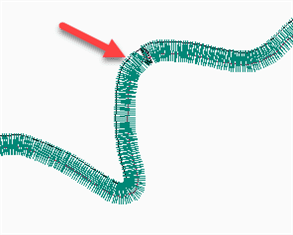
- Here are close-up views of the different between 0 offset on the left and 1.5mm offset on the right. (I changed the thread color to black to make it easier to see.)
Isolate the placement stitch
In order to have just the resized placement stitch to send to the ScanNCut you have to “break apart” the appliqué.
- With the appliqué selected in the Sequence View, right click and select Preserve as Stitches.
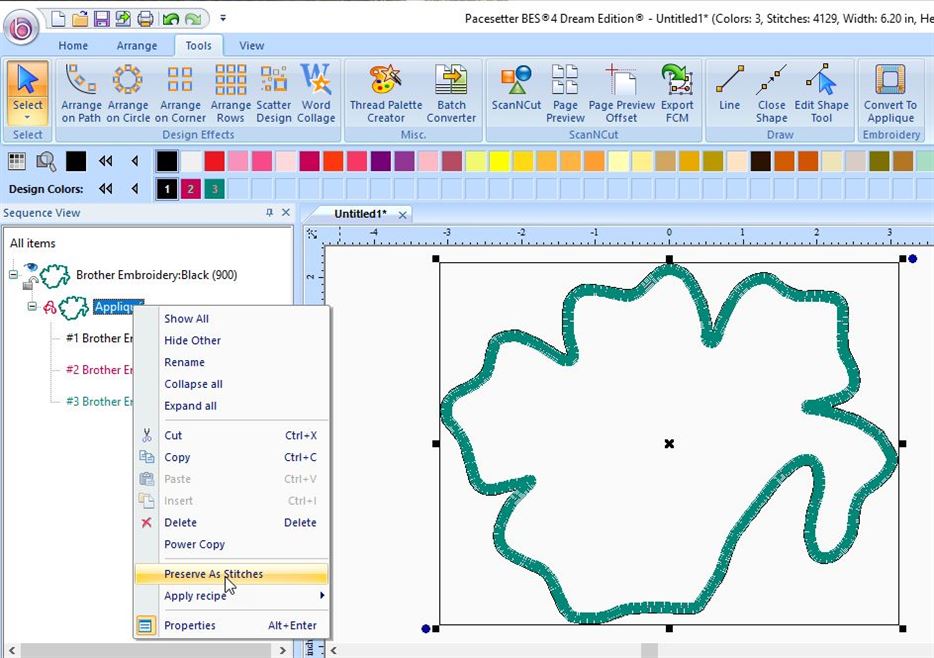
- This will break the appliqué into three different thread sequences.
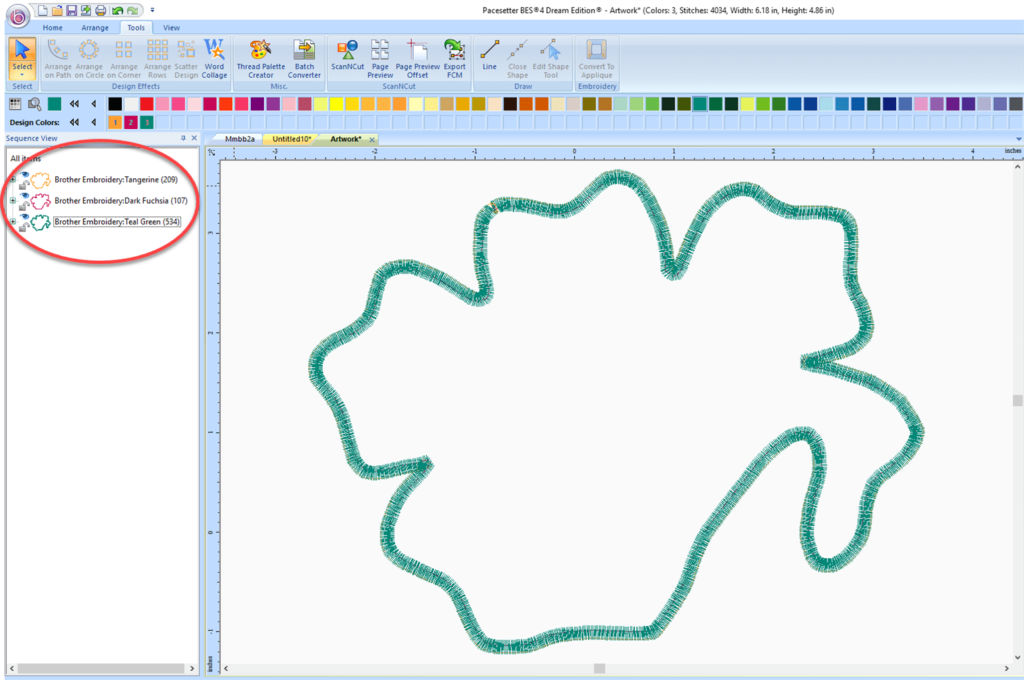
- The first thread sequence is the placement stitch which we want to be our new cut line on the ScanNCut.
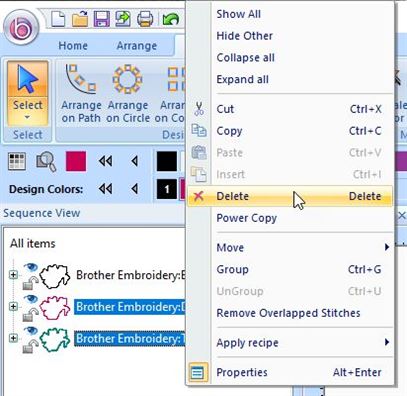
- With the second and third thread sequences selected, right click and select Delete (the tack down stitch and the satin stitch).
- This leaves the new placement stitch, now 1.5mm from the original placement stitch.
Cleanup
When some stitch files are coverted to artwork and then back to stitches, there are often some extra stitches that need to be deleted before sending the design to the ScanNCut.
To delete these in BES4, you have to covert the stitches back to artwork (remember to make sure the thread color is Brother Applique Material (100).
- Click on ScanNCut to convert the stitch file to artwork.
- Select the artwork and then click on Edit Shape Tool icon
 .
.
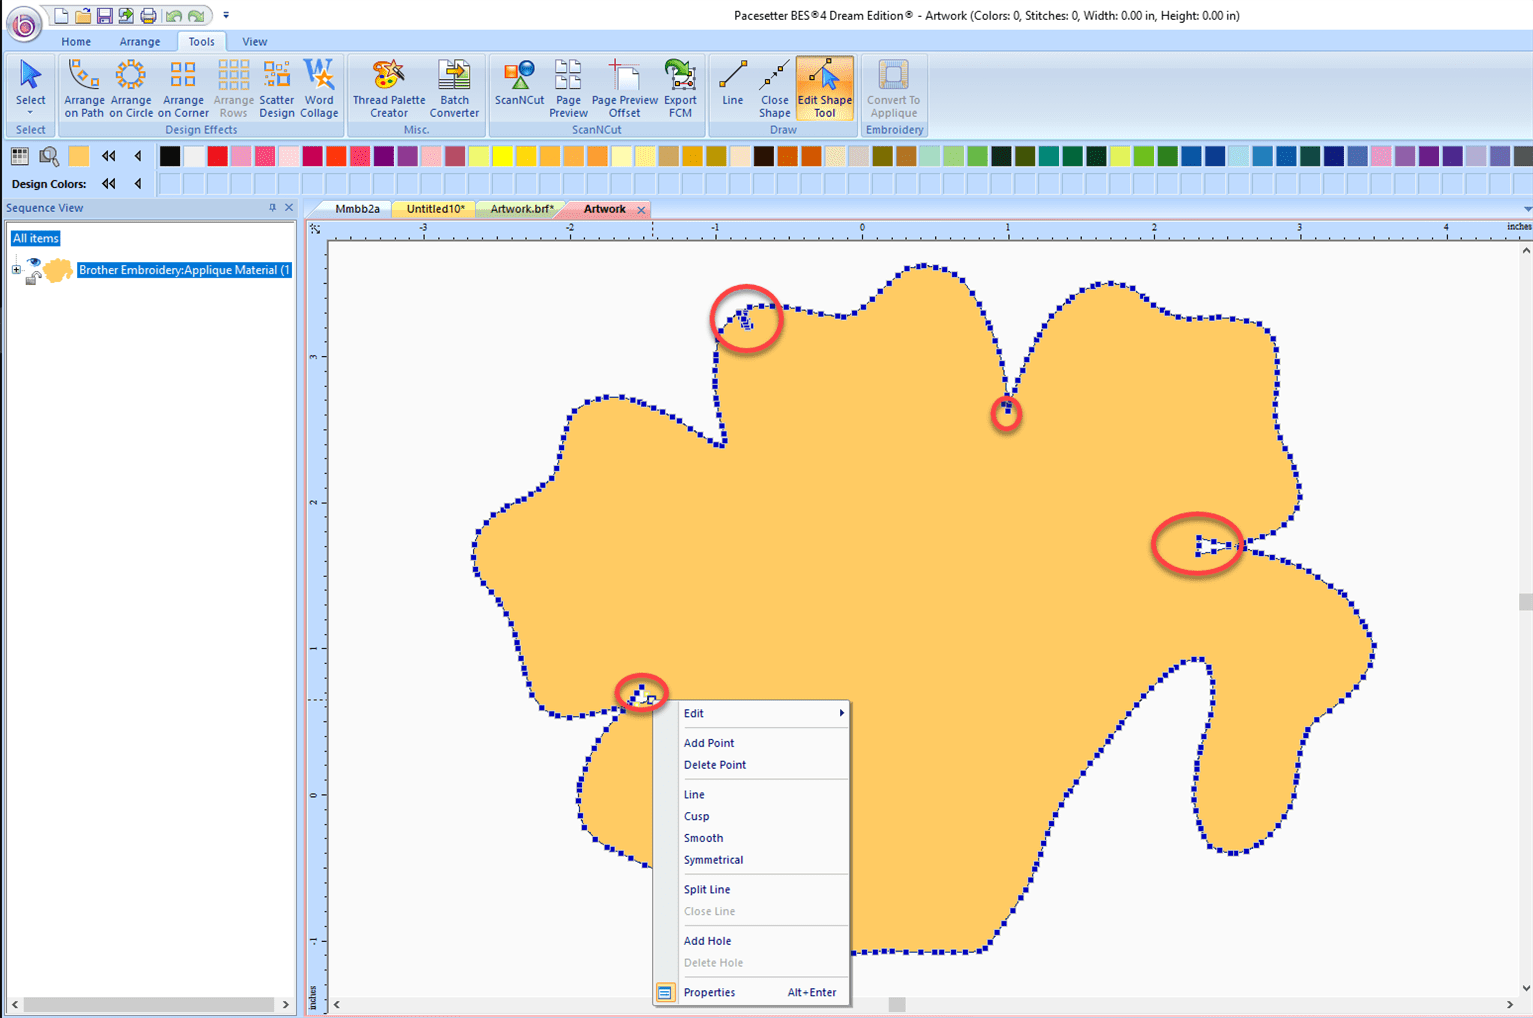
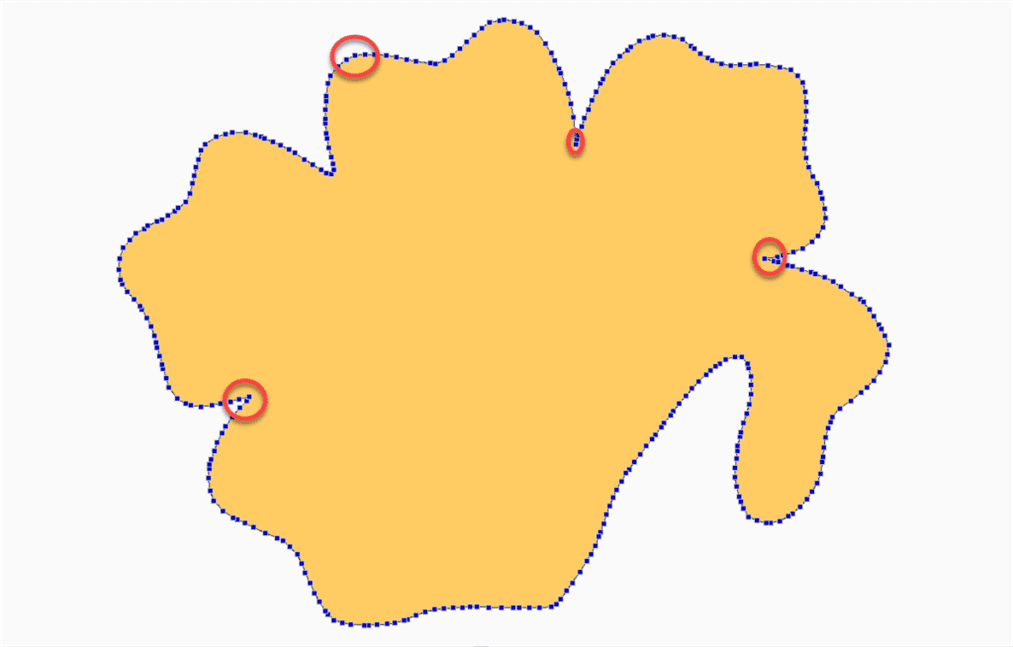
- Red circles in picture below indicate where to delete points. Right click on the points that you want to delete and select Delete Point. (Point will turn white when it’s selected).
Send to ScanNCut
Send your design to the ScanNCut once the extraneous points have been deleted.
Click on the Export FCM icon ![]() to save the FCM file for the ScanNCut.
to save the FCM file for the ScanNCut.
Voila!
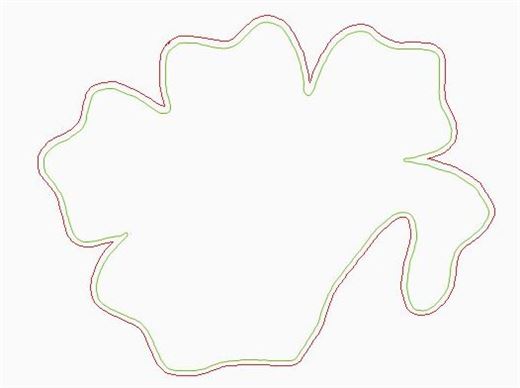
Now see how the new placement stitch (red) is evenly spaced around the original placement stitch (green).
Note, only change the placement stitch for the ScanCut. Do not change it in the original embroidery file.
When you sew out the embroidery file, the placement stitch will be the original placement stitch, but now, the appliqué you cut out with the ScanNCut will be slightly larger than the placement stitch.
As a result you get beautiful appliqués with the edges properly covered by the satin stitch or whatever cover stitch you are using.
Comments
Cathy Ellsaesser
Thanks for the comment and for reading our blog. Happy sewing!
Mary C.
Thank you so much, I’m so glad I found part 2. It has been quite awile since i have been able to work on any of my projects and thank you for the for the step by step lesson. I can even remember most of part 1, Lol
Cathy Ellsaesser
Thanks so much for commenting. I went back and retried my example and found that if I change the tackdown offset I use a positive number, but I have to use a negative number to enlarge the placement offset. It seems logical that a positive number would increase the size, but for the placement stitch, at least in my case, must be a negative number. Not too sure why yours is different…weird! At any rate you have something that works for you and you can safely enlarge the template for the ScanNCut to make sure your applique edges are covered by the edge stitching. So glad that’s working for you.
Patt Lytle, Forsyth County, Georgia
Thank you so much for your excellent explanation of how to resize an Appliqué placement line in Bes4. The only issue I had with your instructions was the negative value suggested when changing the Placement Offset value. I found changing the Placement Offset to a minimum positive value of 1mm enlarged my cut Appliqué fabric therefore ensuring my embroidery machine stitch captured my Appliqué fabric. You have helped me resolve a very frustrating Scan N Cut appliqué sizing issue.