I thought I was being original when I thought of the phrase, Quarantine hair, don’t care. I was sadly mistaken, as I found lots of examples of shirts and hats being made with that phrase when I did a Google search.
However, most of those products were:
- Something you had to buy. We’re makers, we want to make our own!
- Just text. Kinda boring!
So I asked our Graphic Designer, Lani, to come up with a design that I could make available to our customers, so those with a ScanNCut can make their own. If you don’t own a ScanNCut, as Rob would say, “We can fix that!” We’re always ready to make a deal! In fact, you can order the ScanNCut SDX225 online at a great price, and we’ll ship it right to you! No shipping charges!
The Design
So, Lani provided me with a drawing in the format of an .svg file. (That means it is a “scalable vector grapic.) This means you can size this drawing to any size you want from tiny to huge and the design will look perfect — no pixelation!
I took that file and created the .fcm file for the Brother ScanNCut. Since .fcm files are still vector graphics, you can always resize these files, too, without any loss of detail. You can do that on the ScanNCut or in Canvas Workspace.
I am going to show how to:
- Get this file from my blog to your ScanNCut.
- Use the ScanNCut to cut the design from Embellish Foil (you can also use iron-on vinyl)
- Adhere it to the article of your choosing. (In my case, a t-shirt).
No sewing or embroidery is required for this, unless you’re making the article you want to put the design on.
We’re offering a couple versions of the design, one with “pleats” in the mask and one without.


ScanNCut
This design will work on any ScanNCut model. This blog will show you the ScanNCut SDX225. The newest ScanNCut the SDX230 works the same as the 225.
Your screen, and the exact procedures to cut the design might look different if you own a different model.
In a few days, I will post a blog with instructions for the ScanNCut 2.
Download the File
These files are in .fcm format, and are ScanNCut ready.
Click on the file you want to download:
You browser will navigate to the shared drive where the files are stored and provide a download option.
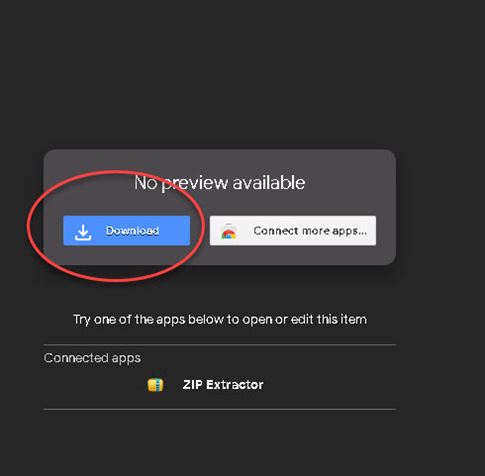
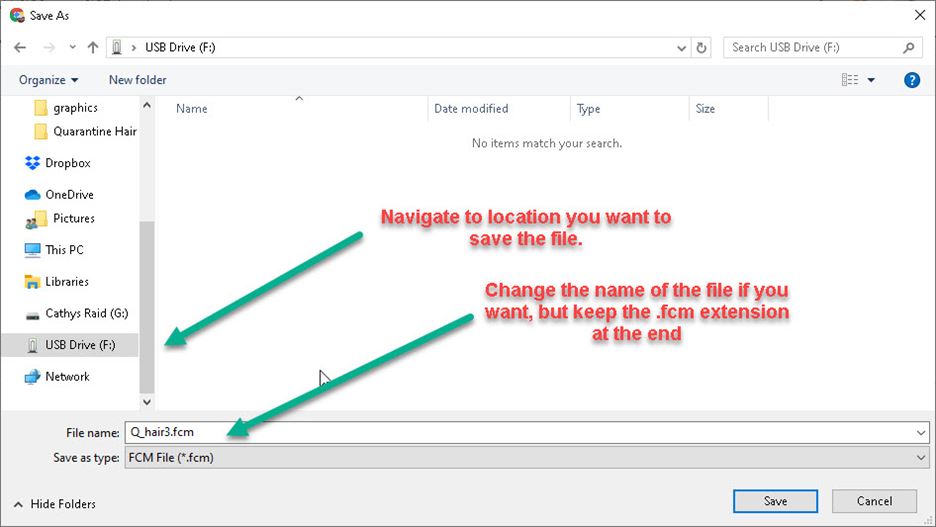
Since this is an .fcm file specific for the ScanNCut there is no preview for this file. Thus, simply click on download and select the location of your choice.
At The ScanNCut
Open Quarantine hair, don’t care Design
One you have the .fcm file of your choice on your USB stick, simply insert the stick into the USB port on the ScanNCut and select “Retrieve Data”.
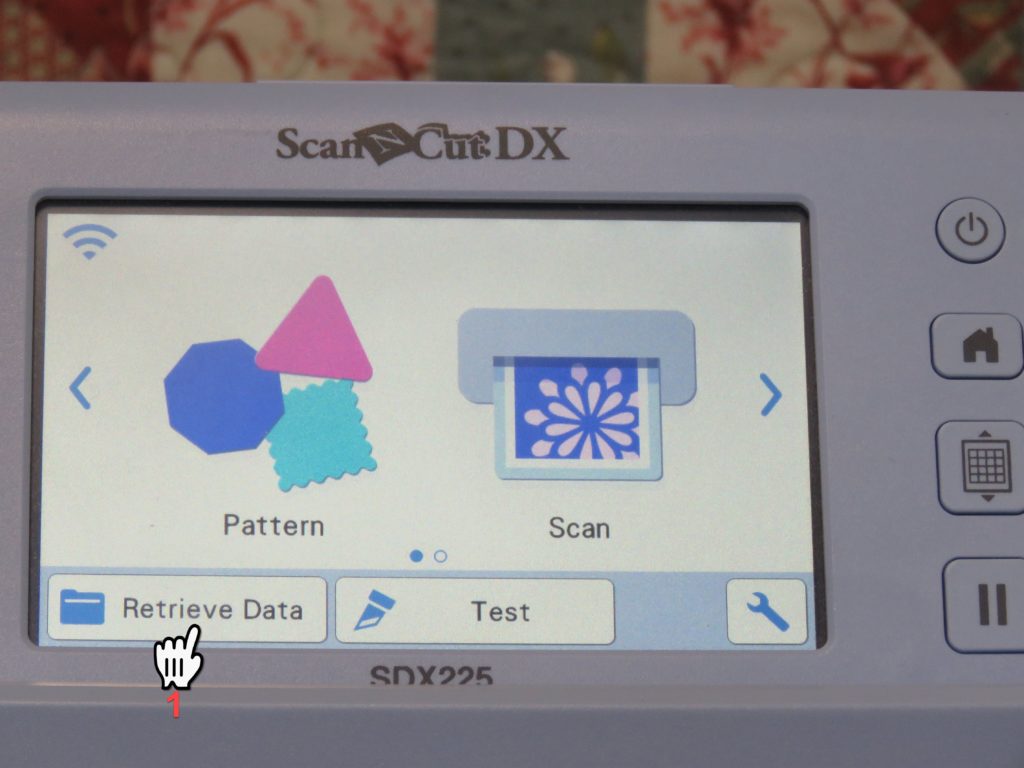
1. Opening Screen 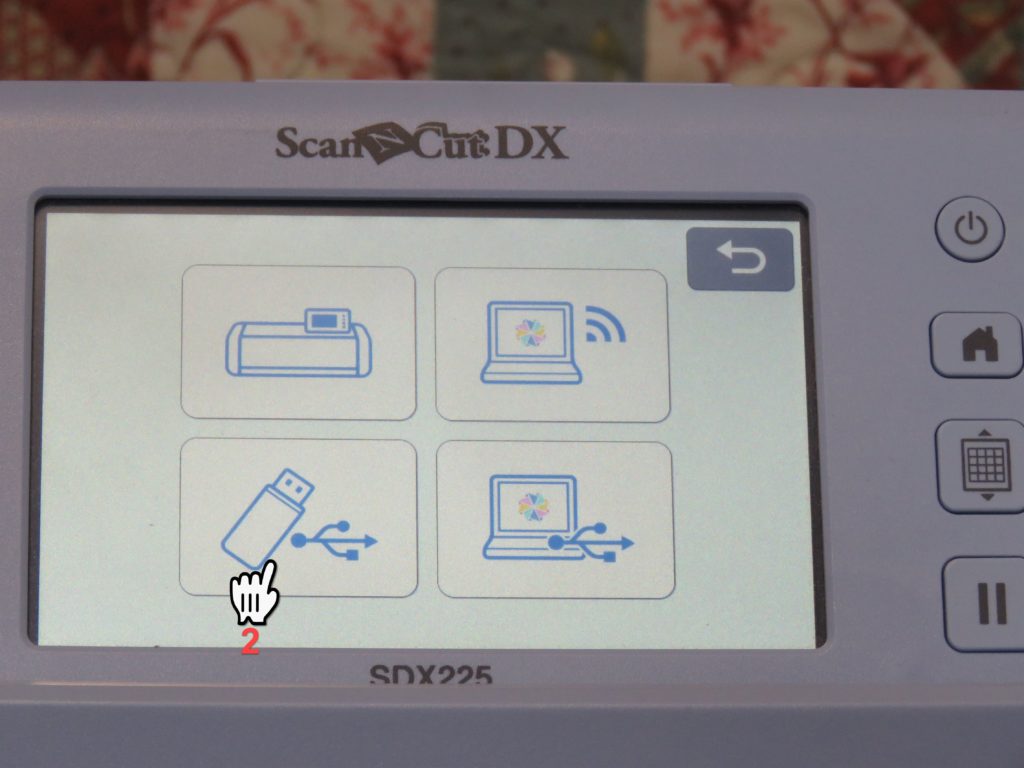
2. Select USB 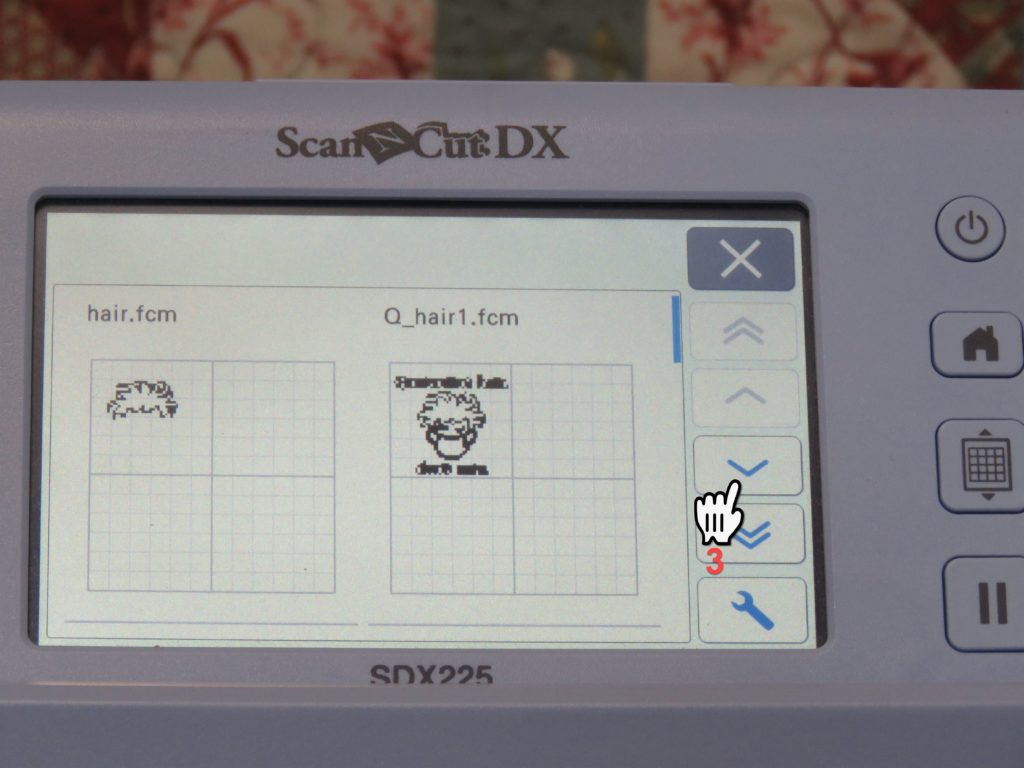
3. Scroll (if necessary) to locate design 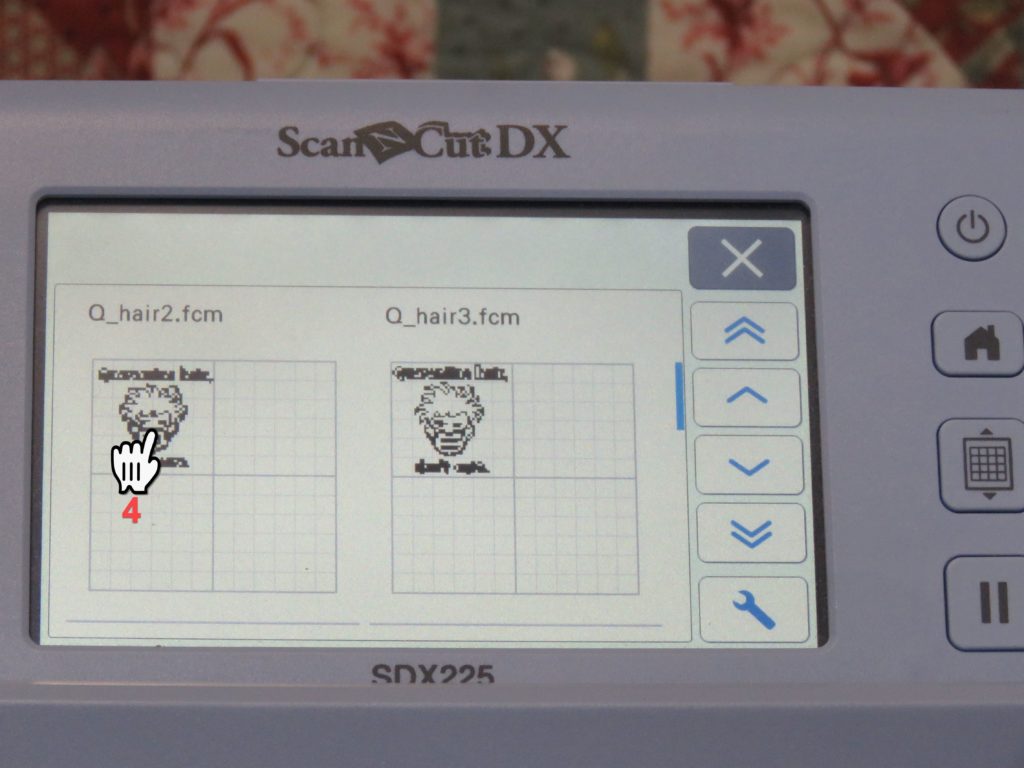
4. Select design 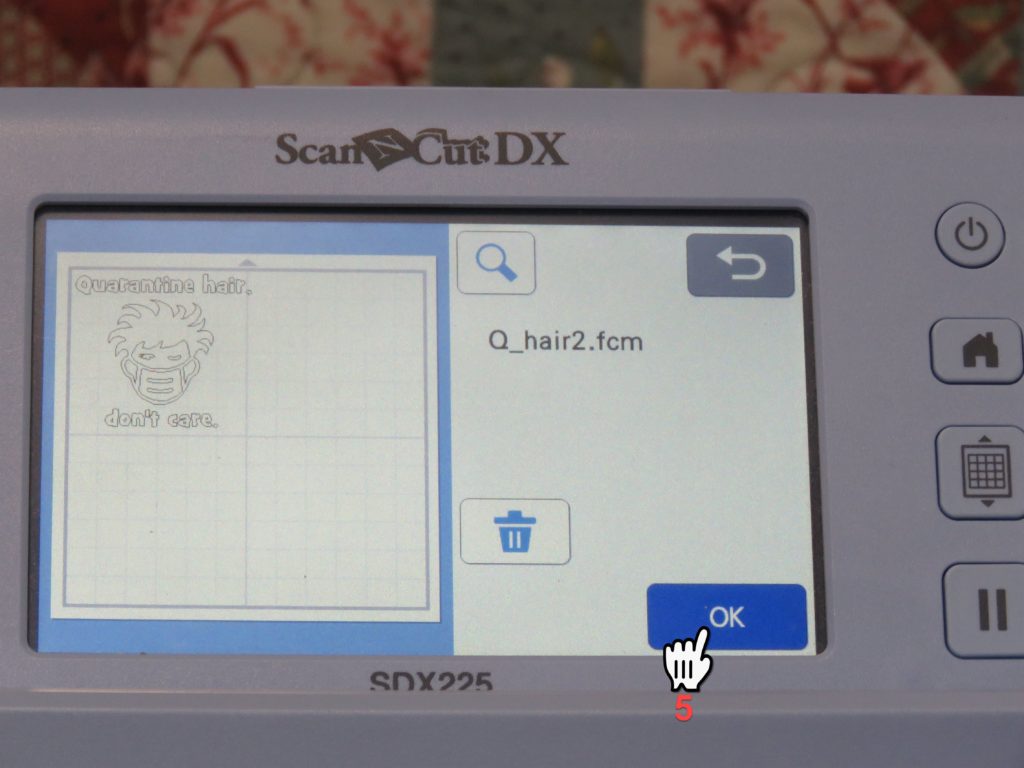
5. Confirm selection; press OK
Edit Quarantine hair, don’t care Design
A Word About Cutting Embellish Foil
The Embellish Foil has a transfer sheet on the top of the foil. This means that the foil must be placed right side down on the cutting mat so the blade can cut the design on the foil and the excess foil can be torn away. So the design must be mirrored so that when it’s turned over to iron it on your project, the letters will be oriented correctly.
Mirror the Design
When you load the design into the ScanNCut it is made of several individual parts. Each letter can be moved, sized, rotated, etc. separately. The lines in the facemask that represent pleats are separate. So, when you mirror the design horizontally, so that it’s “upside down” you must group all of the parts together so that they all mirror.
If you do not group all parts together, even though you have every part selected, it will not select the lines of text but rather the individual letters in the text.
Group All Parts
After opening the design, use the select function to select all parts of the design.
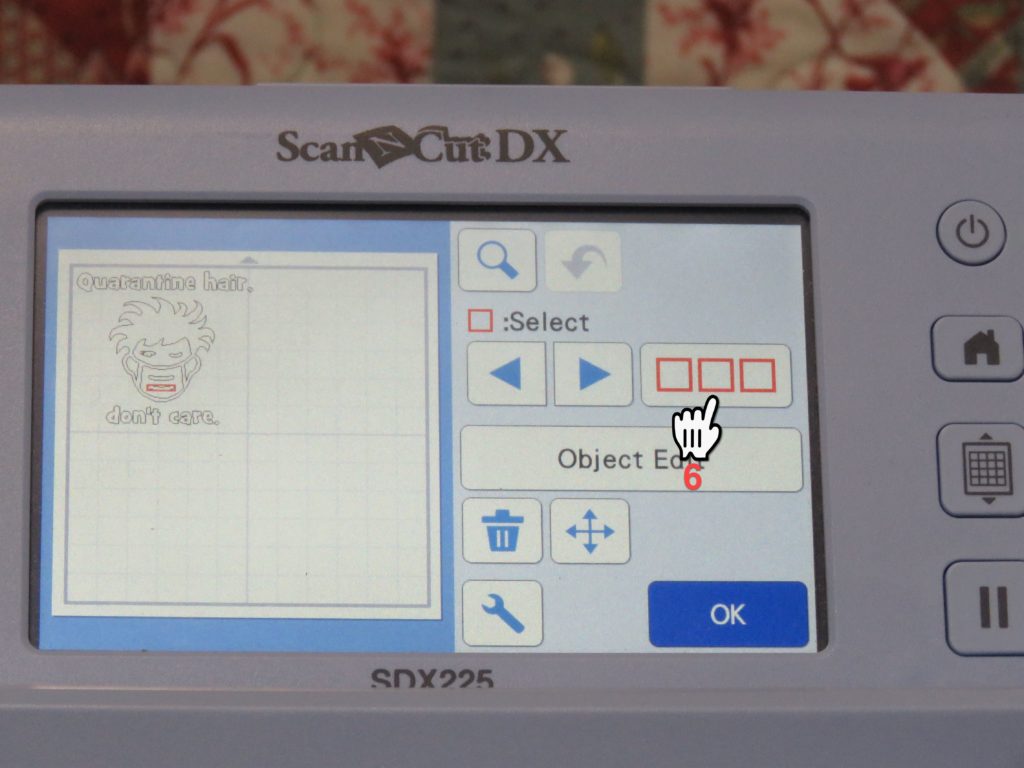
6. Touch the multi-select button 
7. Touch the “Select All” button 
8. Verify that all elements are selected, then click OK
Group all elements together.
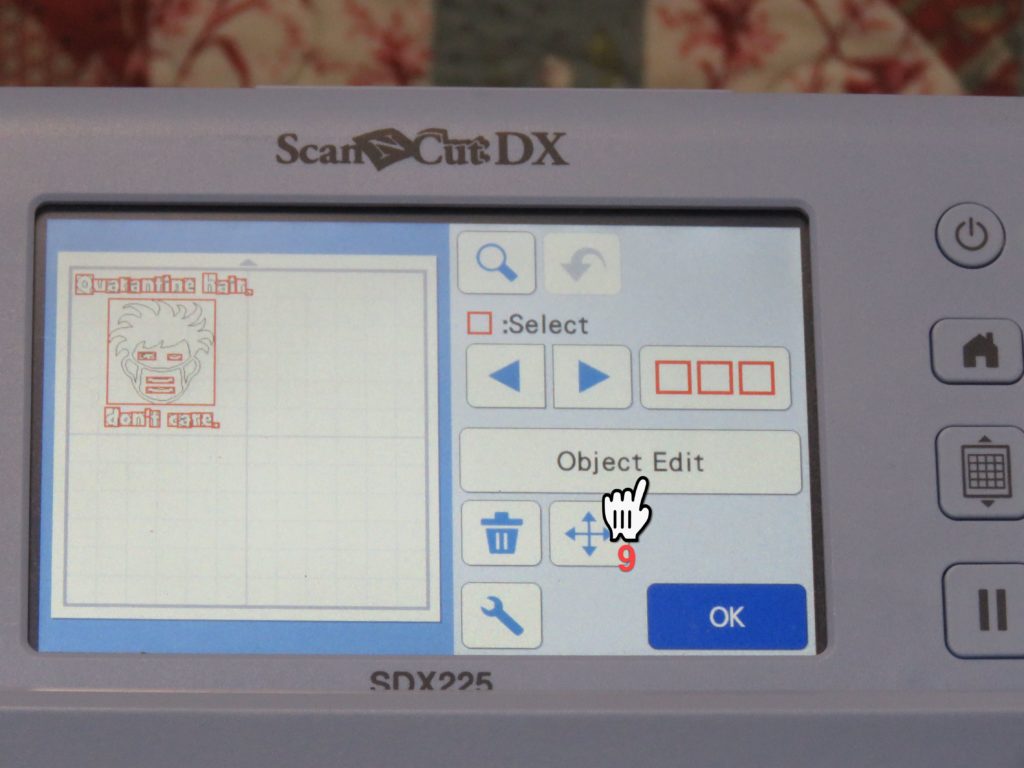
9. Select Object Edit 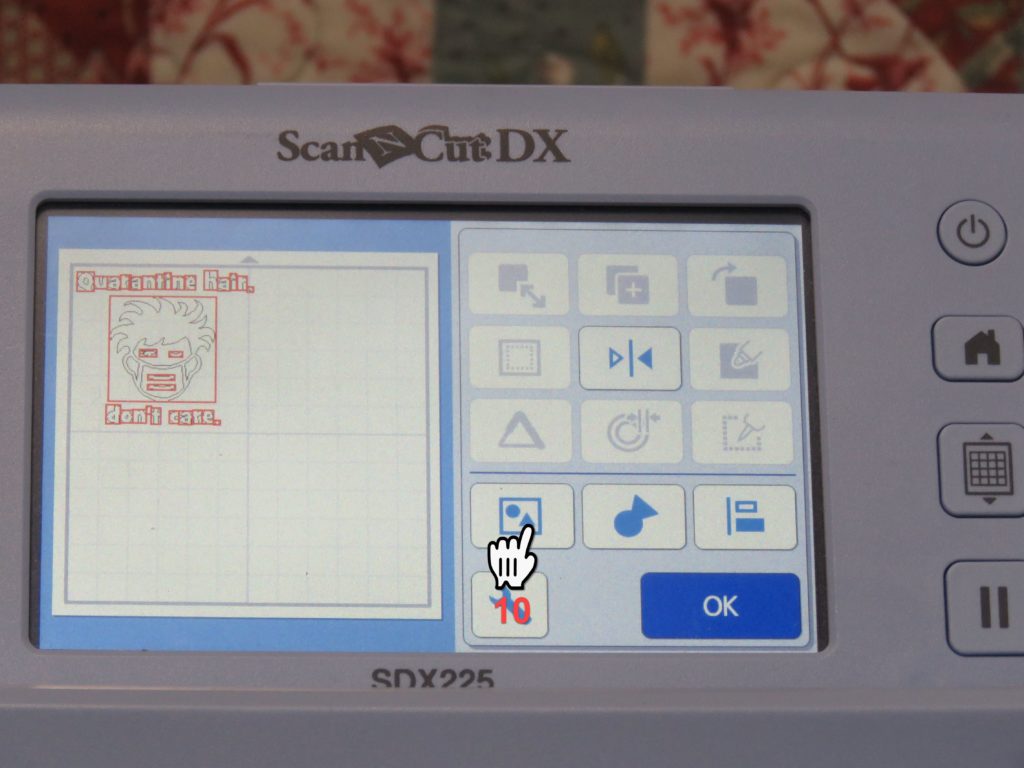
10. Select the “group” button.
Select Edit then group to mirror the image.
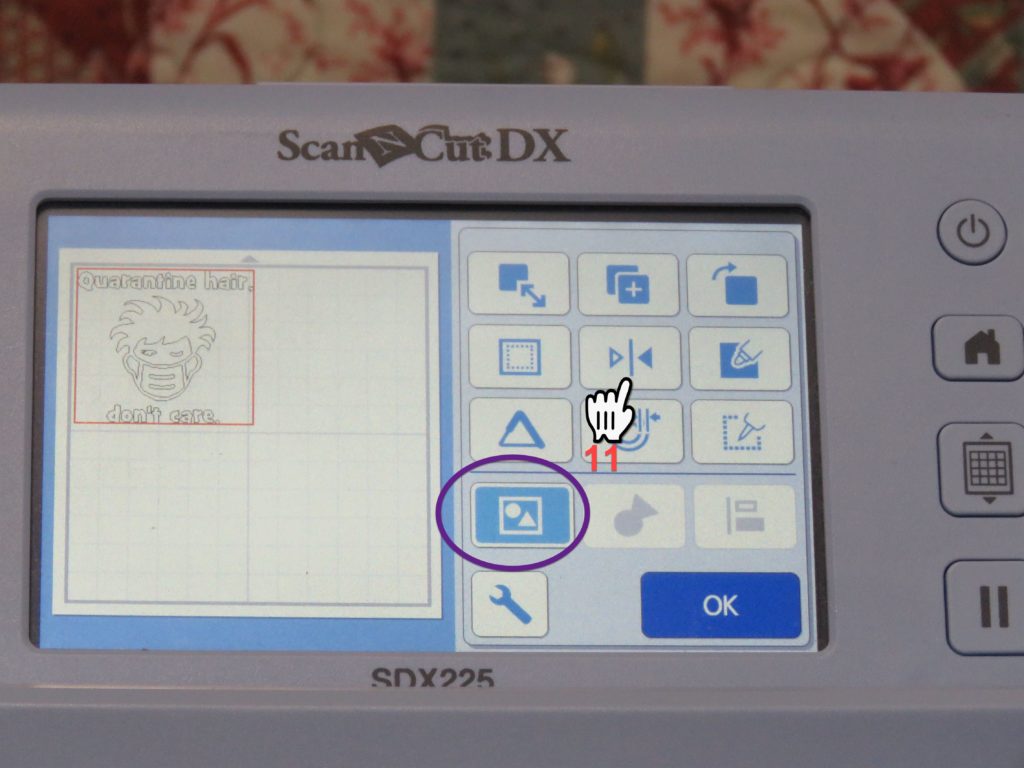
11. Select the mirror button. (Note that the group icon is highlighted, indicated all items are grouped.) 
12. Click OK to exit edit screen. Note that both the group button and the mirror button are highlighted indicating they have been applied to the design. 
13. Click Ok to go the the next step
Place Foil on Mat
Remember place the foil right side (shiny side) face down on the mat.
Adhere foil to mat by using a spatula or brayer to remove trapped bubbles and firmly adhere the foil to the mat.
Scan Mat
To make sure that your design is completely on the foil, scan the mat and move the design as necessary.
Cut Quarantine hair, don’t care Design
You are now ready to cut out the design.
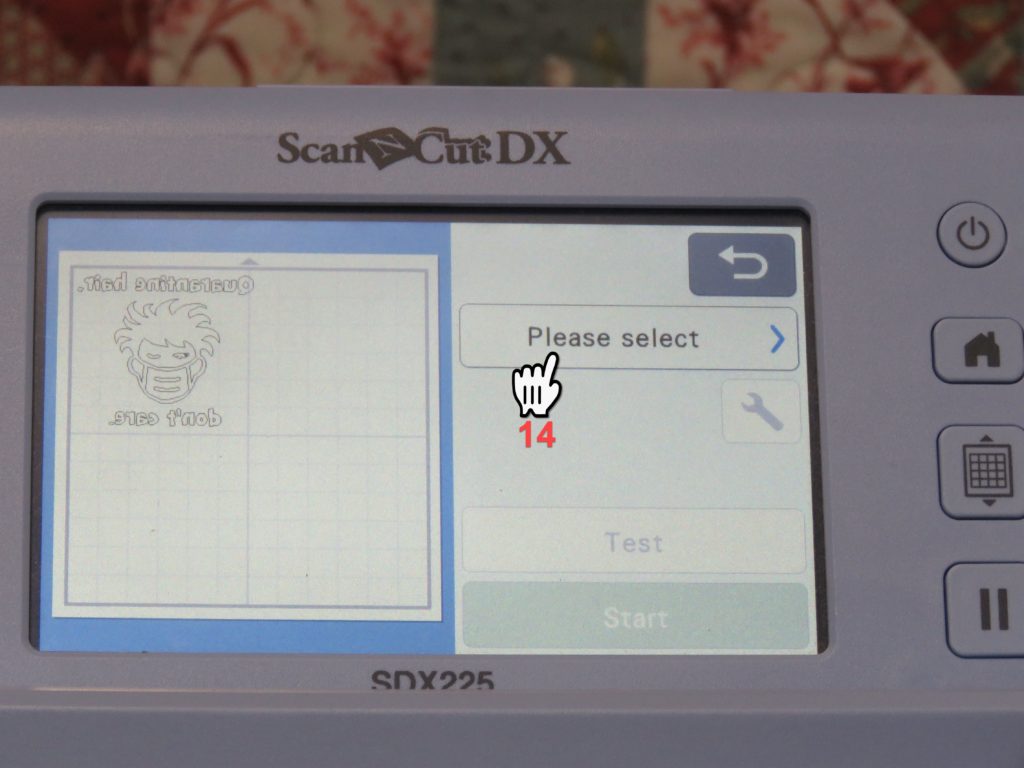
14. Touch “Please Select” to select operation to be performed (cutting) 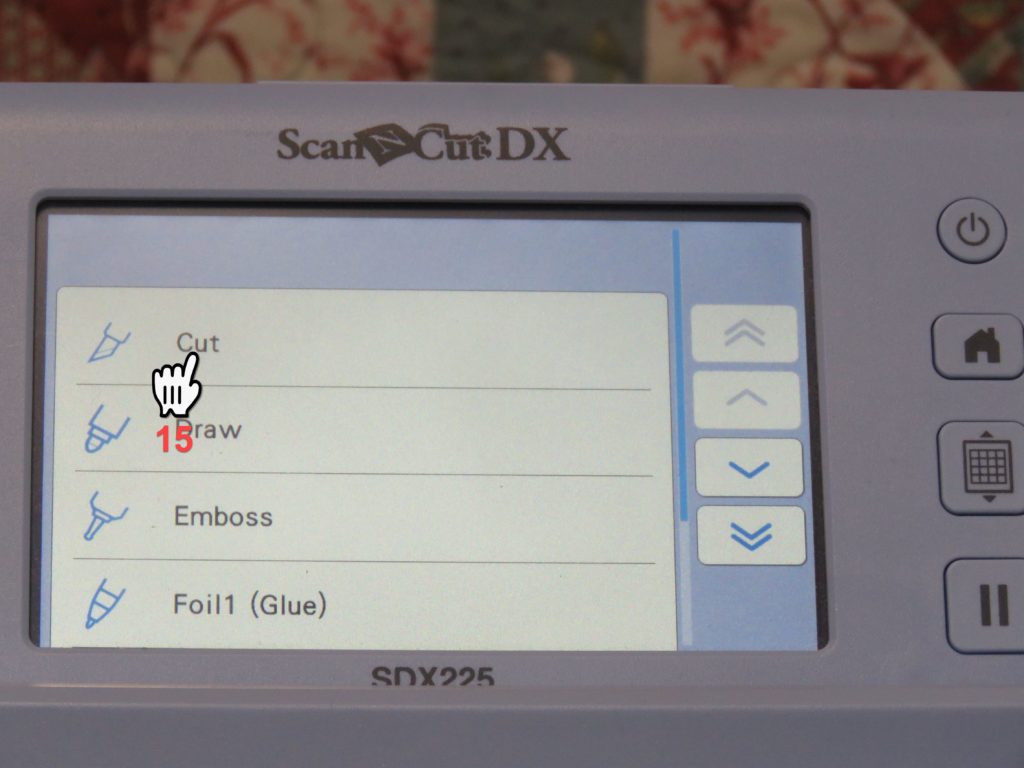
15. Select Cut
Verify Cutting Parameters
For cutting foils, vinyl, anything with a carrier sheet either on top of the product or the bottom, you should do a half cut so that the transfer sheet or cover sheet remains intact. Note on the screen whether half cut is OFF or ON.
Select the wrench icon to adjust any parameters necessary.
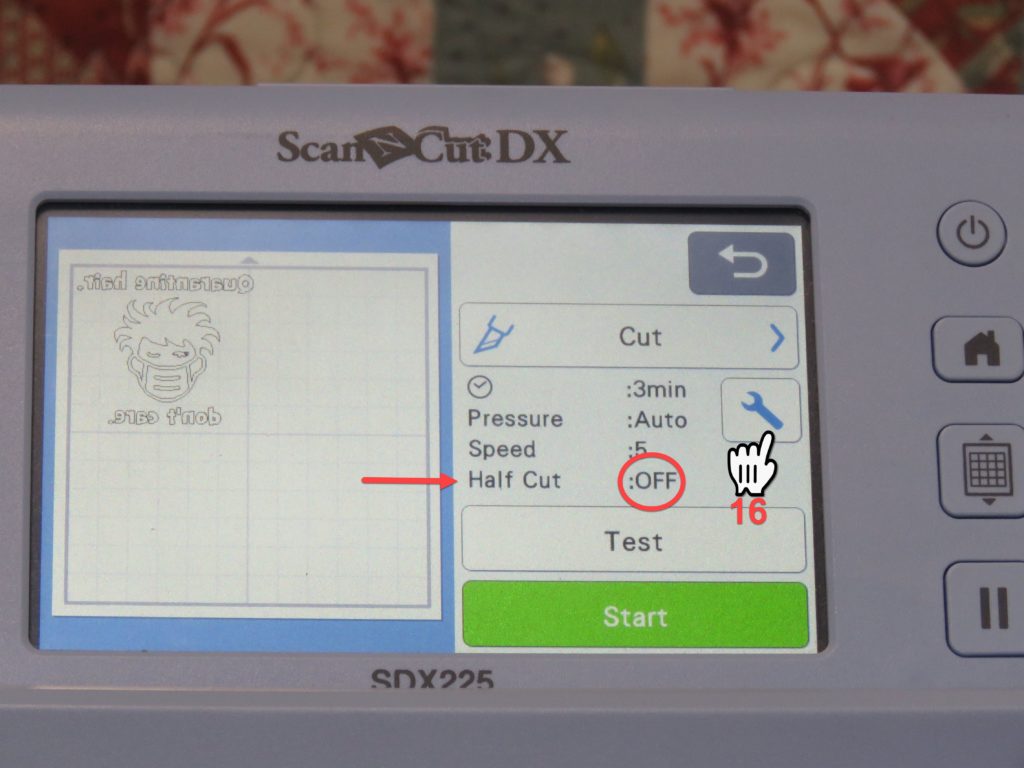
16. Click on the Wrench to change settings. 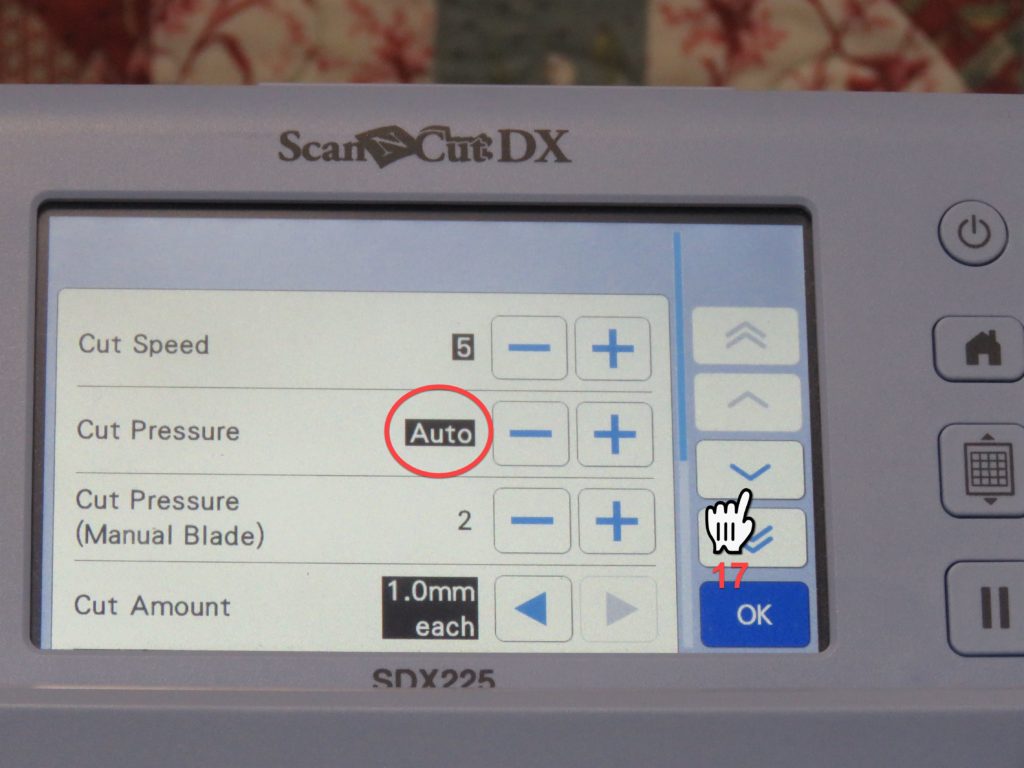
17. Use arrows to view additional cutting configuration pages. 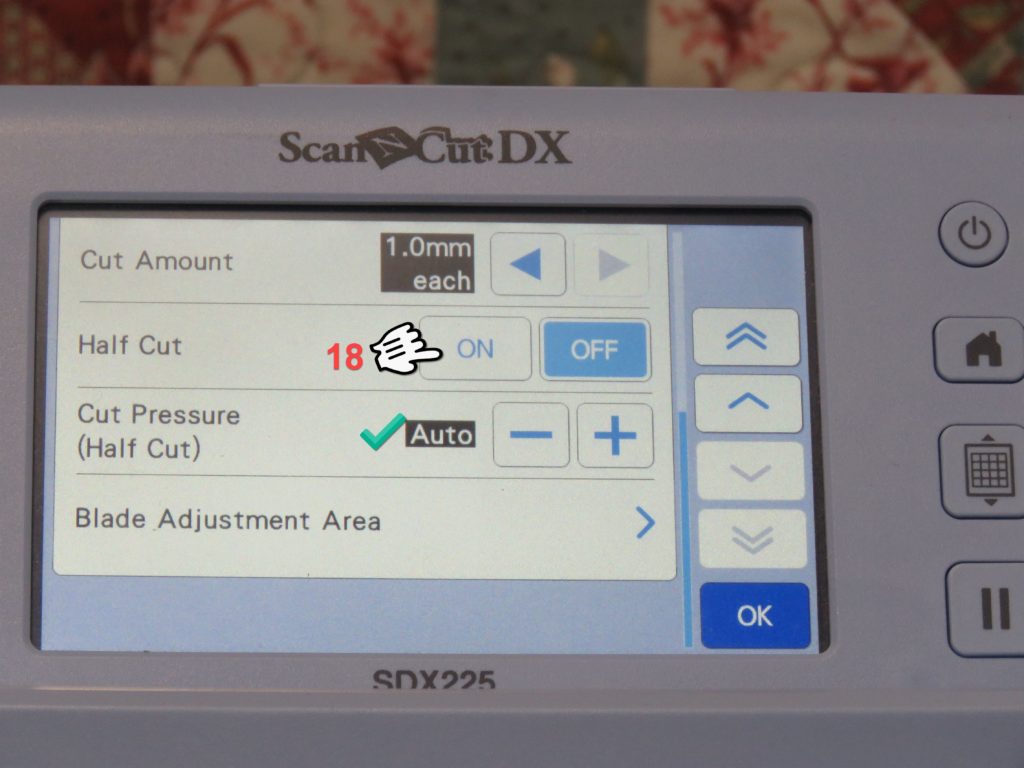
18. Select the “On” button for half-cut. 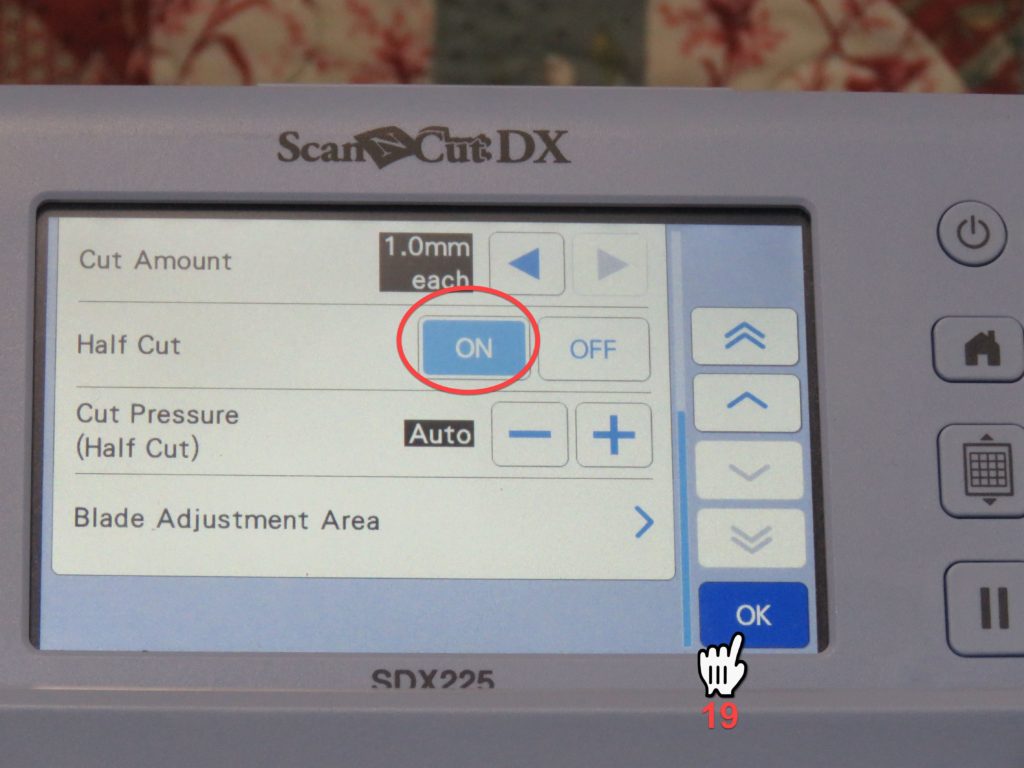
19. Click OK after selecting half cut “on”.
Note: Since the SDX225 has an auto blade, most parameters, set to “auto” will be just right to cut your media. If, for some reason, the auto blade does not cut the media fully, or cuts too deep, you can adjust the blade settings manually.
Cut The Design
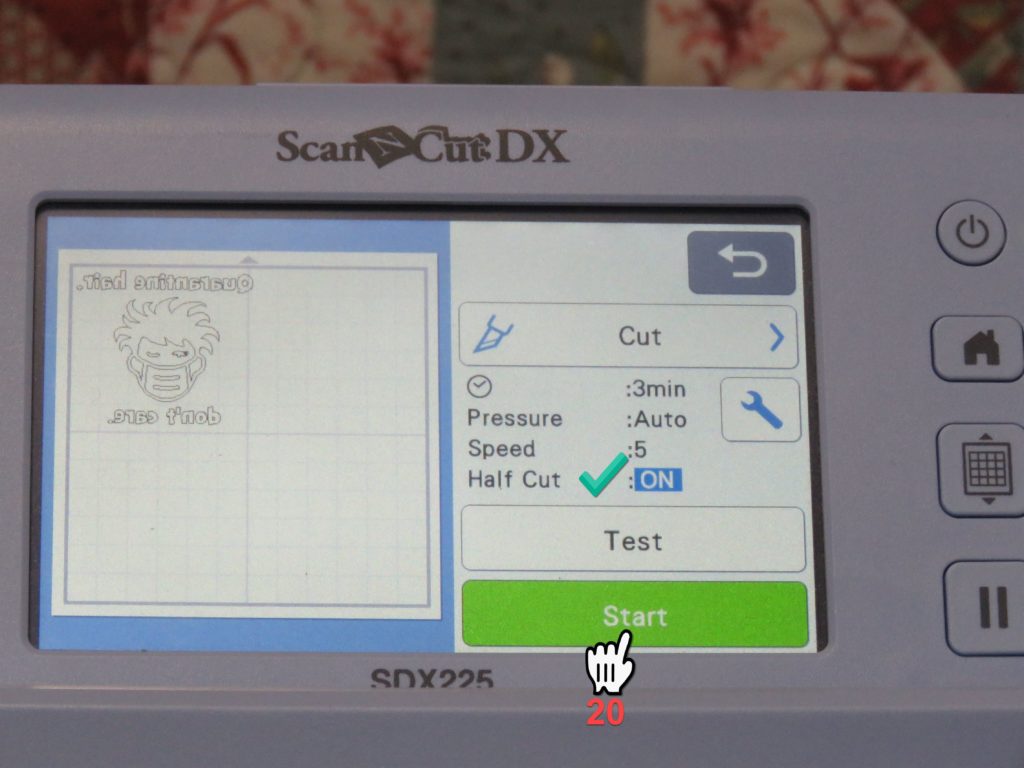
20. Touch the Start button to begin cutting.
Remove Excess Foil
Remove the foil from the cutting mat.
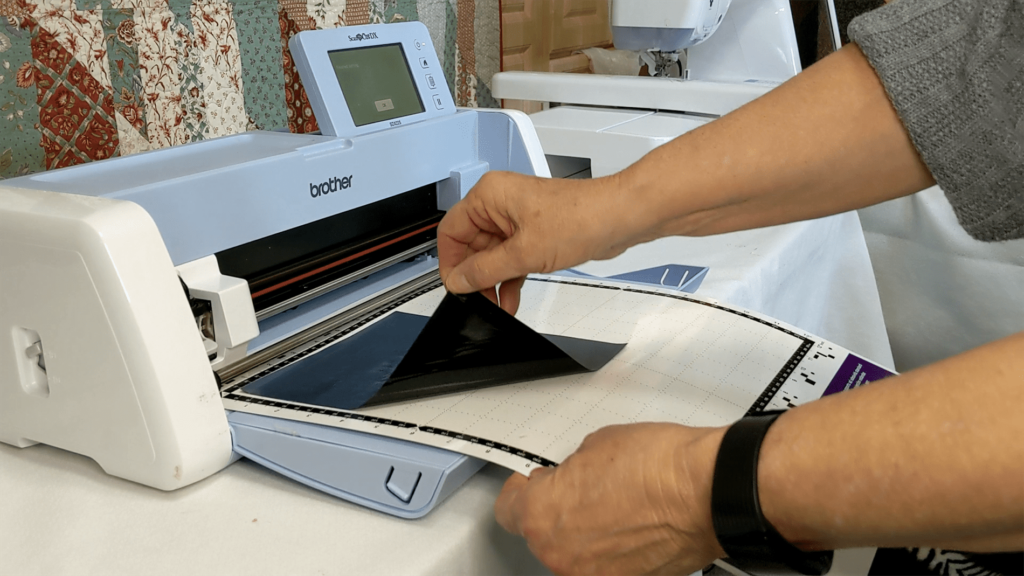
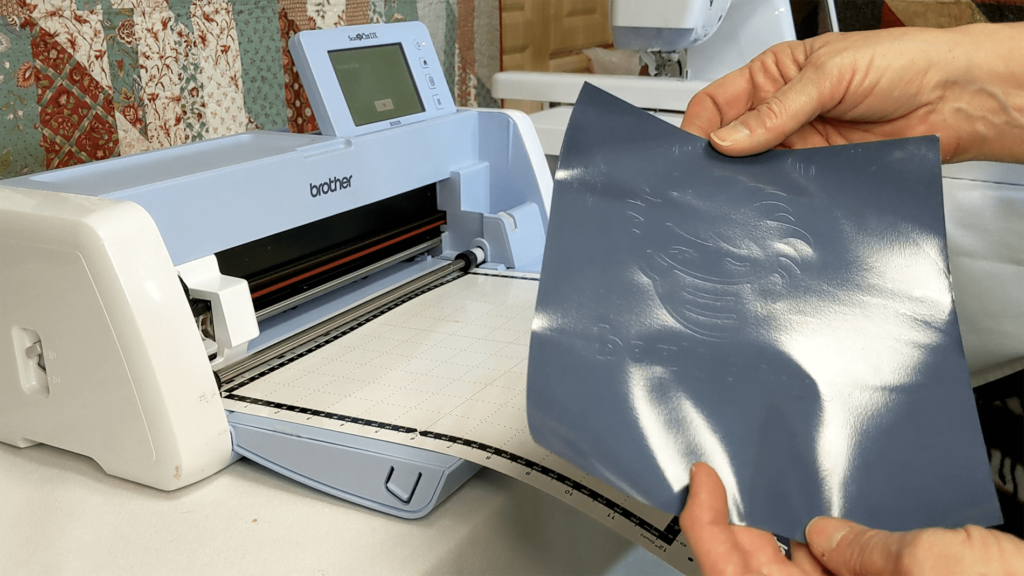
Tear away the foil that is not part of the design. It will easily tear away from the design. Make sure you are removing the right pieces!
The Embellish Weeding Tool is just what you need to remove the small bits of foil that are in the design.
Now your design is ready to heat transfer to the object of your choice!
Align Quarantine hair, don’t care Design to Project
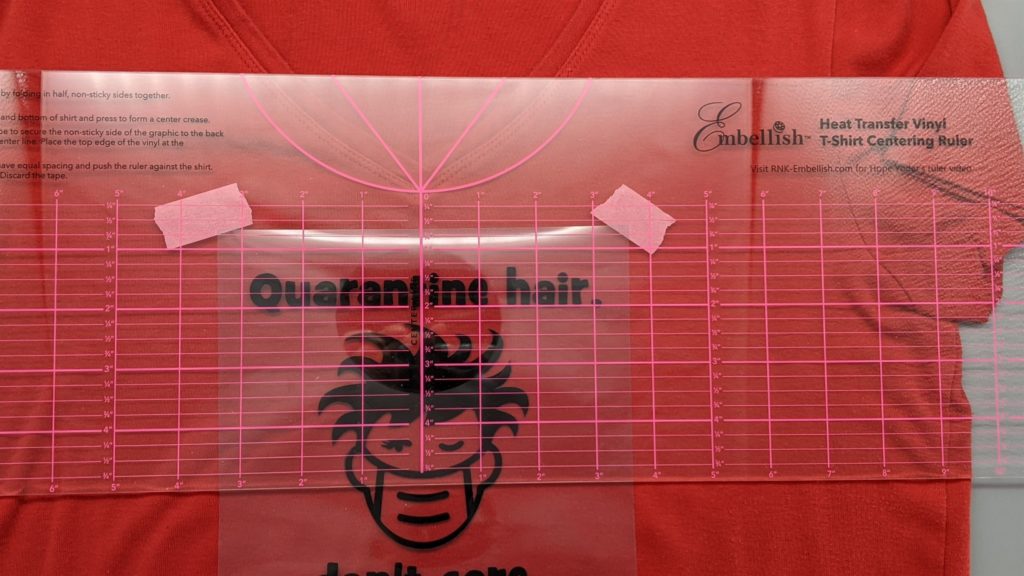
If you are placing the Quarantine hair, don’t care design on a t-shirt, you’ll love the Embellish Centering Ruler! This ruler was designed by Hope Yoder after she realized there was a huge need for something easy to use that would allow her to perfectly center graphics on T-shirts, tote bags and any flat surface.
Watch as Hope explains how to use the ruler:
I found it very easy to use and great for getting the design centered on my shirt.
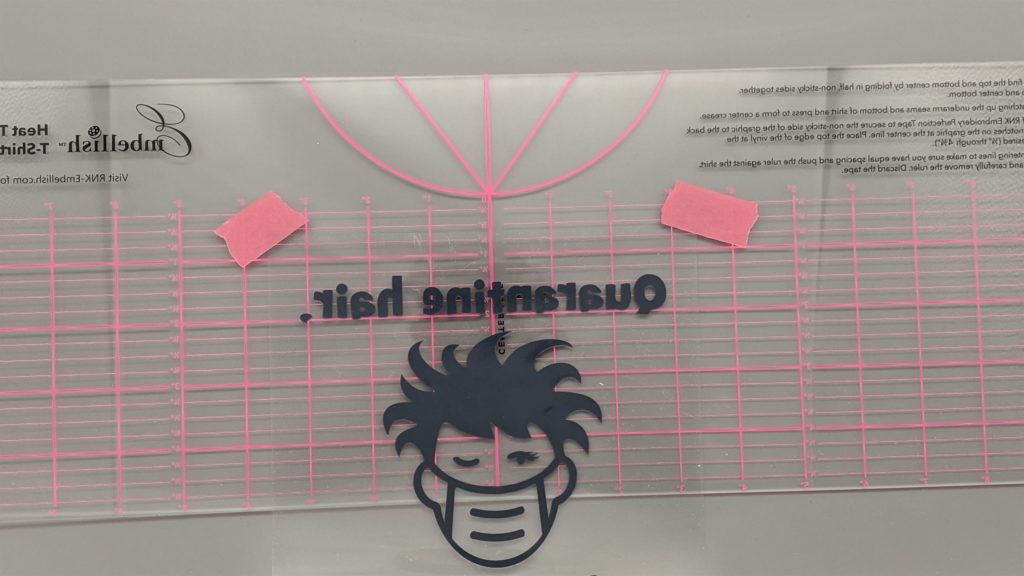
To place the Quarantine hair, don’t care design, decide how far down from the round neck or V-neck you want your graphic to be positioned. Turn the ruler over and align the center of the design with the vertical center line on the ruler. Align the top of the graphic with a horizontal line and use RNK Embroidery Perfection Tape to hold the graphic to the ruler.
Heat Fix Quarantine hair, don’t care Design To T-Shirt
Press the un-embellished shirt for 5-7 seconds to remove any moisture and to warm the shirt. Lay the warm shirt on a flat surface making sure the side seams are at the edge of the shirt.
Flip the ruler over so the sticky side of the graphic is next to the shirt and hovering the ruler over the shirt. Align the ruler so there are equal amounts of space between the ruler and the underarm area making sure it is centered. Once this is aligned press the ruler down onto the shirt.
Slip your hand between the ruler and the graphic. Hold the Quarantine hair, don’t care graphic firmly against the shirt and remove the ruler. Remove and discard the tape.

I did find that the transfer sheet wasn’t very sticky so I used some tape to hold the design in place until I could get it to the press. If you do that, be sure to remove the tape before heat fixing the design!
Iron or heat press the Quarantine hair, don’t care graphic according to the manufacturer’s directions for the media you used. I used the 36″ Simplicity Intelligent Pro Steam Press, with a “non-stick pressing sheet” on top. I can’t say enough good things about this press, and it sure did a great job adhering the foil to the t-shirt — all at once! No ironing a section at a time!
The Embellish foil is a cold-peel foil, so wait a bit before removing the carrier sheet.
I placed the pressing sheet over the design and pressed again after removing the carrier sheet to make sure the foil was firmly fused to the t-shirt.
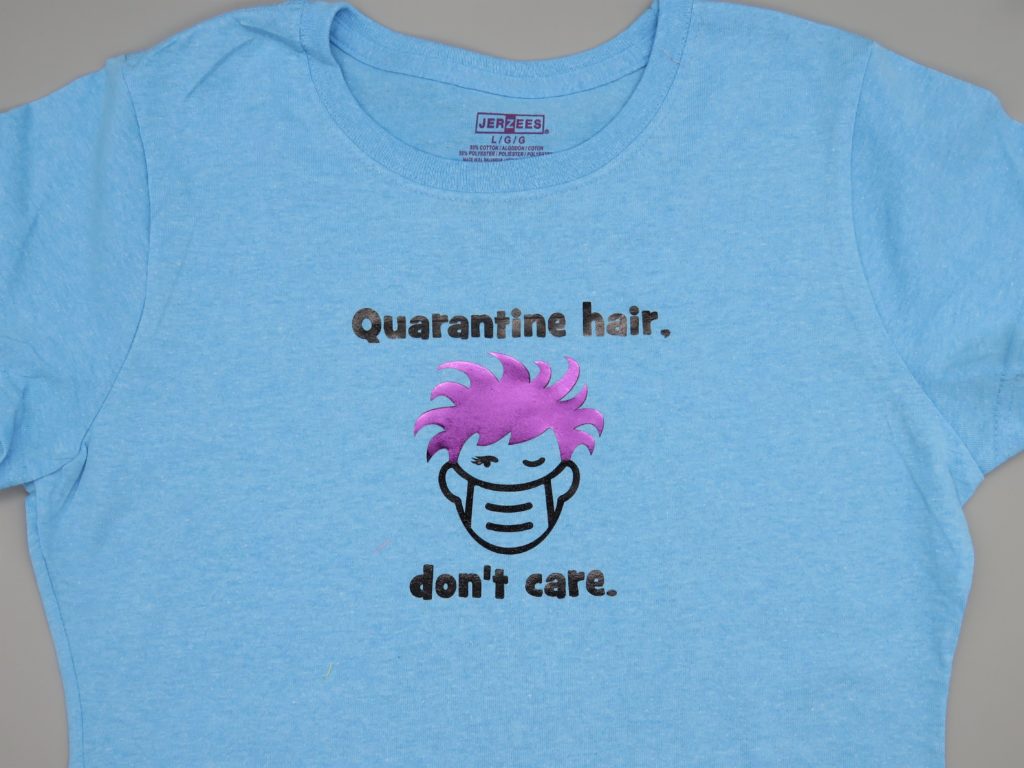
Quarantine hair, don’t care.
So are you ready to make a shirt for yourself or a loved one or friend. Get that ScanNCut out of your closet and try it out! I think you’ll love the results.
As an added twist, you can download a .fcm file of the hair, and cut it out in a different color of foil. Be sure to mirror the design before cutting so that it will line up and cover the hair on the base design.
Just adhere the whole design, then place the cut out of the hair over the hair on the base design and heat set. It adheres just fine, foil on top of foil.
Have fun with this, and we’d love to see your creations! You can post them here or on our Facebook page.