I love to dress my table for Halloween (well, all of the holidays, actually). I like placemats and matching Halloween napkins that reflect the holiday spirit. To coordinate with some placemats I was making, I purchased some black napkins to embroider a Halloween design in the corner. Then, I got out my rulers and markers. I wanted to make sure the designs on the Halloween napkins were in the same position from napkin to napkin. But wait! I remembered the Anita Goodesign trick of stitching a placement line for the napkin corner before placing the napkin on the embroidery hoop. By using this technique, I can be sure the design will be in the exact same place from napkin to napkin. Just what my little OCD-self wants.
So, I looked through my embroidery collections and found the Seasonal Napkin Corners design collection from Anita Goodesign. However, I didn’t find the design I wanted to use. I wanted a design to coordinate with the placemats I was making. So I decided to use the napkin placement technique, but to substitute a design from Anita Goodesign’s Halloween Quilt collection.
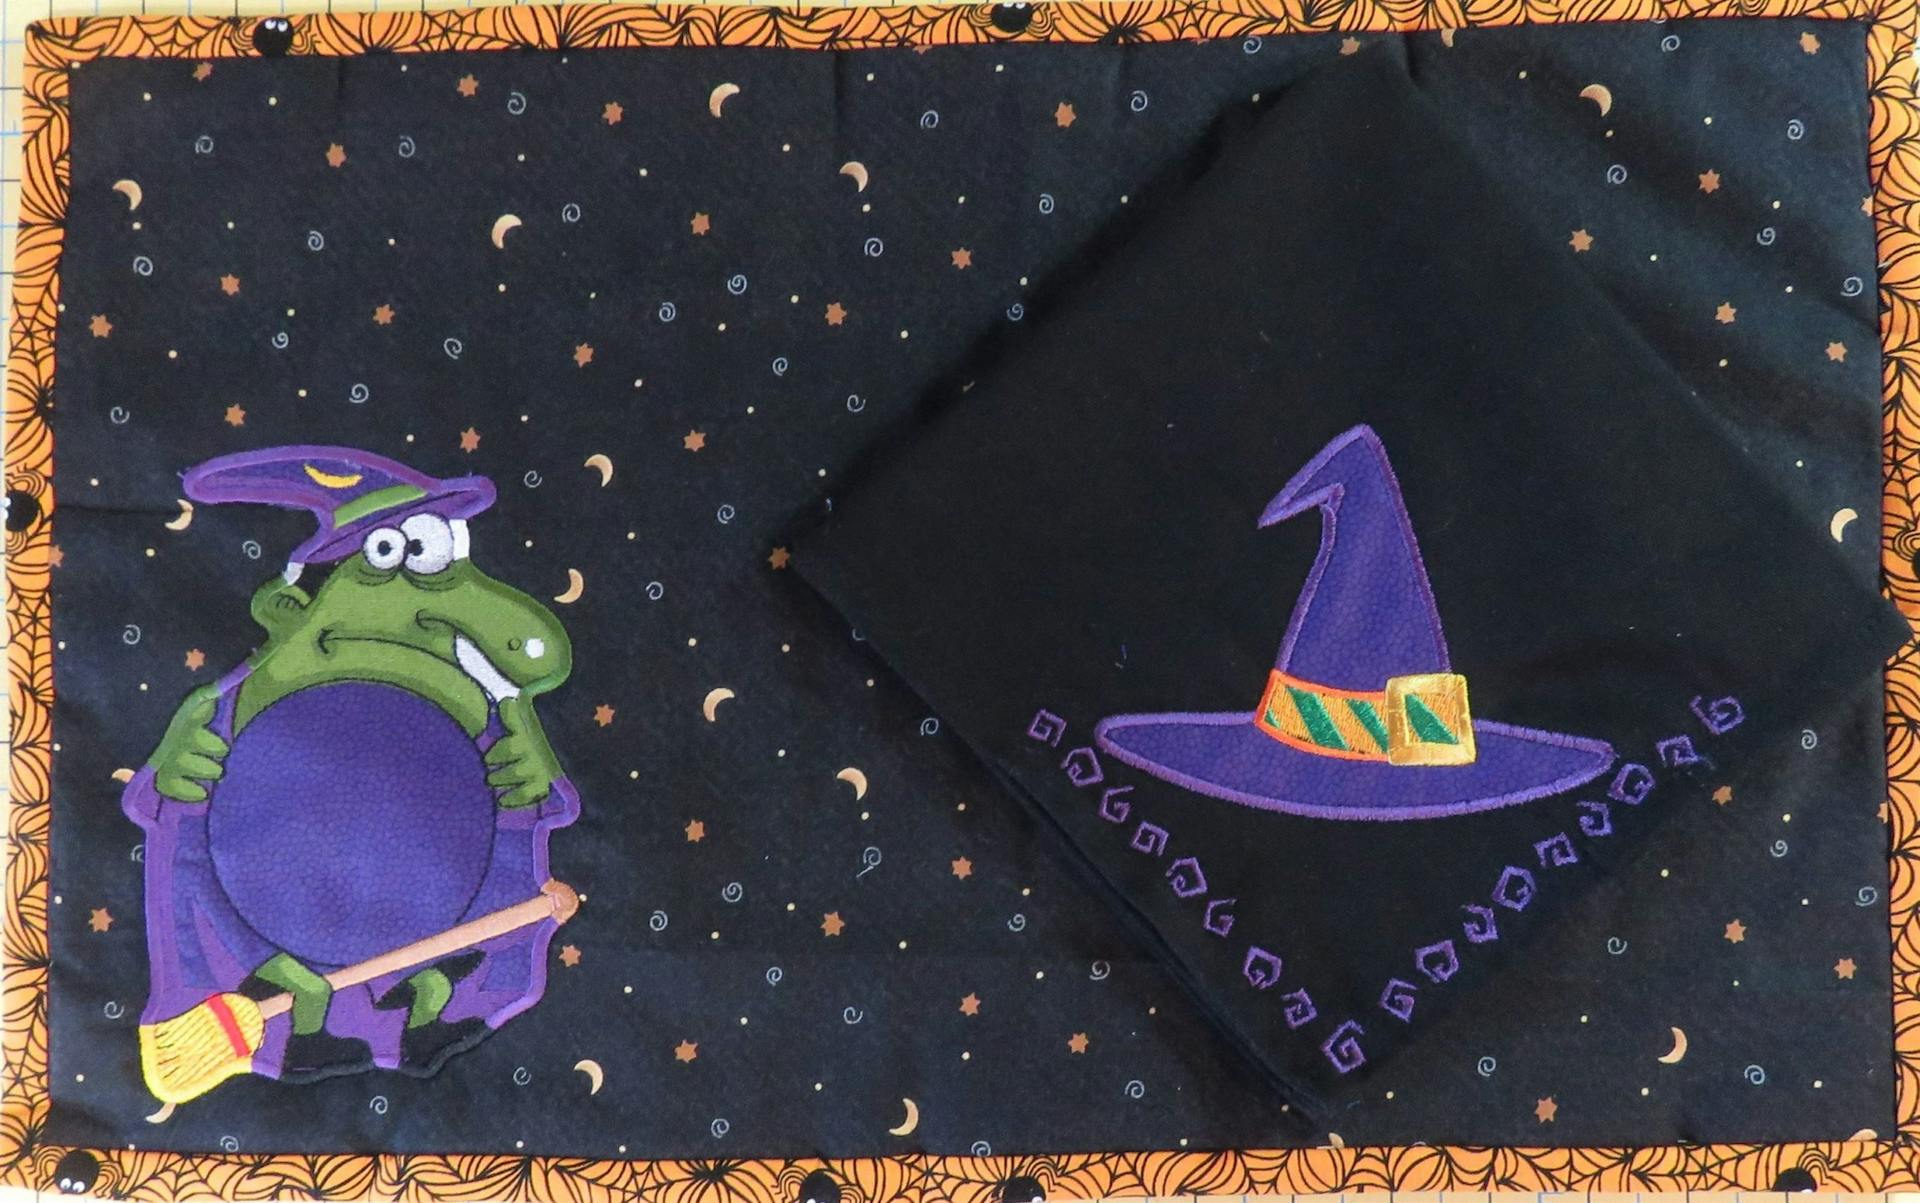
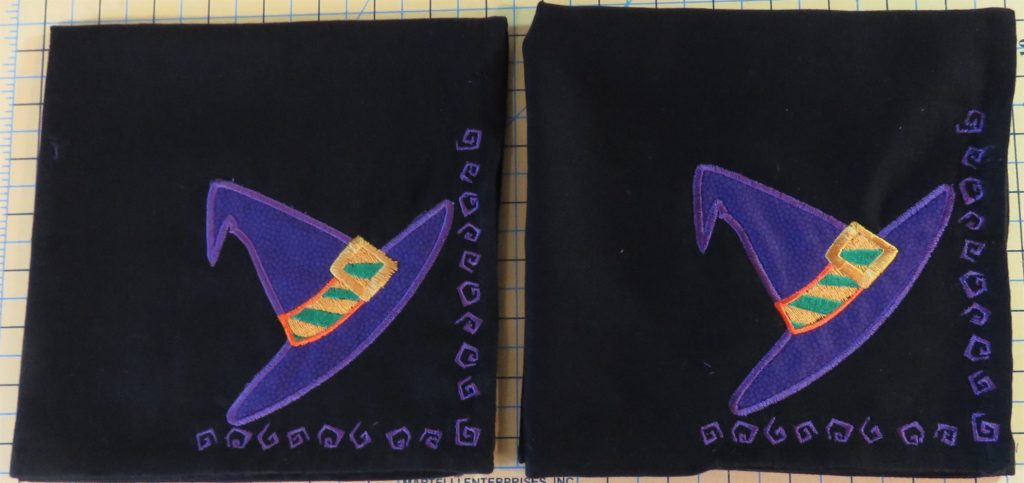
My placemats have a witch embroidered in the lower left corner. I found this really cute witch’s hat in the Halloween Quilt collection that coordinates perfectly with the placemat. So, let’s see how to use that design on Halloween napkins.
On the Computer
Whatever editing program you use, if you can delete parts of a design, then you can do this! I use Floriani’s FTCu program to manage/edit/create my embroidery files, so that’s what I’m going to show you.
Napkin Placement Stitch
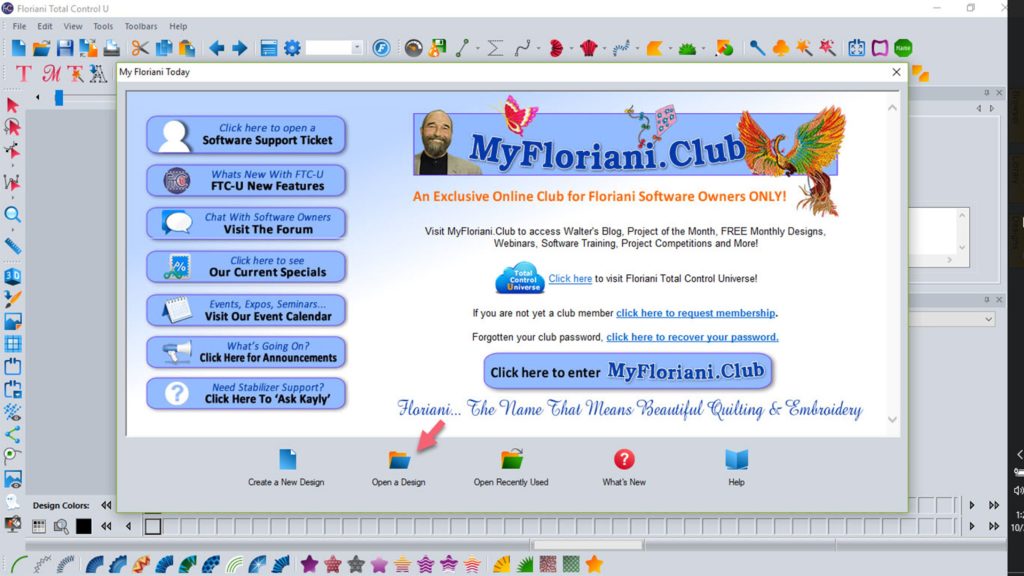
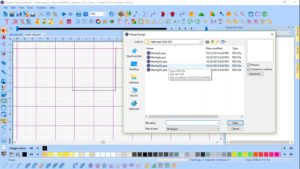
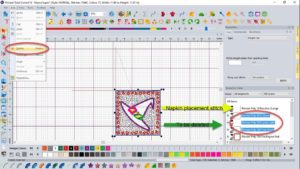
- From the opening screen, select Open A Design by clicking on the icon in the lower left part of the opening page.
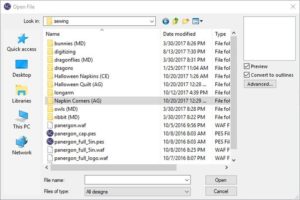
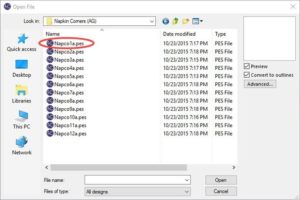
- Open a design that was digitized as a napkin corner.
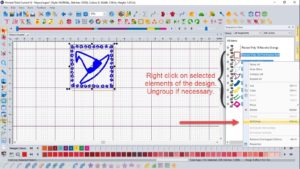
- Remove all parts of the design EXCEPT the placement stitch (the first thread in the sequence). In the photo below, the two thread sequences highlighted in blue in the “sequence view” window were selected, and then deleted. Items can be multi-selected by holding down the Ctrl key when clicking on the items. The selected sequences can be deleted by right clicking and selecting “delete” OR by selecting then going to the edit menu and selecting delete OR by touching the delete key on the PC keyboard.
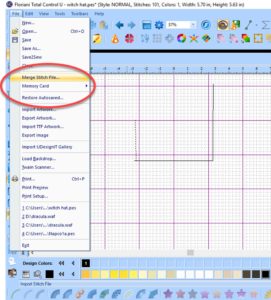
Merge Design
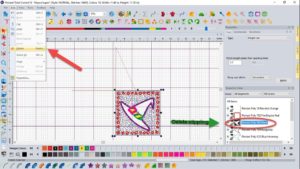
- Once you have deleted all but the napkin placement stitch, you can add the design you have chosen. To do this, click on File/Merge Stitch File to load the design you want to put on the napkin. I used a design for my Halloween napkins from Anita Goodesign’s Halloween Quilt collection.
Edit Design
- With the merged design loaded, remove unwanted portions of the design. As with step number 3 above, in the sequence view window, select those portions of the design that need to be deleted. Since this design was originally for a quilt, there is a batting placement stitch, a batting tack down stitch, and a fabric tack down stitch as the first three threads to be sewn. I deleted those, as well as the stippling stitches.
Position Design
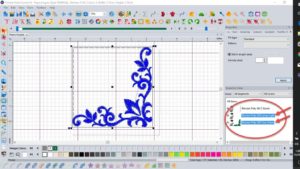
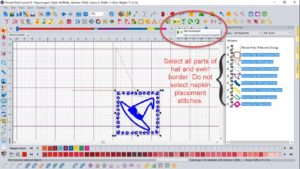
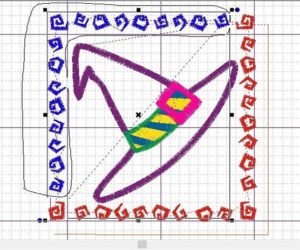
- Now it is time to position the design where you want it on the napkin in relation the to napkin placement stitch. Select all parts of the design, EXCEPT the napkin placement stitch. Flip the hat so that the bottom of the hat will be in the lower right corner of the napkin. Click on the horizontal mirror button at the top of the screen to flip the design. It is very important that you select ALL parts of the design, except the napkin placement stitch, before you click on the mirror button. Otherwise, only those thread sequences selected will be flipped.
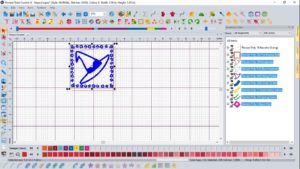
- With the hat and swirl border still selected, move them all at once to the desired position. I want my design to be at an angle, in the corner of the napkin. Use the placement stitch to align the design exactly where you want it. I have positioned the hat just to the left and above the napkin placement stitches.
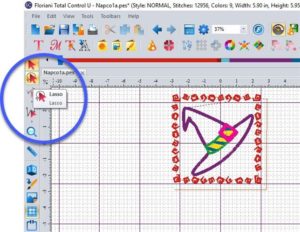
- With the design moved to where I want it, I make the final edits. I do not want the little swirls to go all around the hat. I just want them along the bottom and right napkin edges. It is easy to delete part of a thread sequence using the lasso tool. Before using the tool, however, check to see if the design elements have been grouped together and, if so, ungroup them.
- Select the swirls to be deleted by using the lasso tool. Use the tool to draw a loop around the undesired swirls. Once they have been selected, right click to delete.
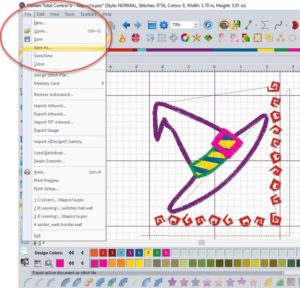
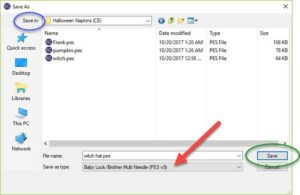
Save Design
- Save your design in your machine’s format. Be careful not to overwrite any of your initial designs. Use Save As and select your machine file type. Click on Save.
- Get ready to sew!
Here’s a video of these steps.
In the Hoop
Embroider the Halloween Napkins
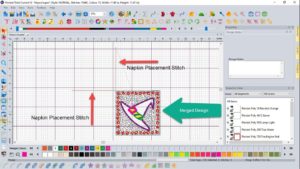
Stitch Napkin Placement Stitches
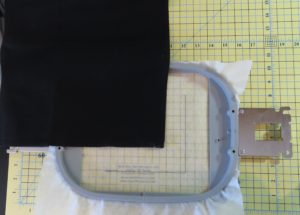
- Hoop a piece of stabilizer. I used Floriani Wet N Gone. With the small areas around the swirls, I didn’t want any stabilizer to get stuck there on the back of the napkin. If your design doesn’t have many small un-embroidered spaces, a good tear away will also work as a stabilizer.
- Once the stabilizer is hooped, place it in your machine and stitch out the napkin placement stitch.
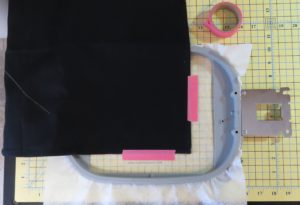
Place Napkin on Hoop
- Remove the hoop from the machine and align the edges of the napkin with the placement stitch.
- Use tape to hold the napkin in place. I use Floriani Embroidery Perfection Tape. Place the tape as close to the edge of the napkin as possible so that it doesn’t get sewn on. Although it will tear away easily if it does gets caught beneath some stitches.
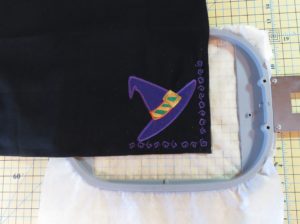
Finish Embroidering Design
- Return the hoop to the machine and embroider the next thread sequence. For my witch’s hat, it is the swirls along the edge. It’s best to do any edge stitches first as they hold the napkin in place on the stabilizer for the rest of the embroidery steps.
- Complete the embroidery of your napkin.
- When complete, remove the embroidery from the hoop and trim any jump stitches or thread tails on the front and back of the napkin.
Remove Stabilizer
- If using wash away stabilizer, it’s best to trim away as much as that as possible before removing the stabilizer with water. Those OESD 4″ applique scissors are perfect for this job! Follow the manufacturers directions to dissolve the remaining stabilizer.

Enjoy your napkin and rest assured that subsequent ones that you embroider will be positioned perfectly!
Stop in one of our four stores and find a perfect design collection to make perfect holiday or anytime napkins for your table. They’re fun to make and you can achieve “napkin perfection” using this technique to position the embroider design of your choice on a napkin.
To help you hold the napkin in place on your hoop, pick up some Floriani “pink tape” and use this coupon for 30% off the tape and/or wash away stabilizer.
