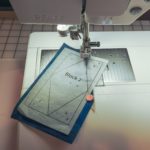
 Back at the July Sew Fun, Lisa demonstrated paper piecing using the “Add a Quarter” ruler. There is a block in the Alaska quilt I am making that suggests using paper piecing. So, I thought I’d try that technique, use the ruler, and write about it. The idea behind paper piecing is that you can achieve perfect points by machine stitching your fabric directly onto paper. Paper piecing is ideal for small blocks with intricate angles. Points that might be difficult to achieve with regular piecing can be a breeze when using paper piecing. You stitch your fabric to a paper foundation and then, after all of the blocks are completed and stitched together, you remove the paper from the back.
Preparation for Paper Piecing
The Paper
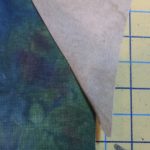
Although you can use just about any paper, the easier the paper is to print and later tear away is best. You can use copy machine paper, vellum, newspaper print, tracing paper, wash away paper, or freezer paper. Pretty much any paper can work. It is ideal, however, if you can run the paper through a copier to create the paper foundation for your block. Equally important is being able to easily tear away the paper once you’re done stitching. I used Carol Doak’s Foundation Paper for my project. The large block I am creating has several smaller blocks as part of it. So I placed a couple of sheets of the foundation paper into my copier and simply copied the blocks provided in the pattern book onto the paper.
Of course, you can hand-draw your pattern on the foundation paper and then, if making multiple identical blocks, use your copier to make more. I found that the foundation paper I used fed through the copier just fine.
Stitch Length and Needles
The more you perforate the foundation paper, the easier it will be to rip out later. I used a size 90/14 machine needle. I also shortened the stitch length to 1.5mm. More stitches make it easier to tear away the paper at the end, and stitch integrity is maintained.
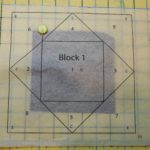
The Pattern
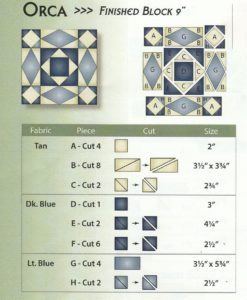
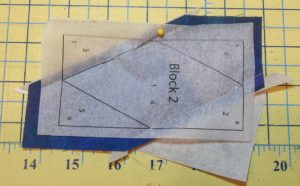
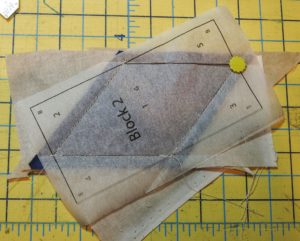
Here is a picture of the pattern I used for my blocks.
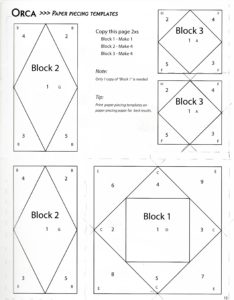
The pattern book provided a page of actual sized smaller blocks that make up the whole block. So, with the foundation paper loaded in the printer, I simply copied the page twice, as I need one pattern for each of the smaller blocks. Usually for paper piecing, the pattern for your block will be numbered, indicating the order in which you add the pieces of fabric.
The Ruler
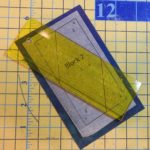
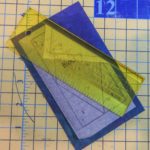
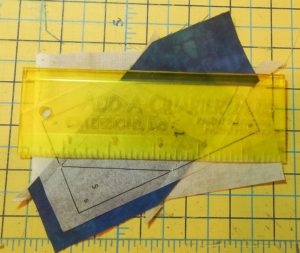
 I remember Lisa saying that one of the items that made paper piecing so easy was the “Add A Quarter Plus” ruler from CM Designs. This ruler is an indispensable tool for all paper piecers. It accurately adds a quarter inch to your piecing templates and provides a straight line for trimming and placement of the next fabric piece. The ruler comes in two sizes. The 6-inch is perfect for small blocks or blocks with tiny pieces while the 12-inch makes it easy to trim large blocks or those long, skinny pieces like you find in a compass block. One edge of the ruler is tapered for folding back foundation paper and the other side has a 1/4″ lip so you can quickly trim the seam allowance with your rotary cutter.
Creating the Smaller Block
I have to admit to struggling a little bit at first trying to figure this all out, but, wow, once I did get the technique down, it was a snap. At first I couldn’t figure out how to get the fabric pieces placed properly on the foundation paper. That’s when I discovered one of the benefits of the ruler.
Prepare Fabric and Pattern
Cut all fabric pieces to size per block instructions.
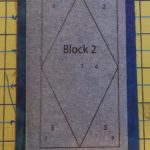
Prepare the printed block pattern by leaving a ½” margin around the lines on the paper delineating the block.
First Fabric Piece
- Place the template face up on the wrong side of the first fabric piece.
- Pin or use a dab of glue to hold in place.
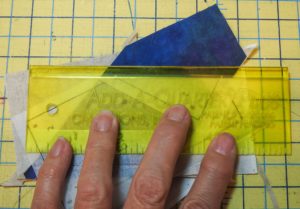
- Using the ruler, and working from the right side of the paper, place the tapered edge of the ruler on the first stitching line.
- Fold the foundation paper back along the stitching line over the ruler and crease the paper.

- Remove the ruler and turn it over and place the inside edge of the lip of the ruler along the folded piece of paper. The ¼” lip provides the cutting line for fabric#1.
- Trim the first side of fabric #1 by running your rotary cutter along the edge of the ruler, thus creating a ¼” seam allowance.

- Fold the foundation paper back to it’s original position.
Adding Second Fabric Piece
- On the back side of the foundation paper, and with fabrics right sides together, align the edge of the second fabric piece along the edge of the first fabric piece that you just trimmed.
- Pin in place if needed.
- Turn the piece over so the foundation paper is face up
- Sew along the line on the foundation paper, creating the first seam of the block.
- Finger press fabric.
Adding Additional Fabric Pieces
Following the numbered pattern, trim the other side(s) of fabric # 1 as above, and add additional fabric pieces to complete your block.
- Add fabric#3 to block
- Trim fabric #1 and place fabric #4 on block. Sew seam.
- Trim fabric #1 and place fabric #5 on block.
- Sew seam.
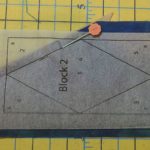
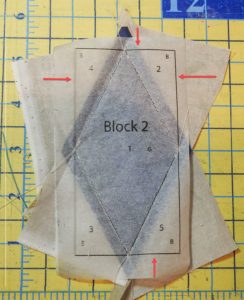
- Once all pieces have been added, trim the entire block so that there is ¼” all around. Use the solid line (red arrows below) that represents the finished edge of the block. Extend the ruler 1/4″ past that solid edge, and cut. CAUTION – Don’t be like me and cut on the solid line ! The solid line is the finished edge – you must add 1/4″ to this line before cutting.
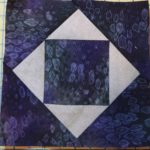
- Set block aside and complete other blocks as needed.
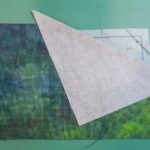
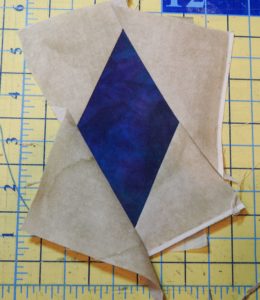
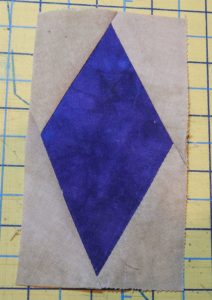
Here’s some pictures of another block I made using the paper piecing template. I love how the corners on the square and diamond are so sharp!

Click here for a short video from the maker of the Add a Quarter Plus ruler further explaining the technique.
Sewing Smaller Blocks Together
Besides mistakingly cutting on the solid line once (or twice), I stupidly took the foundation paper off once I created the smaller blocks. I did not think about how useful paper piecing would be to put them all together into the larger block! Duh! So I had a bit harder time getting all the points to line up and be perfect. In fact, they’re not as good as they would have been if I had used the paper patterns to line everything up.
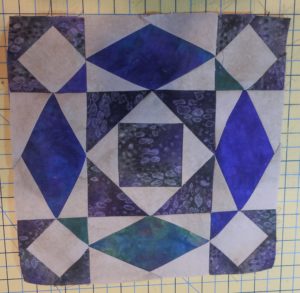
But I got the block finished, and the applique applied. This completes the twelfth block out of the 16 needed for my quilt.

So, now, I am a paper piecing convert … as long as I have the wonderful Add a Quarter Plus ruler! I can’t wait until my next project, and am anxious to see how perfect the block can be if I leave the paper on until everything is sewn together.
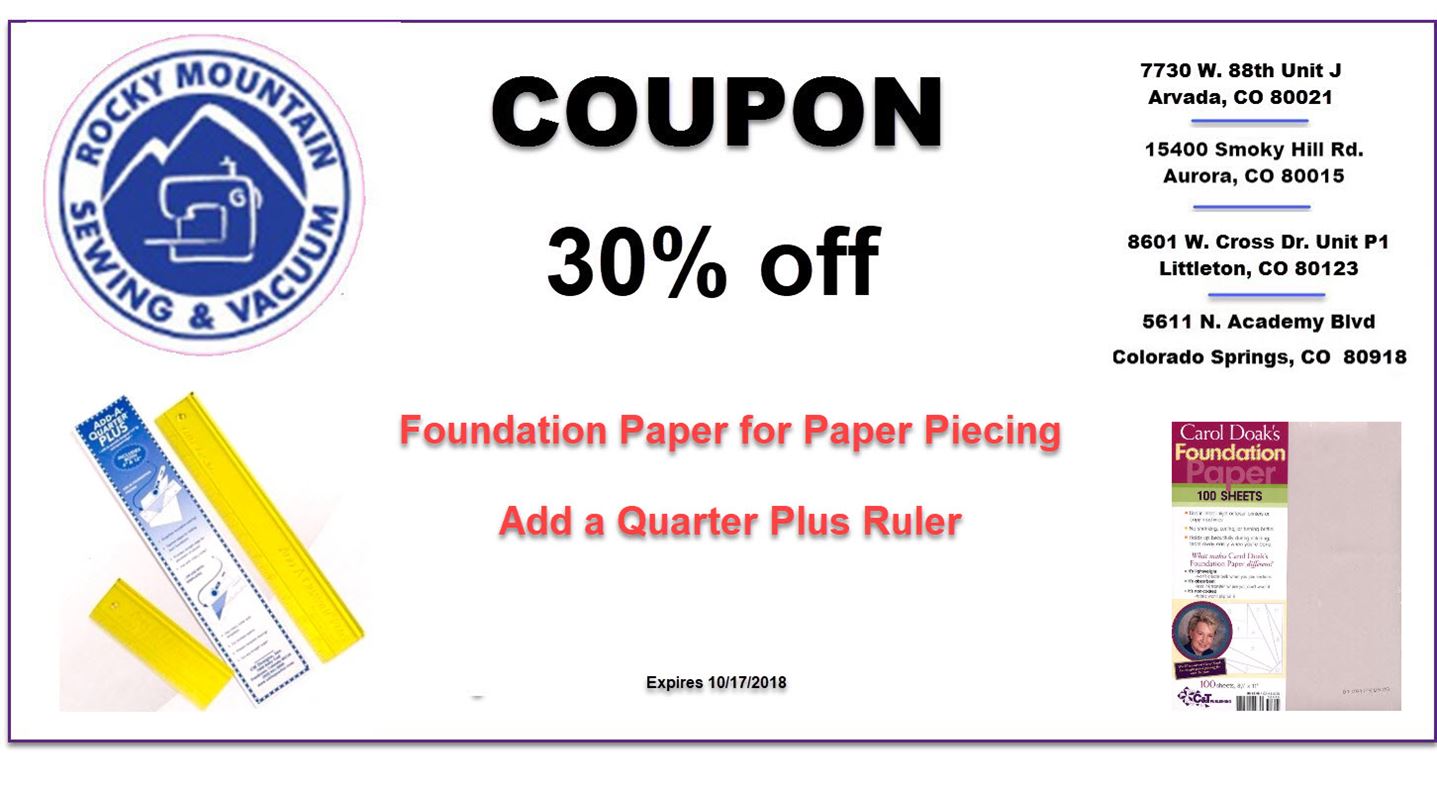
Try paper piecing. It’s really pretty easy once you get the hang of using the ruler. Just come by any one of our stores and pick up the paper and/or ruler. If we don’t have them in stock, we’ll be happy to order them for you.
Here’s a coupon to help you get started.