I was in the Rocky Mountain Sewing and Vacuum Littleton store the other day and saw that Lynn, the manager, had stocked some Mylar. Yippee! Mylar is durable, doesn’t shrink or stretch, and is food safe, it has many uses. When used in specially-created Mylar embroidery designs, Mylar adds a delightful shimmer and shine.
Mylar Embroidery Designs
The process to embroider with Mylar is not really different from any applique design, but you do need designs that have been digitized to use Mylar. There are several sources of Mylar embroidery designs. Anita Goodesign has Mylar Spring, Mylar Christmas, and Mylar Bookmarks. OESD also has some cute butterfly and fish designs digitized for Mylar.
Mylar is very durable, and is an excellent material to be used in embroidery on clothing that will be washed. Since it is made from polyester, it has a a high melting point so clothing can be ironed. I do suggest using an ironing cloth between the Mylar and the iron, or ironing from the back.
One of my very first Anita Goodesign wall hangings was Mylar Christmas This collection has 20 block designs along with 7 borders that really pop when you use Mylar in the block.
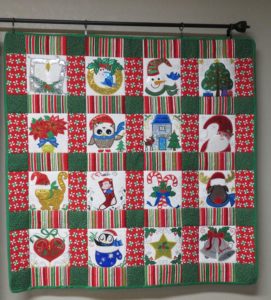
Mylar Christmas Moose
One of the designs in the Mylar Christmas collection is a moose. Let’s see how to use Mylar in that design.
Create the block
Since this is an Anita Goodesign quilting collection, the first few steps in creating the block are:
- Hoop a piece of Floriani “no show nylon mesh” or similar stabilizer
- Sew the placement stitch for the batting
- Tack down the batting
- Sew down the background fabric
- Stipple the background fabric
Obviously, if you are not making a quilt or a wall hanging, then you would just hoop a piece of stabilizer appropriate for the project, and skip these first few steps.
Embroider the Design
The Scarf
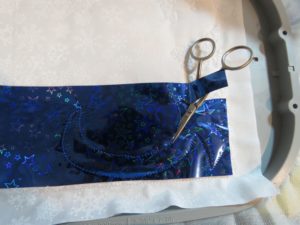
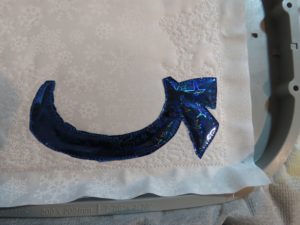
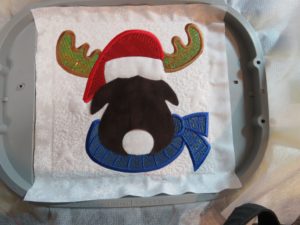
As with most if not all applique designs, there is a placement stitch that shows you where to place your fabric (or in this case Mylar). So, after the block has been created in the hoop, sew out the placement stitch for the first applique piece. The scarf of the moose is the first applique. Once the placement stitch is complete, place the mylar so that it completely covers the placement stitch and stitch the “tack down” stitch. This will anchor the Mylar to the base fabric. Trim the excess Mylar away, trimming as close to the edge of the stitching as possible without clipping the tack down stitches. Complete the embroidery of the scarf using blue embroidery thread.
The Antlers
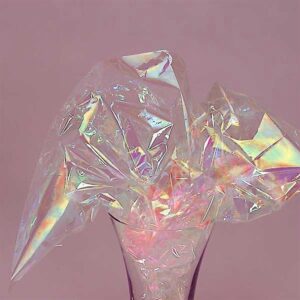
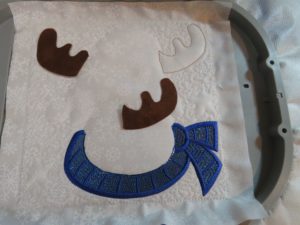
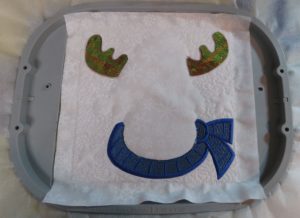
The Moose’s antlers are next. What color should antlers be? For my block, I wanted the antlers to be light brown, but didn’t have any brown mylar. So I used a light brown base fabric and then topped that off with a clear, iridescent mylar. This “opal Iridescent” Mylar is transparent. It reflects back the color of the thread used. In addition, you can use this clear Mylar with an underlayer of any colored fabric to give the design the color you want but still have the iridescent sparkle of Mylar.
I used my ScanNCut to cut out the antlers from some quilting cotton, and was also able to cut the Mylar with the ScanNCut. Sandwich the Mylar between two pieces of waxed freezer paper and then iron the sandwich with a dry, iron set on nylon. This will provide a firm substrate and a smooth surface for blade to the Mylar. Mark the position of the Mylar in the sandwich so you know where to put the design on the ScanNCut.
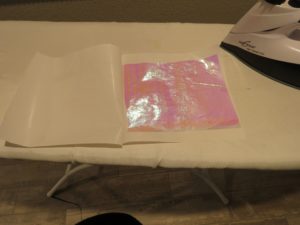
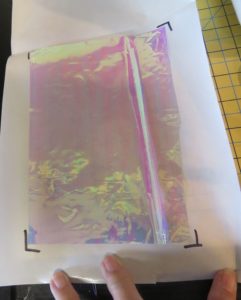
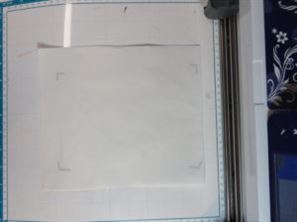
I used a cut speed of 4 and a cut pressure of 4 on the ScanNCut2, but these settings may vary for you, depending on your cutting blade.
Once the antlers have been cut out, sew out the placement stitches and put the base fabric and the Mylar as indicated. Hold them in position with tape if necessary. Complete the embroidery of the antlers with light brown thread.
The Hat
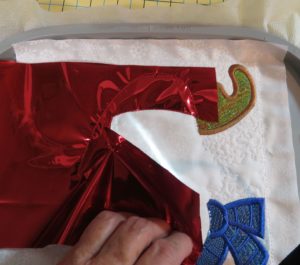
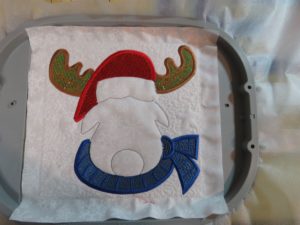
For the moose’s hat, I used red Mylar. I trimmed the Mylar after the tack down stitch as I did with the scarf. I completed the embroidery of the hat with red thread.
The Moose Head
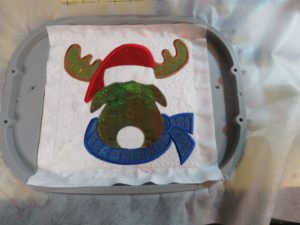
As with the antlers, I wanted the moose to be a darker brown. So I used a dark brown base fabric with the clear iridescent Mylar to create the moose. I used the ScanNCut to cut out the moose head base fabric and Mylar just as I did for the antlers. Next, I completed the tack down and embroidery of the moose using dark brown thread.
The Nose and Hat Band
The final two pieces, the moose’s black nose and the white hat band were also appliqued with Mylar. For the hat band, I used a white base fabric with the clear iridescent Mylar on top and for the black nose, I used black Mylar. Each applique piece was stitched with matching thread, black for the nose and white for the hat band.
Finishing Up
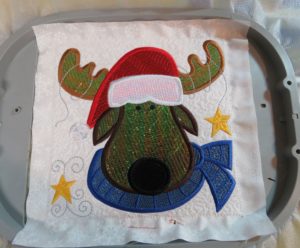
After all the appliques are complete, complete the block by embroidering the moose’s eyes, and the string and the stars.
If you look closely at the design you’ll note that:
- A satin stitch finishes the edges of the Mylar, hiding the raw edges.
- Stitches cover the top of the Mylar. This keeps the Mylar from tearing away from the satin stitches.
- There is space between the stitches on top of the Mylar. This allows the Mylar to show through the design. The threads pick up the colors of the iridescent Mylar. Thus, they appear to be metallic threads even though they are not. They also lend color to the design, especially when you use clear Mylar without any base fabric underneath to add color.
Choosing Mylar Embroidery Designs
As I mentioned, if possible, use designs digitized for Mylar embroidery. However, you might be able to use other designs, depending what type of stitches are on the top of the Mylar. Be aware, though, that if you do use designs that are not digitized for Mylar, they may have under-stitches in the design. Under-stitching (or underlay) is usually embroidered first, before the outer layer of stitches, creating a foundation for the design. If your design has under-stitching, sew out the under-stitching first. Then, stop the machine and then place your Mylar over the area where your design is to sew out. This hides the under-stitching underneath the Mylar. If you stitch it on the top of the design, it might show through and ruin the effect.
Try It Yourself!
The pictures here don’t really do justice to just how pretty Mylar embroidery is. So stop in one of the Rocky Mountain Sewing and Vacuum stores, and pick up some Mylar to try. If they don’t have it in stock, check with the store manager about ordering some. Here’s a coupon to help you get started!

