Ah, love is in the air, and, at Rocky Mountain Sewing and Vacuum, we sure love our customers! To celebrate Valentine’s day, we are pleased to provide you with a lovebirds embroidery design just right for Valentine’s Day. As with our Christmas collage, published in the blog on December 21, our graphic designer, Lani, provided me with a beautiful drawing that I digitized for embroidery.
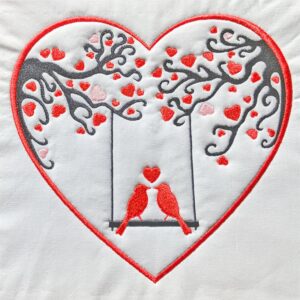
The Lovebirds Embroidery Design

Import Artwork
Lani sent me this file as a .svg so it was so easy to digitize in Floriani’s FTCu software by importing the artwork.
- Select File/Import Artwork… from the menu.
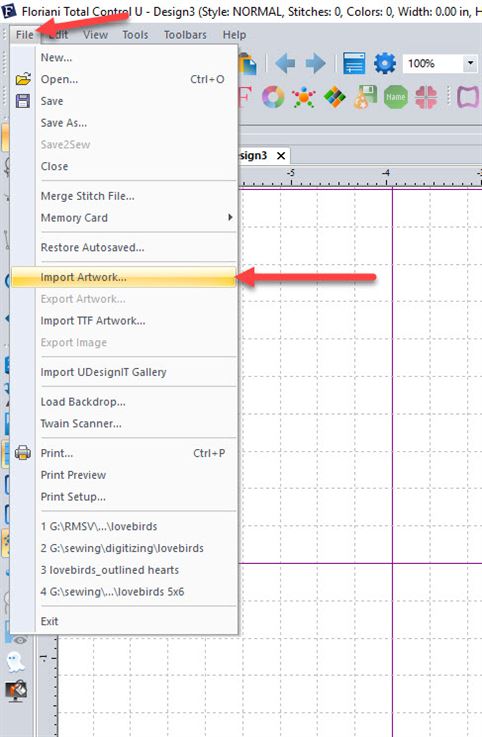
- Navigate to the location of the artwork and select it. Note several types of vector files (circled below) can be imported.
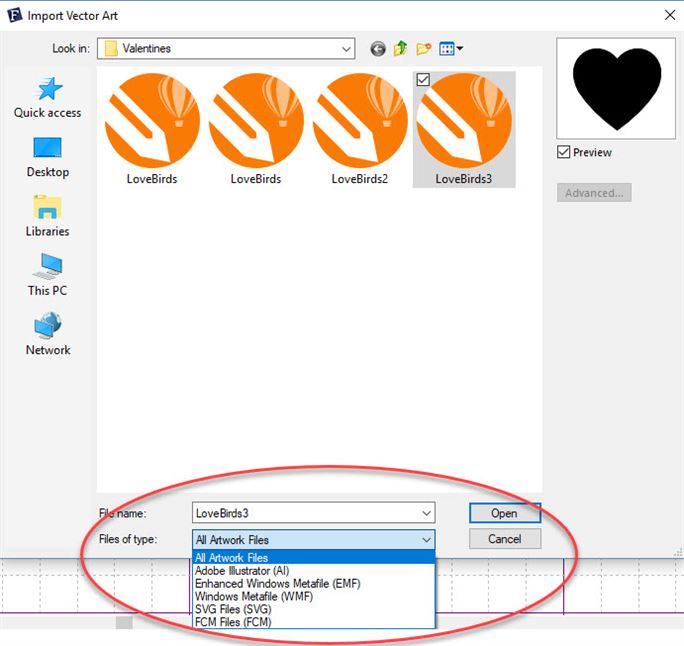
- Select the file and click on Open.
I was a little taken aback at first when the design imported at a solid black heart! However,I realized the last sequence, the heart border, was simply filled in.
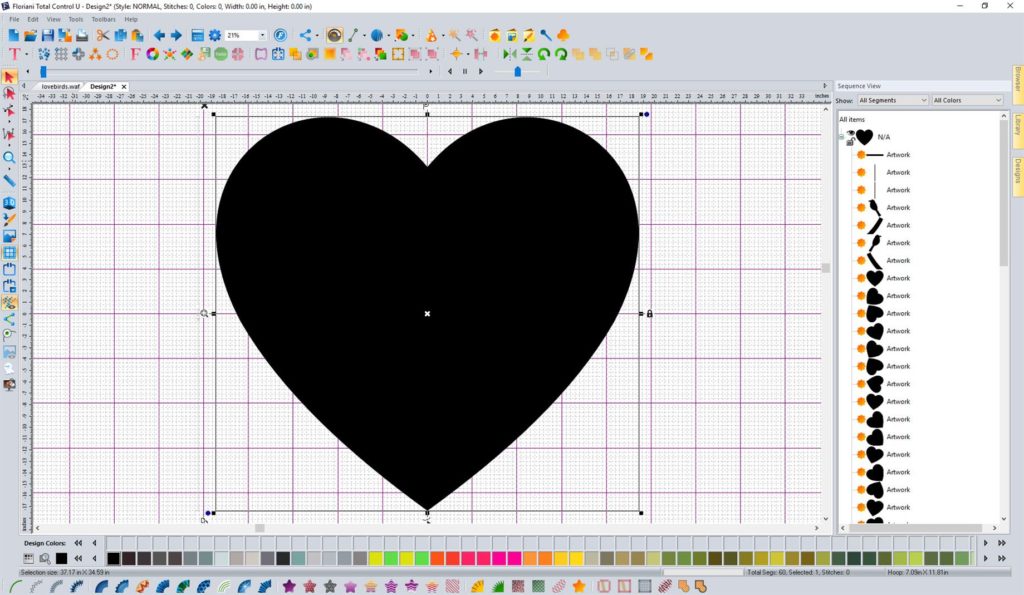
So it was a simple matter to remove the fill on the last sequence, the heart border. Simply uncheck the Fill box and click on Apply.


Create Stitches
Since .svg files are vector graphics, each element becomes a separate sequence in FTCu. To digitize, simply select each element and click on the type of stitch you want for that element. In the picture below, I selected Standard Fill for the branches. So very easy.
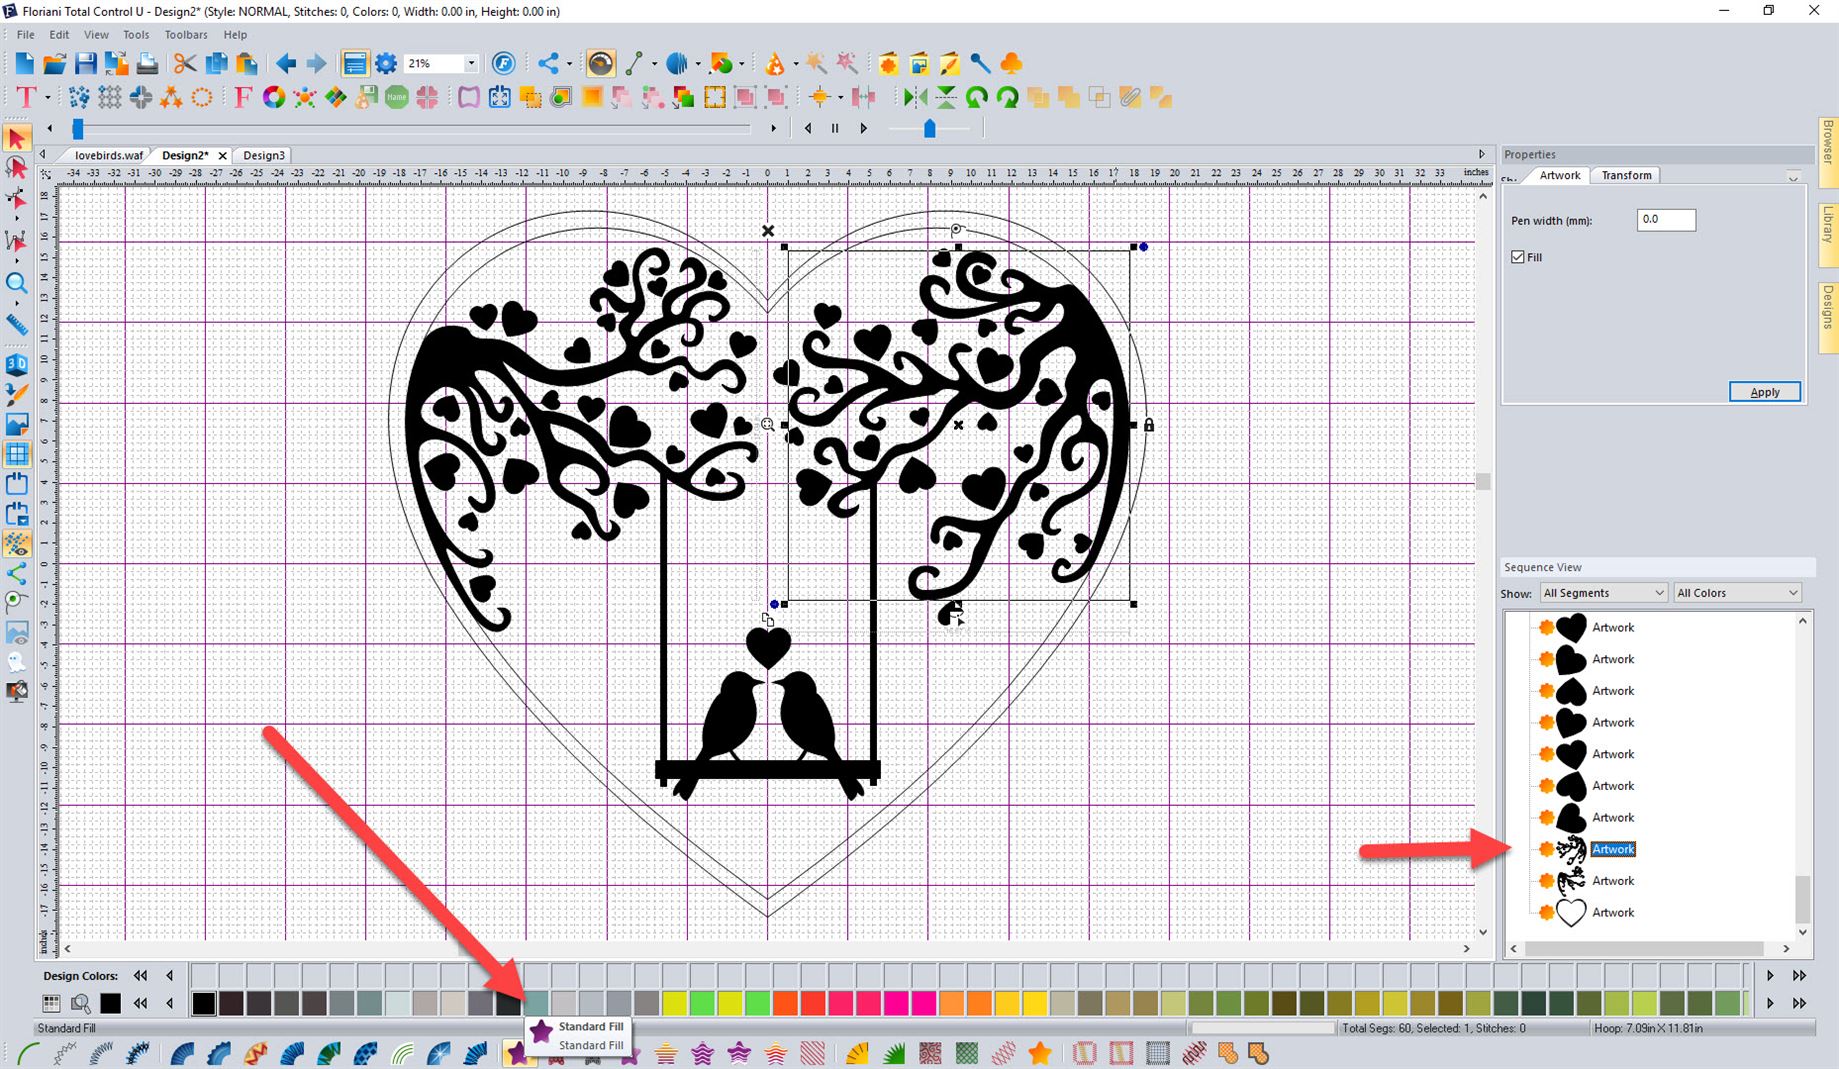
Once the element has been converted to stitches, it is easy to modify the fill type or other properties of the sequence.
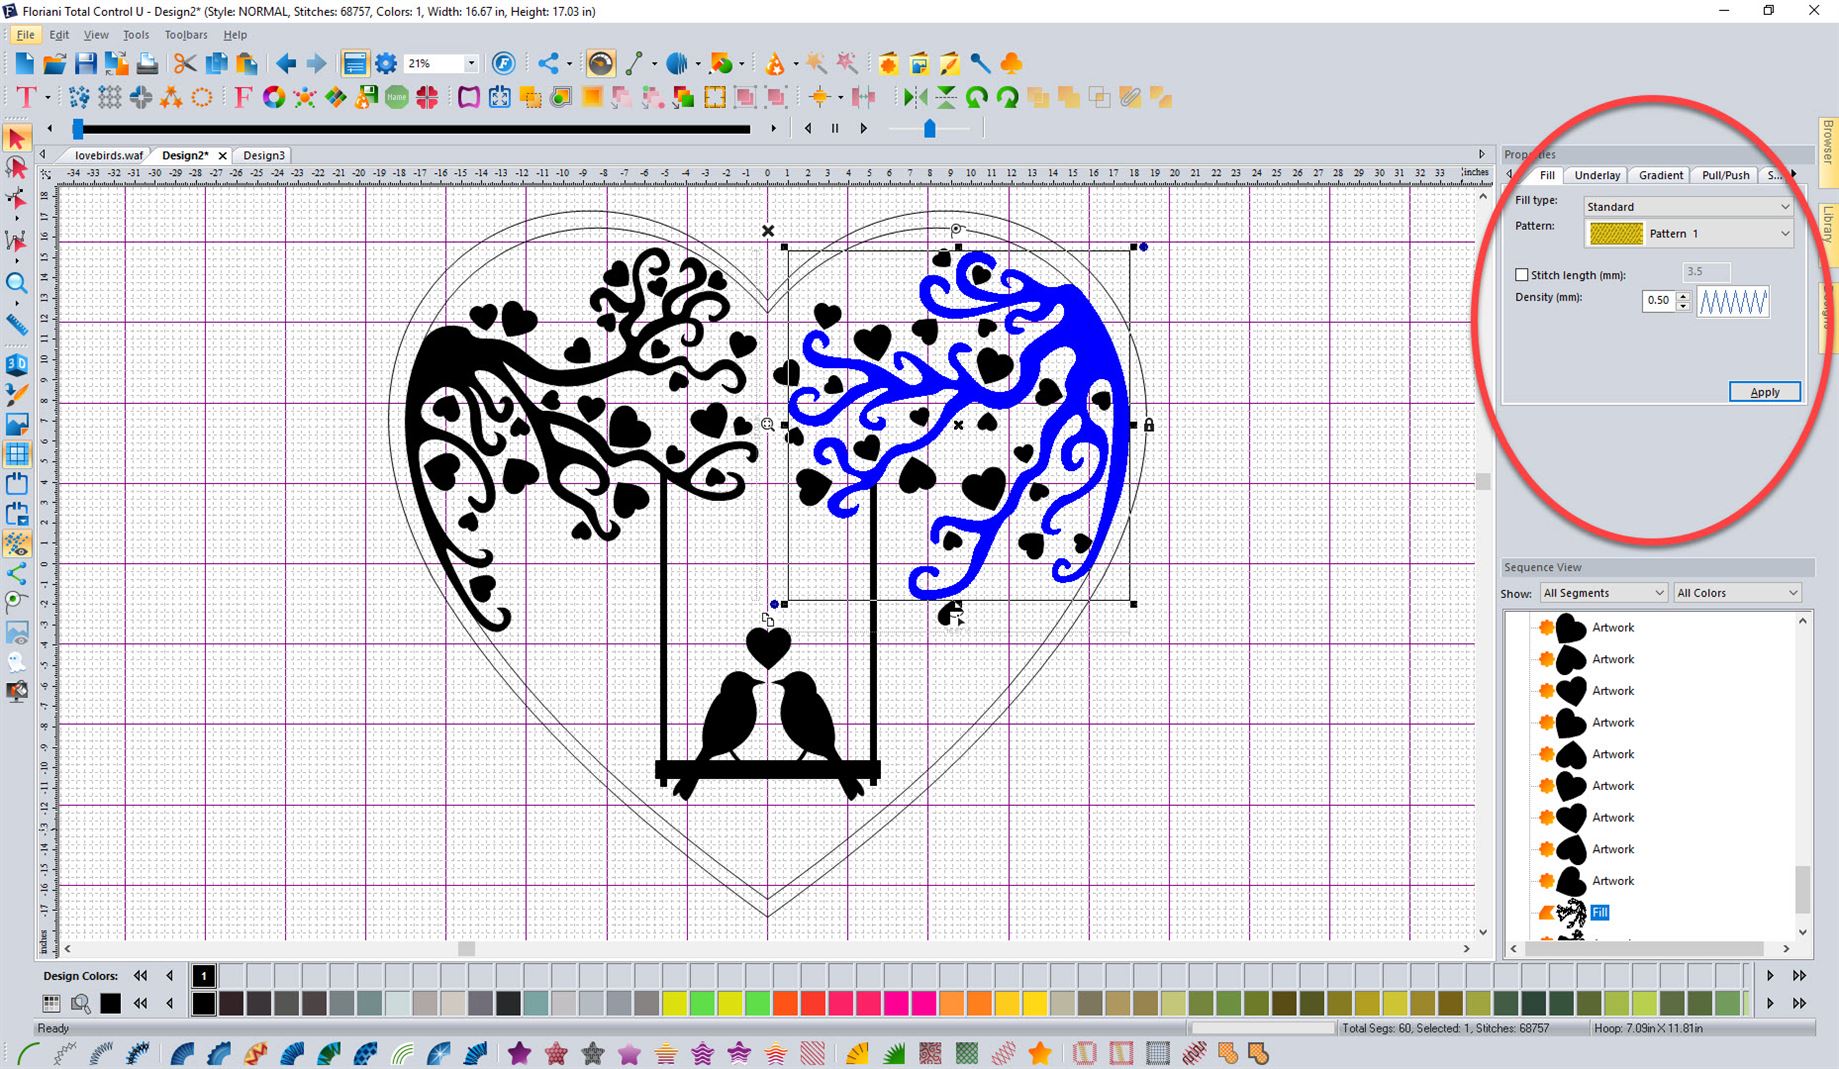
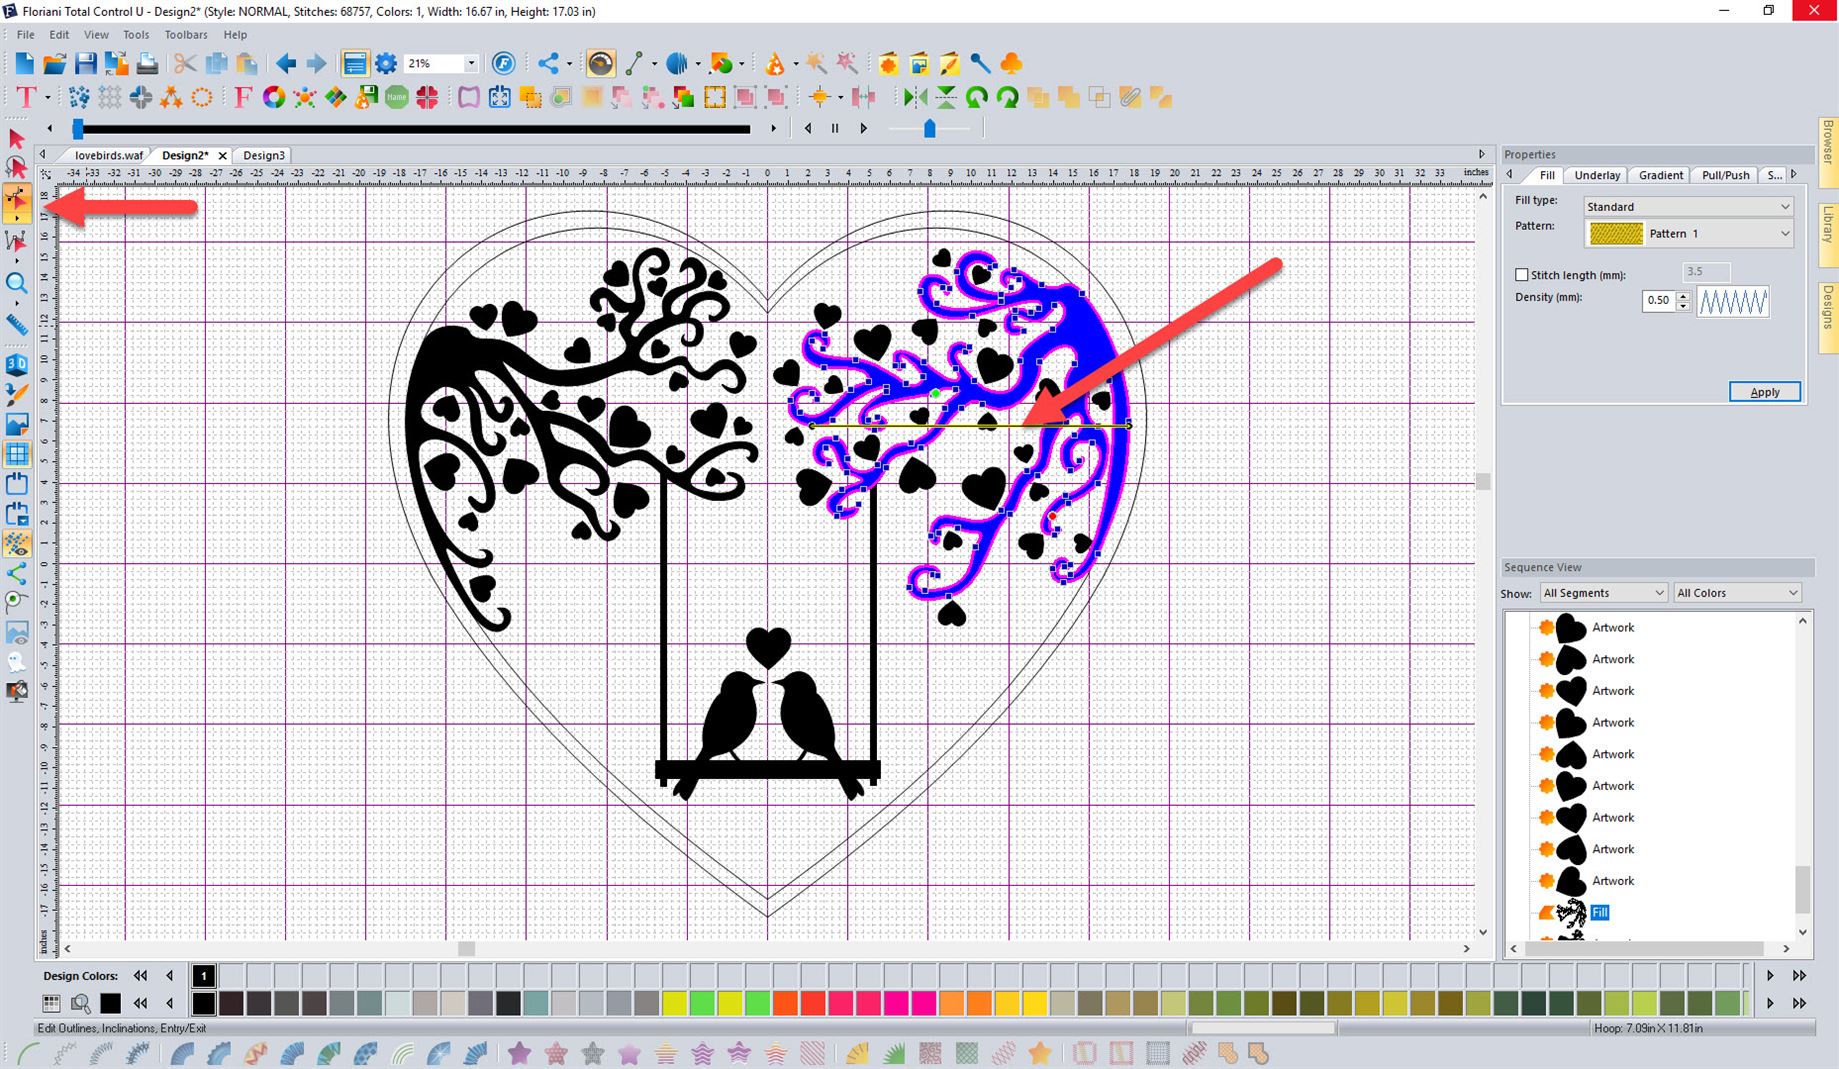
Click on the shape icon, ![]() , to modify the shape of the element by selecting and moving the blue control points as needed. You can also change the angle of the fill by selecting and moving the black dots at either end of the yellow line as shown below.
, to modify the shape of the element by selecting and moving the blue control points as needed. You can also change the angle of the fill by selecting and moving the black dots at either end of the yellow line as shown below.
The real beauty of using vector files as artwork is that each element comes in as a separate sequence. In addition, the fidelity of the digitizing is quite good.
The Thread Sequence
The final design is 7.5 x 8 inches. Some of the hearts are pretty small, so beware if you reduce the size. I used 40wt. Floriani embroidery thread, but if you reduce the thread, I recommending using micro thread for the hearts.
Lani’s drawing only had two colors, red and black, but I created the stitch out to provide for up to 6 color changes. The ropes for the swing are one color, the seat for the swing is another color, the branches are a third color, the birds and most of the hearts are color #4, a smattering of hearts are color #5, and finally, the heart satin border is a 6th color. You can download a pdf color chart for the design here.
For my sewout I only used three colors, as I liked an occasional pink heart in the mix, but was happy with black for the swing and branches.
Create a Gift for Someone You Love
So do you need to create a last minute, one-of-a-kind homemade gift? If you’d like to use this design, click on the link below that matches the format for your machine. Save the file to your computer, and sew out the design. When you click on any of the links below you’ll get a message that the file cannot be previewed. Just click on the download the file button and download it to your computer or USB stick. It may take a moment for the download button to show up.
Note: If I missed a format you need, please email me at rockymountain.blogger@gmail.com and I’ll send it to you.
Need some ideas on what to put it on? Check out some of my previous blogs for instructions on several different projects that would go great with our lovebirds embroidery design. Put it on a pillow. How about a hemstitched towel? Wouldn’t it look great on an apron or a tote or beach bag? Only your imagination sets the limits!
When you sew your own, we’d love to see a picture of it on our Facebook page or Instagram. Please use the hashtags #rockymountainsewingandvacuum and #rmsvblogproject with your post.
Bonus
As a bonus here’s the .svg file so you can cut it out on the ScanNCut if you’d like to make a vinyl decal!
Disclaimers
I stitched out this design on my Brother PR1000, and had no issues. I am not a professional digitizer, though, so I can’t guarantee this will stitch out okay on your machine. If you want to use this for a gift, I suggest that you stitch out a sample first.
The design is copyrighted by Rocky Mountain Sewing and Vacuum. You are welcome to download the stitch file(s), but please do not distribute it electronically to others. Please direct anyone else who is interested in the files to this blog, to download it for themselves.
If you make this smaller than 7.5 x 8 some of the hearts may lose their resolution. I recommend using micro thread for the hearts if you reduce the size.
Happy Valentine’s Day!