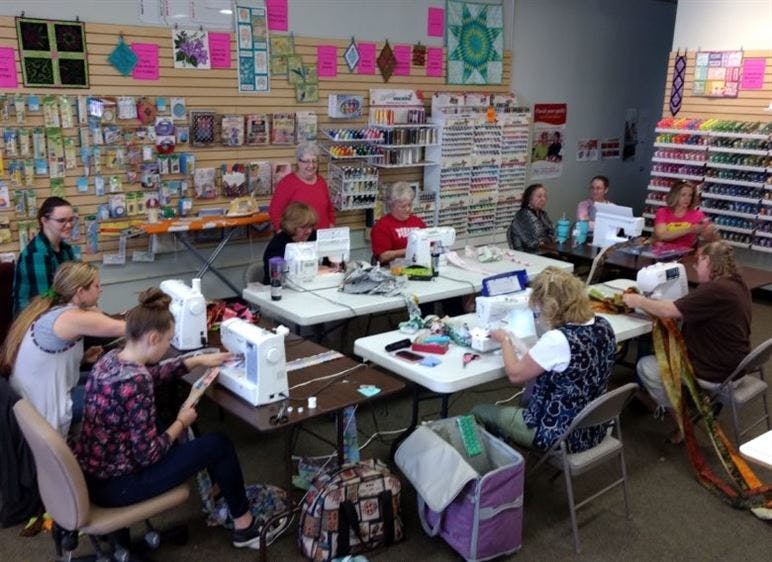
July 1 at the Colorado Springs Rocky Mountain Sewing and Vacuum store was the scene of a sewing frenzy! Participants competed against each other and the clock in a Jelly Roll Race.
What is a Jelly Roll Race?
A standard Jelly Roll Race produces a quilt top that is approximately 50″ x 64″. It uses one 40-strip Jelly Roll fabric collection, sewn into a single, super long strip. Once that strip is made, the race begins. Participants are timed as to how long it will take them to take the 1600 inch “mega strip” and turn it into a Jelly Roll quilt top. You end up with a quilt top that is a series of offset strips that come together in a surprisingly fast and fun fashion. You can’t really tell what it will look like until it is all done, and you spread it out for the first time. It’s quilt magic!
How Do You Prepare for a Jelly Roll Race?
Materials needed
- Jelly roll (40 strips, each 2½” by width of fabric (WOF) wide.
- Rotary cutter or scissors
- Ruler (optional)
- Thread
- Sewing Machine
- 1/4 inch quilting foot (optional)
- Stamina
- Chocolate (not optional!)
Pre-race preparation
Unroll your Jelly Roll. You can just use one strip after another as it comes in the roll or sort the strips into colors or patterns then alternate selecting them. That way, you won’t have two of the same strips together, end-to-end. Other than that, don’t spend too much time worrying about the order of the strips! Invariably, it seems that once the rows are sewn, you’ll have two of the same fabrics next to each other. It’s very difficult to predict or control how the strips will line up once they’re sewn in rows with a Jelly Roll Race quilt. Just trust that the fabric collection will come together in a fun way.

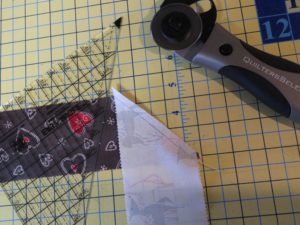
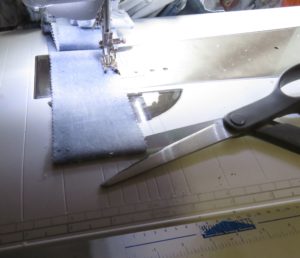
Next sew each of the strips together end-to-end, right sides together. You usually see Jelly Roll Race quilts with the strips sewn together at a 45 degree angle. That’s what I prefer. Others prefer the way it looks with a straight seam. It’s all up to you. I like to mark my 45° angle but, you can “eye ball” it. Just make sure to go corner to corner, so the edges line up.
Once sewn, trim seams to ¼ inch with scissors or rotary cutter and press them open or to one side as is your preference.
When you have sewn all of your jelly roll strips into your mega strip, cut off 18″ of one end of the strip. This will offset the seams as you sew the strips together along the length. Then accordion fold or wrap the mega strip into a circle to make it easier to manage if you are taking it elsewhere to sew it together.
Now you are ready to race!
What Are the Steps in a Jelly Roll Race?
The race begins when you unfold your mega strip and start sewing.
- Fold the 1600 inch strip you have prepared long ways over on top of itself, right sides together (RST). Lay the two ends on top of each other, right sides together, and sew them together along one edge with a ¼” seam. (Hint: A quarter-inch quilting foot really helps keep the seams even and at ¼”. Check your Rocky Mountain Sewing and Vacuum store to see if there is one for your machine.) This first row will take seemingly forever.
- When you get to the end, you will have to cut open the folded edge so your new double strip will lay open flat. Don’t worry if this first row is twisted. Just cut the end open and untwist it right before finishing the seam. (It will get easier to not twist the rows as you go along.) This will create two rows of strips, approximately 800 inches long.
- Repeat. Grab the two ends, right sides together, sew a ¼ seam along one long edge until you hit the end. Once again, cut open the folded edge. This will create 4 rows of strips, approximately 400″ long.
- Do the same thing for this 400″ strip, folding it over on top of itself, RST. Again sew a ¼” seam along the long edge. This will create 8 rows of strips, approximately 200″ long.
- Two more folds and you’re done! The 200″ inch, 8 row strip is folded over on itself, sewn RST resulting in a 100″ strip of 16 rows.
- The 100″ inch piece is folded one last time, sewn RST. This final fold gives you a jelly roll quilt that measures approximately 50″ wide and 64″ long.
That’s it! Open up your Jelly Roll Race quilt top and enjoy the surprise.
How long did it take you?
Here’s a short video from Missouri Star Quilt Company on preparing a Jelly Roll Race quilt.
Finishing
How you finish your quilt, is of course, up to you. If you just back and bind the jelly roll you have stitched together without any border the quilt will be approximately 50″ x 64″. I like mine a little bigger and have found that 4½ yards of 44″ wide fabric is sufficient to add a 4″ border to the top and to back the quilt. This gives you a finished quilt that is approximately 58″ x 72″. I really like this size for laying across the bottom of a bed or for use on the couch on those chilly evenings.
The quilt back and borders
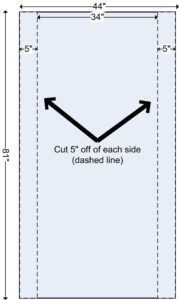
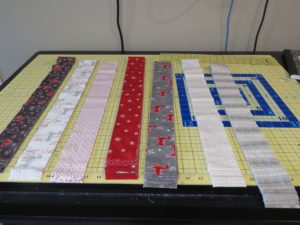
I first cut the 4½ yard length of fabric in half, resulting in two pieces. (Each piece is 44″ x 81″). Next, I cut 5″ off each side of each piece of fabric. This results in two pieces that are 34″ x 81″ each and 4 pieces that are 5″ x 81″. I use the 5″ x 81″ pieces for the borders of the quilt. Shown here is one of the two halves of the original 4½ yard length. (By taking the 5″ off of each side, I know, when I sew the two 34″ wide pieces together, the seam will be in the middle.)
Once I sew the two 34″ x 81″ pieces RST along the long length, I have a quilt back that is 68″ x 81″ . The finished quilt top will be 58″ x 72″, so this 68″ x 81″ piece for the back will be sufficiently long and wide to load on a quilting frame if desired.
Note: Each of the 5″ strips has a selvage edge. This can be removed now or after the pieces are sewn onto the quilt top. One you remove that and sew the border onto the quilt with a ¼ inch seam, the resulting border is approximately 4″ wide.
The quilt top
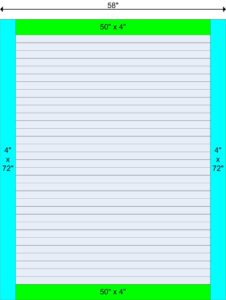
I cut the two of the 5″ x 81″ strips to the width of the quilt (approximately 50″) and sew these one on the top of the jelly roll quilt and one on the bottom. (Green strips shown here). Finally, I sew the two remaining pieces (blue strips), one on each side of the quilt, finishing the top.
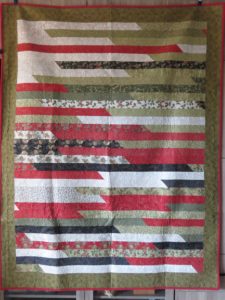
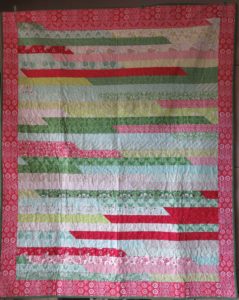
Here’s some photos of a few of my Jelly Roll Race quilts, complete with borders:

Changing Sizes
Check out my next blog to see how to calculate the number of strips needed if you want to change the size of your jelly roll quilt. I’ll also include some cute ideas to “spice up” your jelly roll quilt by adding blocks or appliques.
Results from the Colorado Springs Jelly Roll Race
Now that you know how to create a jelly roll race quilt, you should be suitably impressed with the winning times from the Jelly Roll Race at Colorado Springs. I know I was.
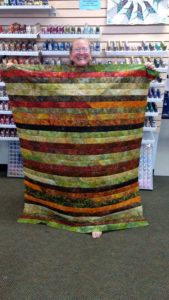
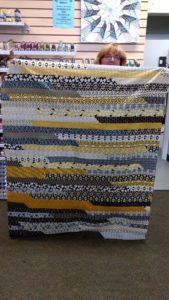
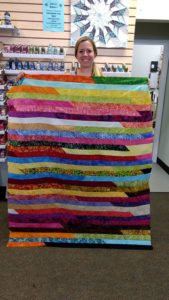
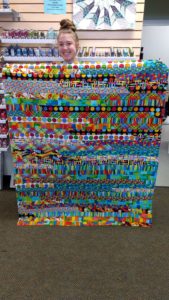
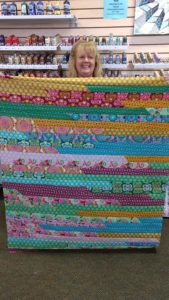
Take a look at the beautiful quilt tops the 7 ladies who participated created in just around one hour.


My Race Against the Clock
After seeing these results, I decided to time myself and didn’t even come close to those ladies!
I timed how long it took to sew each seam after the fold.
- First fold (800 inches) — 42 minutes, 26 seconds
- Second fold (400 inches) — 21 minutes, 12 seconds (at least I’m consistent!)
- Third fold (200 inches) — 11 minutes, 53 seconds
- Fourth fold (100 inches) — 5 minutes, 48 seconds
- Fifth fold (50 inches) — 2 minutes, 51 seconds
Total time: 84 minutes, 10 seconds.
(I iron after each seam, but these times did not include ironing.)
So, I don’t think I’ll compete in a Jelly Roll Race with any of the ladies from Colorado Springs!
We’d Love to See Your Jelly Roll Creations
If you haven’t made one of these beauties yet, what are you waiting for? Jelly rolls come in all manner of fabric collections including Halloween, Autumn and Christmas. They are so easy to sew, and a great project for a new quilter — the pieces are already cut! Even if you don’t have a quilting machine, you can quilt your jelly roll with something as simple as “stitch in the ditch” or a decorative stitch along the seam lines. (Of course, we’d love to hook you up with a quilting machine like the PFAFF Quilt Expression or any of our fine machines!)
Thanks so much to the participants for letting us share their pictures with their creations. If you have created a Jelly Roll Race quilt, we’d love to see it. You can attach a photo in the comments below.
What a great gift to make for someone special — or for yourself. So give it a try and let us know your results. Race ya!
Comments
Cathy Ellsaesser
Thanks for sharing. It looks great!
Patricia Mathias
Hi Cathy,
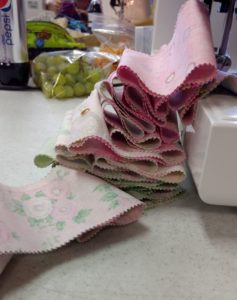
I wanted to share my completed Jelly Roll Quilt! I just love how it turned out – thanks for the tips on adding a border! Working on another jelly roll quilt now – I think I’m could easily be a Jelly Roll Quilt “Junkie”!