
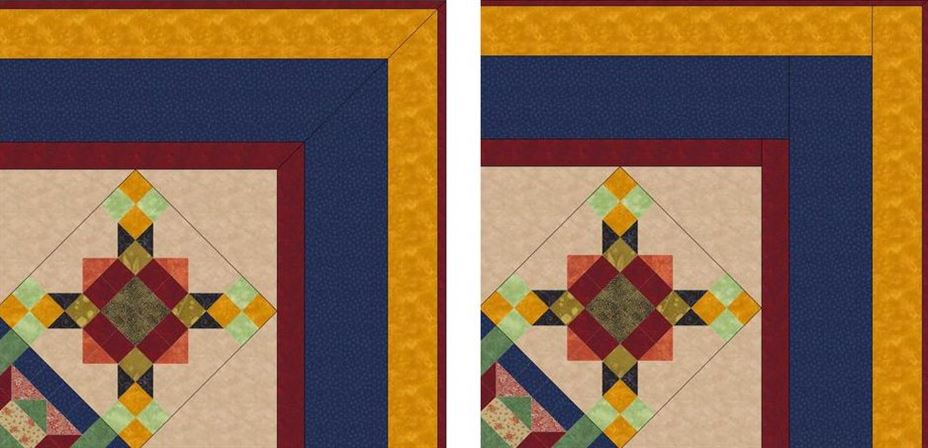
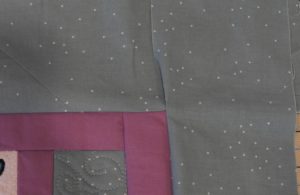
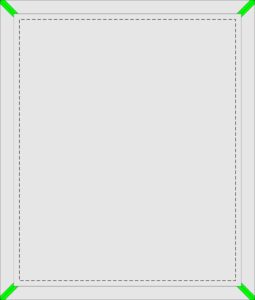
A mitered corner is one in which the corners meet in a 45-degree angle. What does that mean? Take a look at a picture frame or window frame and you will see a mitered corner. I like the look of a mitered quilt border around the edge of some of my quilts. The miter is formed when bands of fabric are added to the width of the project, usually at right angles. Although a mitered quilt border is a more challenging border to create, the angled seams look great and are well worth the effort. See the difference here between a mitered border (left)and one that is sewn with seams parallel or perpendicular to the borders’ edges (right).
This technique can be completed with some careful measuring and accurate sewing.
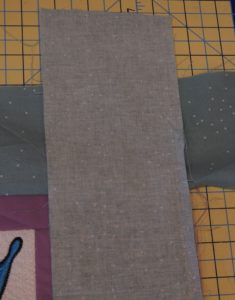
Cut Fabric Strips For The Mitered Quilt Border
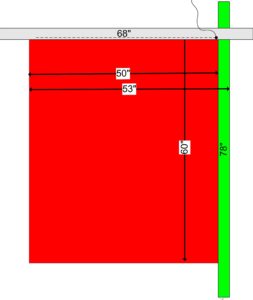
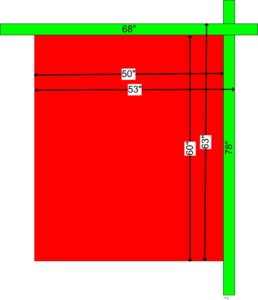
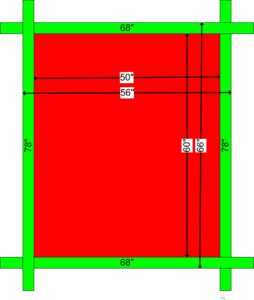
Calculations
Width of Border Fabric
The Length of the Border Fabric
Sew the Borders onto the Quilt Top
-
- Pin one strip to one edge with the right sides together. Match raw edges and extend the border strip evenly beyond each end of the quilt top. Stitch the edge, starting and stopping a seam allowance distance from each end.

- Press the border away from the edge with the seam allowance toward the border. Next,with right sides together, stitch adjoining band to the adjacent edge. Start at the end point of the previous seam, and end a seam allowance distance from the next end.
- Press border away from the edge with seam allowance toward border.
- Complete all sides.
- Pin one strip to one edge with the right sides together. Match raw edges and extend the border strip evenly beyond each end of the quilt top. Stitch the edge, starting and stopping a seam allowance distance from each end.
Creating the Miters
Mark Miters at Corners
There are different ways to sew the borders together at this point, but I think this is the easiest.
-
- Fold the quilt top in half diagonally with right sides facing each other, creating a triangle.
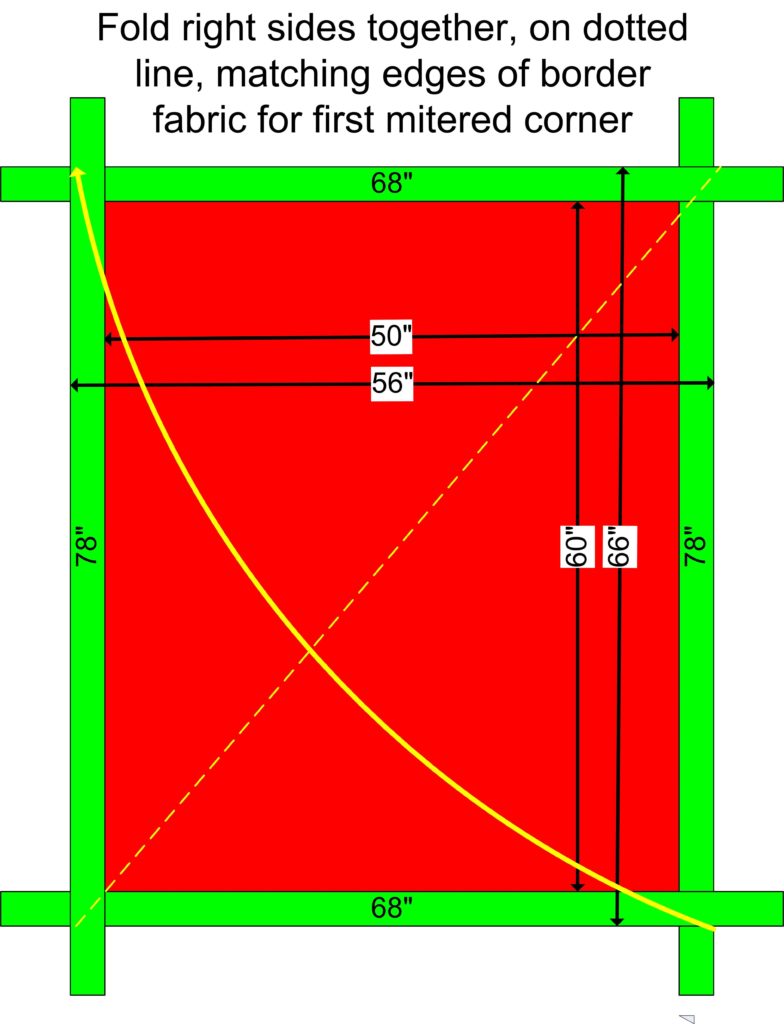
- Line up two neighboring borders — like the top border and the right side border, for example — on top of each other with the fold of the quilt top running at a 45-degree angle between the two.
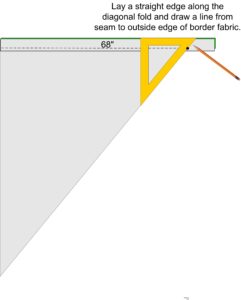
- When these borders are lined up, grab a pencil and a ruler. Place the ruler along the 45-degree angle and extend it over the borders. Trace the angle onto the border, and pin firmly place.
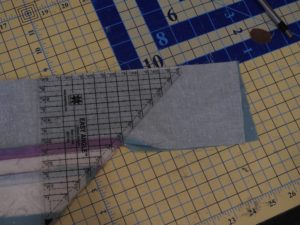

- Fold the quilt top in half diagonally with right sides facing each other, creating a triangle.
Sew the Mitered Corner
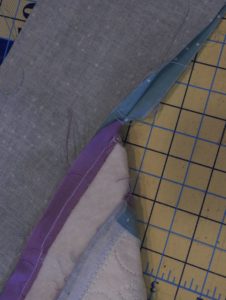
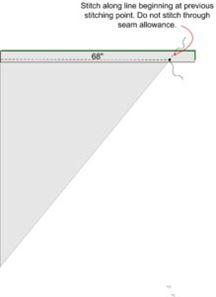
Machine stitch on the marked line, beginning at the previous stitch point (the stitch line you made when you sewed the border to the quilt top). This will ensure that you there are no gaps or spaces on the front.
Sew from the stitch line out toward the end of the border, directly on the pencil line. Backstitch at the beginning and end. Avoid stitching through the seam allowances.
Unfold your quilt top and make sure there are no gaps in the inner corner and that the border lies flat.
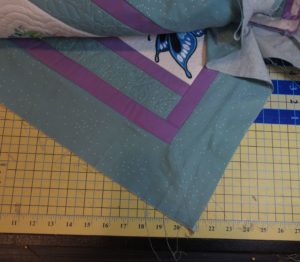
Trim and Press
Trim the excess border to 1/4″ and press seam open. Re-press the edge seam allowances toward the borders. Tuck the diagonal seam allowed under the seam allowances or trim as needed.
Repeat these steps with the other three corners.
To see a video of how to create a mitered quilt border, click here.
Not Just for Quilts
The subtle seam of a mitered corner creates the illusion of a continuous line around the quilt and is the epitome of beauty when it comes to quilting. Great mitering techniques can also be used for edges and corners of garments, bed and table linens, and home decorating projects. Once you get the hang of creating beautiful mitered corners, they’re really pretty easy to do, and they add a professional look to your project.
Comments
Cool Sewing A Quilt Border | Quilt Pattern Inspirations
[…] a mitered quilt border helps frame up a beautiful quilt Cool Sewing A Quilt Border Size: 536 X 390 | Source: wp.rockymountainsewing.com […]