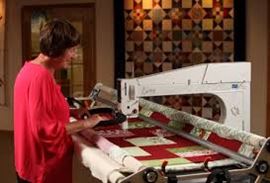
I had a great time last weekend helping out at our Handi Quilter event at the Aurora store. Our students were able to work on the Handi Quilter Amara and were taught by Handi Quilter national educator, Denise Best. I think all of our attendees had a good time and learned a lot from our instructor. So, I thought I’d share with you some of the things I learned as a new longarm quilter. I don’t have a Handi Quilter, but I know the lessons I learned are certainly applicable to my Juki longarm, as I’m sure they’ll work with other brands of long arms as well.
The Basics
Ergonomics
Stand up
You’ve probably heard the old saying, “proper planning prevents poor performance,” but with stand up quilting, the saying should be “proper position prevents poor posture.” So the first thing we learned was how to set up the long arm so that it is ergonomically comfortable and safe. If the freehand side of the machine is your favorite, start with the machine’s quilt backing roller right at your belly button. Then stand at the machine and look at the needle. Move the machine forward and backward and evaluate whether you can see the needle area clearly without bending left or right to see. Adjust the machine’s height until your sight path remains clear. Another way to determine proper height is to set the height so your elbows are bent 90° when your hands are resting on the machine handle bars.
If you enjoy working on the pantograph side of the machine, you should be able to operate the machine properly without bending forward at the small of your back. Raise the machine until you can stand erect. Stand with your feet hip-width apart.
Don’t reach too far into the quilt. Try to keep your quilting within the first 12 inches in front of you.
Loosen up
A light touch on the handlebars is all that is needed to guide your machine. Don’t strangle them in a death grip! Take breaks occasionally and stretch.
Lighten up
Make sure you have plenty of light to prevent eye strain. If your machine doesn’t provide enough light, consider adding additional light so that your work space is well-lighted.
Thread
 The only hard and fast rule about thread is to use high quality thread. In class we used 40 weight quilting thread and a size 18 needle as the top thread. We also tried our had at sewing with metallic thread and mono-poly thread. We found that the two specialty threads required a looser tension, and the mono poly worked best with a 14 or 16 gauge needle. Check out Superior Threads Longarm Machine Thread Reference Guide for more information on matching thread with the proper needle.
We used 60 wt. prewound bobbins.
Don’t Be Too Tense
Bobbin
Start with the bobbin tension, and make sure it is properly adjusted before stitching. Check out the Handi Quilter video on the bobbin drop test to see how to properly test the bobbin tension.
Once the bobbin tension is set correctly, do some test quilting to check the top tension. Denise recommended creating a quilt sandwich with materials like those in your quilt on the backing that is extending out on either side of the quilt top. This makes a fine area to run some test stitches and check the tension.
In the article, How to Get Perfect Tension on Your Longarm Quilting Machine, by Andreab, suggests that you purchase an extra 12″ x WOF (Width of Fabric, usually 44″) of your quilt fabric backing and batting that you can sacrifice to the longarm. Create a quilt sandwich that is 12″ wide x approximately 44″ long. Take your new quilt sandwich to your longarm, and attach it with pins to the bar in the back. Next, bring the sandwich forward and lay it over the belly bar. (This is the forward most bar you’d touch with your belly if you were leaning against the machine.) Now you will “belly up to the bar” to hold that piece in place while you use it to do your test stitches. This really makes it easy to lift the quilt sandwich up and inspect the tension on the underside.
Upper Thread
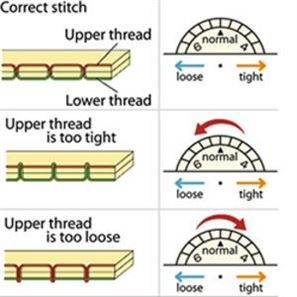
Proper tension results in loops formed with the upper and lower thread sandwiched in the middle of the quilt, so that when looking at the top of the quilt, you only see the top thread. Looking at the bottom of the quilt, you should only see the bobbin thread.
If you see the bobbin thread on the top of the quilt, the top tension is too tight. Loosen it.
If you see the top thread on the bottom of the quilt the top tension is too loose. Tighten it.
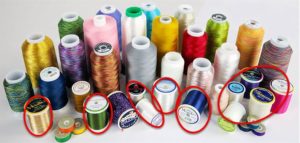
How Are You Wound?
It is important that the upper thread comes off the spool in the same orientation in which it was wound. Thus, if you are using cross-would thread, it should come off the top of the spool. If you are using stack wound thread (circled in red, below), you might need a spool pin to change the orientation of the spool on your machine.
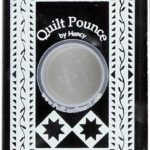
Are You Ready to Pounce?
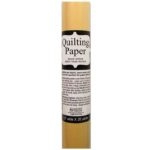
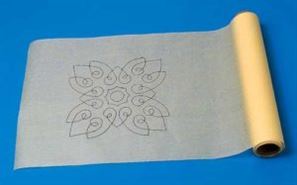
Make your own stencils by sketching your design on Golden Threads Quilting Paper. Then, stitch along the lines you drew using a sewing machine without thread to create small holes for the pounce powder to go through, marking the quilt top.
Denise showed us how to use the Golden Threads paper and pounce to create a grid on the quilt top. Watch this short video to see how she did it.
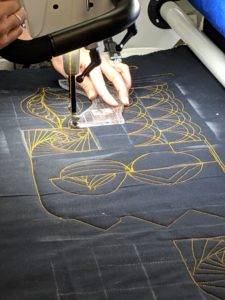
Ruler Work
If you love precision and consistency in your quilting designs, you will love using design rulers and templates! These handy tools assist in placing designs accurately and stitching them out precisely. The wide variety of Handi Quilter rulers will inspire you to new design heights. However, if you want to do ruler work, you must use a ruler base on the machine. You also need a foot designed to work with rulers. The taller profile of the Sure Foot provides additional stability while working with rulers.
Using the Grid
A grid chalked onto the quilt top is a great tool to use for ruler work. Look at some of the beautiful designs created with the grid and the Handi Quilter rulers.
Practice, Practice, Practice!
Denise certainly made free hand quilting look easy! She emphasized the need to practice hand drawing quilting designs to build “muscle memory”. She provided several sheets with free hand designs, a sheet protector, and a dry erase marker. Simply place the sheet with the printed design in the plastic, see-through sheet protector and trace over it with the dry erase marker. Use batting to remove the marker from the sheet protector and practice again — and again. Once you’ve got the motion down, it’ll be much easier to duplicate the pattern when sewing at the long arm and using the quilting machine instead of a pencil.
Handi Quilter Resources
Handi Quilter has some great resources for long arm quilters including motifs that you can print and practice drawing and then sewing.
Free Pattern Booklets
Color Play: Simple Quilts, Spectacular Quilting
Handi Quilter and allpeoplequilt.com have partnered to bring you a free, downloadable booklet, Color Play: Simple Quilts, Spectacular Quilting. This series of nine quilts feature free patterns and quilting designs from quilter and Handi Quilter Educator, Marie Eldredge. Keep an eye out for videos detailing Marie’s process and how-tos.
9 Pattern Booklet + Designs
Handi Quilter and American Patchwork & Quilting® magazine have partnered to bring you a free, downloadable booklet, 9 Free Quilt Patterns + Quilting Designs for Each Quilt. Sign up for Handi Quilter updates to get the booklet download – you can opt-out at any time, but you still get the free patterns. Have fun with these quilt patterns, and customize them in your own way!
A Fine Finish
The HQ Studio Educators teamed up with Love of Quilting magazine to showcase the transformational step of finishing a quilt. Each educator has a section of the Rouge Roundabout to quilt, and shares their creative decision-making process. Learn what elements they considered when approaching the quilt design. Find out how the piecing influenced their choices. The end results were featured in the May/June 2016 issue of Love of Quilting. This online version has added tips and tutorials to give you more information.
Free Software Templates
Minute Motifs feature quick designs you can use for a variety of projects. Try following the pattern with your finger before quilting, or draw it out as described above. (Each motif includes a PDF of the design for practice.) Once you get the feel for a design, you’ll discover the best ways to nest and repeat. Unless the pattern is intended only for free-motion quilting, digital files for computerized quilting are available as well. These digital files include a .dxf, .hqf, and .qli version of the file.
Minute Tips are quick video shorts featuring longarm quilting tips.
Our Customers Are So Talented!
Check out our Facebook album with some pictures of some of the quilts our students brought in for us to see during the Handi Quilter event. (Sorry, I was not able to get pictures of all of the quilts brought in for us to see.)
More to Come
If you were not able to attend this event, but are interested in long arm quilting, we have a couple of upcoming classes that might be of interest to you. Of course, you can stop in one of our stores any time for a demo and/or test drive on one of our longarm machines. Find out how much fun you can have quilting on a longarm.
Quilt, Craft and Sewing Festival, March 21 – 23, 2019
Rocky Mountain Sewing and Vacuum will sponsor 6 Handi Quilter classes at the Festival. Click on the class(es) below to register.
- Longarm Basics (March 21 @ 9:30 am – 12:30 pm)
- Fast, Fun, Fabulous Free Motion (March 21 @ 1:30 pm – 4:30 pm)
- Creative Textures and Fills (March 22 @ 9:30 am – 12:30 pm)
- Ruler Essentials (March 22 @ 1:30 pm – 4:30 pm)
- Backgrounds, Blocks and Borders (March 23 @ 9:00 am – 12:00 pm)
- You Can Do That on a Longarm? (March 23 @ 1:00 pm – 4:00 pm)
Each class is $59.00.
Handi Quilter Pro Stitcher® and More
Handi Quilter will be at our Event Center May 29 through June 1 for a class using the Pro-Stitcher® for the Handi Quilter. The Pro-Stitcher® quilting system integrates Handi Quilter’s world-class quilting machines with the latest computer technology to help you finish more quilts. Pro-Stitcher® guides the machine to quilt any design you want to use, create, or customize. It works with all Handi Quilter stitch-regulated quilting machines: HQ Sixteen, HQ Simply Sixteen, HQ Avanté, HQ Fusion, and HQ Infinity. Expand your quilting possibilities with this easy-to-learn, easy-to-use, computerized system and have fun finishing more quilts! More information on this will be coming soon.
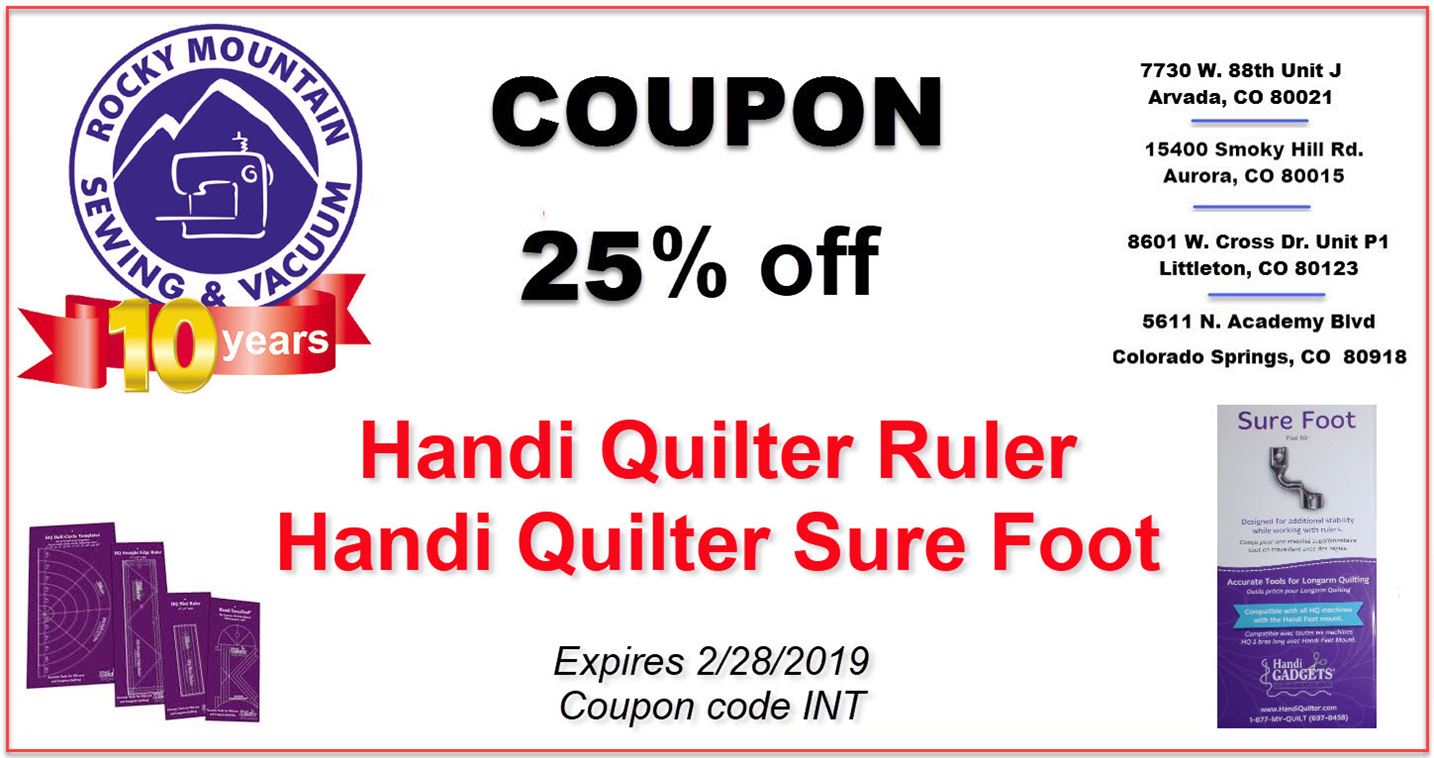
Coupon
Want to try some ruler work? Here’s a coupon for 25% off any Handi Quilter ruler and/or a Handi Quilter Sure Foot.