
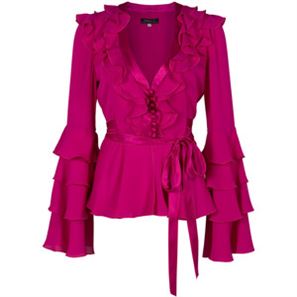
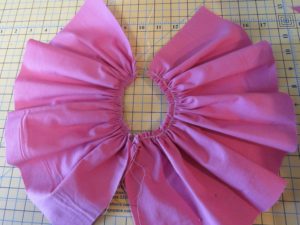
Isn’t that dress gorgeous? How would you like to gather all that fabric to make the skirt of the dress and then add a beautiful ruffle to the neckline. I hope, with this blog to give you some details on gathering fabric in such as way as to make beautiful gathers and ruffles. Gathers can add to the finish of a project or be a focal point. They can be tight and frilly or loose and billowy. No matter how you use them, they’re a great embellishment. Doesn’t a ruffle on a blouse add a bit of whimsy?
Gathering fabric creates fullness and shape in fabric that is otherwise flat.
You’ll see gathered fabric:
- In the skirt of a dress gathered then sewn to a bodice.
- As a ruffle attached to the bottom of a skirt or around the neckline of a blouse or the end of a sleeve.
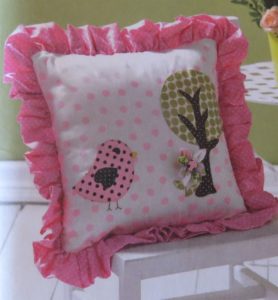
- Inserted between a seam, such as around a throw pillow or blanket.

The appearance of a gathered (or ruffled) strip of fabric depends on three aspects:
- The type of fabric selected for the gather. Some fabrics simply gather better than others.
- The technique you use in gathering the fabric (I’ll show you several options).
- The tightness of the gathers. The longer the piece, in comparison to what it is being sewn to, the tighter the gathers.
There is a general rule of thumb regarding the cut length of the piece to be gathered. For medium weight fabrics (cottons and knits), the length should be 2½ times the length of the edge you will be sewing it to. For lightweight fabrics (voile or that tutu tulle above), the cut length should 3 times as long.
Gathered fabric is always sewn to a flat section of a project.
How to make gathers
Basting Thread Gathering
If you’re like me, you were likely taught to sew two lines of basting stitches at the top of the fabric you are trying to gather.
Before you sew
It’s a good idea to place markings on your fabric for any center or side points prior to the actual gathering. This helps you can match the points between the straight and gathered fabrics. You want to make sure the gathering is evenly spaced between the points. Otherwise, you could end up with too much fabric gathered to one side or the other, giving your project a lopsided look. Many patterns, of course, have diamond shaped markers to match up once you sew the gathered fabric for a skirt, for example, to a bodice.
Before starting, decide how you want to finish the opposite raw edge from where you’ll be gathering. You can create a double hem, rolled hem, serged hem, etc. It’s usually much easier to do this before the gathering the fabric.
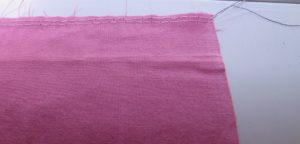
Sewing the Gathering Threads
- Set your machine to a long stitch length – anywhere from 3 to 4. Make sure you have long lengths of both top and bobbin thread before you start sewing (at least 3 inches).
- Sew one straight line 1/8 inch from the edge of the fabric. Be sure to start right at the edge of the fabric and don’t backstitch at the beginning or end).
- Leave a long length of both top and bottom thread at the end of the stitched line.
- Sew another line another about 1/8 inch in from first line again having long lengths of thread a the beginning and end of the sewn line.
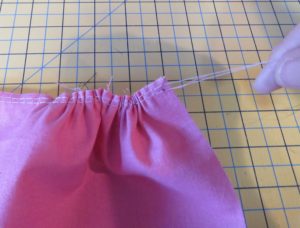
Gathering the Fabric
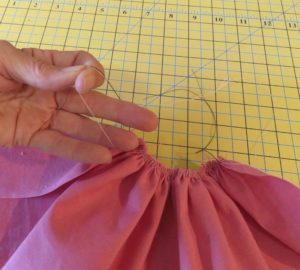
Grab the top threads of both lines of the stitches you just made with one hand and pull the fabric toward your other hand. You’ll see it start to gather up.
Do this on the other side as well. Keep alternating, pulling from one side then the other until you reach the length you want. It’s important to alternate sides so that you don’t end up pulling the threads tails all the way into the fabric on one side.
If the gathering process starts to jam up and the fabric won’t move, you’ve pushed too much into the same spot too soon. Back out the gathers a bit and work in smaller increments; you’ll find the fabric starts sliding easily on the thread again.
Tie It Off and Adjust the Gathers
Once you have gathered the fabric to the size you need, tie off the threads on each side. On each side, tie all four threads together into a knot (both the top and bottom threads of the two lines of sewing). This will keep the gathers from coming out while you adjust it.
After it’s tied securely, feel free to cut off the ends.
Now you can move the gathers around to create the look you want.
Once it’s all gathered properly, sew back over the gathered stitches with a normal stitch length to secure everything. Take it slow and guide the fabric so it’s straight and the gathers don’t catch on the presser foot. Alternatively, you can just sew the gathered section to the object you’re making without sewing the gathered stitches down first.
Using Yarn or Dental Floss to Pull the Gathers
Some people call this “cheating,” but I call it easy! You can use thin yarn or a strong string (like dental floss) to pull your gathers rather than using basting stitches. I like this method because, for me, it makes pulling the gathers much easier — especially when you have a lot of fabric to gather.
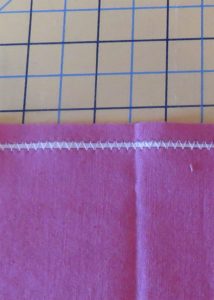
For this method, you encase your yarn, string or dental floss inside of a zig zag stitch, being careful not to catch the pulling string with one of the zigzag stitches.
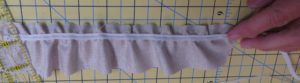
In the illustration below, I am using dental floss. I usually use dental floss but you certainly can use other strong, thin, string or yarn.
- Line your dental floss close to the top edge of the fabric you are going to gather.
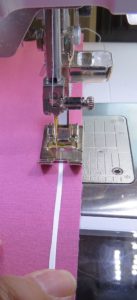 Center your presser foot over the center of the floss. Use the center mark on your presser foot to stay centered on the floss.
- Sew a zigzag stitch wider that the floss down the length of the fabric you want to gather, being careful not to catch the floss in any of the stitches.
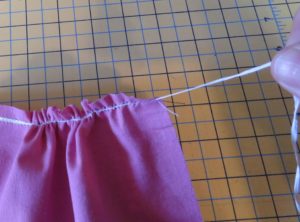
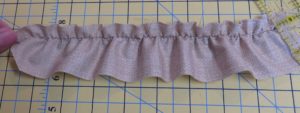
Once you have finished sewing the zigzag, simply pull the floss to create the gathers. As with the basting thread method above, pull alternatively from each end to make gathering easier.
When you are finished gathering you can tie off the dental floss with the tails of the threads used to make the zigzag stitch.
When all is said and done, there is not much difference in the look of the gathers of the two methods.
Gathering Fabric Using Elastic
If you want to add a gather to something elasticized, you can sew the elastic to the fabric while pulling on the elastic. Once you have finished sewing the elastic and release it, it returns to it’s relaxed size and created gathers in the fabric. This is a great way to create a gathered, elasticized waist or ruffle for the end of a sleeve.
Hints and Tricks
- Sometimes, when gathering a very long piece, it is helpful to work from the center out instead of from edge to edge. You start the gathering stitches in the center, leaving thread tails in the middle. Work out to the edges, first to one side, then to the other side. This allows you to gather two smaller sections instead of one super long strip.
- You need a continuous length of thread when using basting stitches to pull the gathers. So make sure you have enough bobbin thread for the distance you need to sew.
- Keeping track of all the threads can get confusing. Use a different color thread in the bobbin, and you can clearly see which threads you need to hold.
- If you forgot to mark your center and side points before you started, pin the basted strip to the straight edge at the center and/or the side edges (just these points – don’t fill in with pins). Then, gather between the pin points to the finished size.
- Sew a third row of basting for more precise gathers.
- Sometimes the basting or zigzag stitches peek out from the seam after you’ve sewn the gathered strip to your final project. Simply remove the stitches with a seam ripper. It will not affect the finished seam.
- If you’re sewing gathers on loosely woven or jersey knit fabrics, you may find you have to sew seam binding, twill tape, or ribbon just above the original line of sewing to strengthen the gathers.
- If you need to press gathers, use the point of the iron on the wrong side to go in and out of the gathers as you press.
- Check out Nancy Zieman’s “10 Sewing Tips for Stitching Perfect Gathers” for more help in gathering fabric.
Specialized Feet for Gathering Fabric
In an upcoming blog, I will examine some specialized feet available for both sewing machines and sergers that can help you not only gather fabric, but sew it onto the object you’re making at the same time.
Until then, gather your wits, gather your materials, gather your sewing tools and start gathering!
Comments
joyce cantin
Thank you so much for these great ideas. I have started sewing again and I couldn’t remember how to gather the bottom of a dress under a bodice. I hope I will succeed. Thaks again regards from Quebec Canada
Cathy Ellsaesser
Thanks for the feedback and for reading our blog. Happy Sewing!
Sara Alicea
Way to go, very much appreciated, thanks 😊