I am making a set of draw curtains for my granddaughter’s bedroom. She picked out some sheer fabric and a taffeta lining. Since the outside fabric is sheer, and the lining ravels, I decided to join the panels together with French seams. These seams are perfect for lightweight and sheer fabrics, and are among the most popular of seam finishing techniques.
In French seams all the raw edges of the fabric are hidden in an elegant finished seam. French seams enclose the seam allowance on the inside of a sewn item so that no raw edge is visible. This eliminates the need for another form of seam finish. French seams are commonly used on very sheer fabric so the seam blends with the fabric. Use French seams in place of a zigzag or serge stitch that would leave a lot of thread visible through the fabric.
French seams are not just for sheer fabric, though. Use them on any fabric to enclose a seam allowances and keep a soft edge to the seams. This works especially well for a person with very sensitive skin or children who are bothered by rough seams. I always make French seams on my granddaughters’ dresses wherever they are not lined or the seam is exposed. Even for window treatments that are not sheer, use French seams to join sections of fabric. The seams blend into the fabric. For unlined window treatments French seams are visually appealing from the wrong side of the curtain, which is visible through the glass window.
Sewing French Seams
Calculate Your Seam Allowances
French seams require you to split your seam allowance in two parts and sew two seams. There are two ways to think about this. Traditionally, sew the first seam and then trim it down to 1/8″ or 1/4″ . Sew the second seam at a distance from the first seam minus the width of the first seam. For example, if your seam allowance is ½ , first, sew a 1/4″ seam . Trim this to 1/8″ and sew the second seam 1/4″ from the first seam. Another example, if you have a 5/8″ seam allowance, sew the first seam at 3/8″, trim it to 1/8″ and then sew the second seam at 1/4″.
I don’t usually trim my first seam so small. I like my French seam to be full so I usually only trim away enough to make sure it won’t get caught in the second seam. You don’t want edges of the first seam to peek out on the right side of the fabric in the seam allowance. For example, for a 5/8″ seam allowance, sew the first seam at 1/4″, do not trim, and then sew the second seam at 3/8″. The directions below are for a 5/8″ seam.
Sew the First Seam
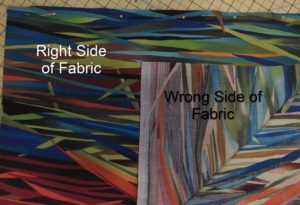
For ease of illustration for this blog, I am going to use cotton material with a right and a wrong side.
Wrong Sides Together
The biggest hurdle is getting over the idea of sewing wrong sides together instead of right sides together at the beginning. It feels all backwards. Putting the wrong sides together is the opposite of what is normally done when sewing a basic seam, so don’t worry if it feels counter-intuitive.
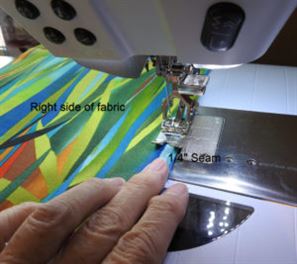
- Pin wrong sides together and place in the machine at 1/4″ seam allowance.
- Sew the entire seam at the 1/4″ seam allowance.
- Trim the seam allowance down to 1/8″ if desired.
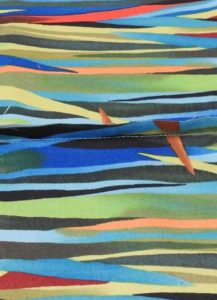
- Open the seam, right side of the fabric facing up.
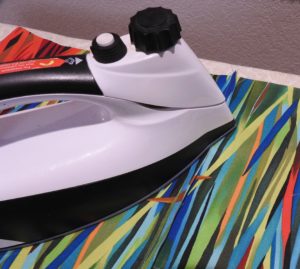
- Press the seam allowance to one side, on the right side of the fabric. Be sure to have your iron set to the correct heat for your fabric type.
- Press on the wrong side to ensure the seam is flat.
Sew the Second Seam
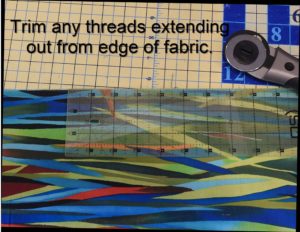
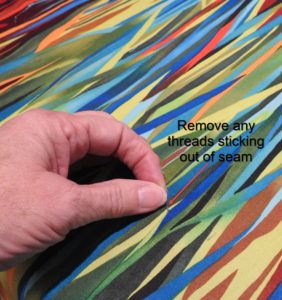
- Trim away any threads sticking out from the edge of the fabric so they will not get caught in the second seam.
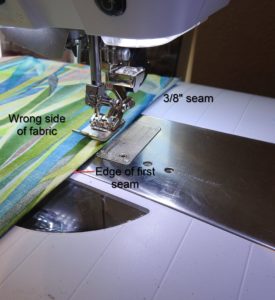
- Fold the fabric on the seam, right sides together. Press the seam flat with the stitching on the edge of the fold.
- Pin the layers together along the pressed edge.
- Align the edge of the pressed seam along the 3/8″ mark on your sewing machine.
- Continue sewing the entire seam, trapping the original seam and allowance in the fold.

Iron It
- Press on the wrong side of the seam, pressing the entire French seam to one side.
- Press on the right side of the seam for a final pressing.
- Remove any threads sticking out of seam.
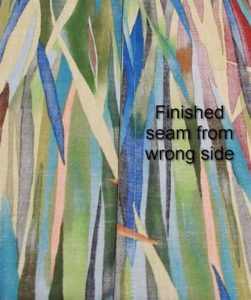
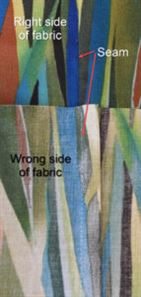
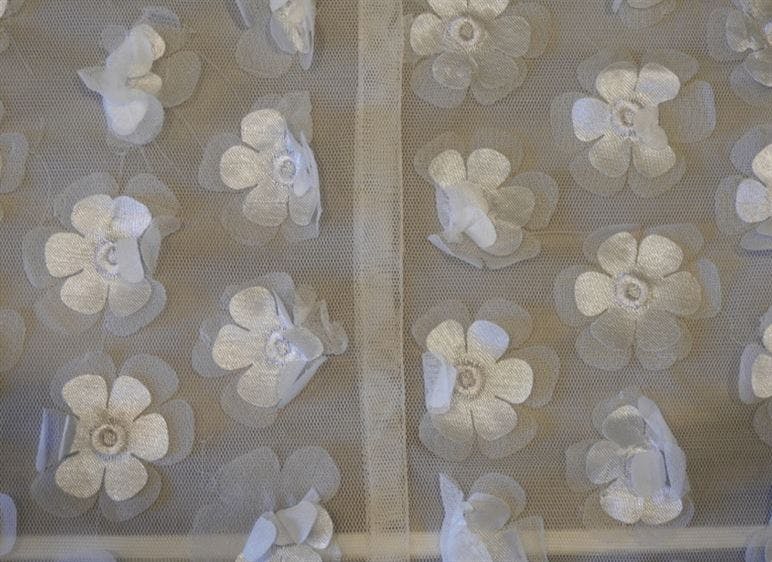
Sheer Curtains
Here’s a look at a French seam in the sheer fabric I am using for my granddaughter’s curtains.
Note: Lightweight sheers tend to slide and also pucker as they’re stitched. Practice on scraps to adjust tension settings (usually looser) for a flat smooth seam and shorten the stitch length to about 15 stitches per inch. Pin pieces together only within the seam allowances to prevent fabric damage. Use a new small size (60/8 or 65/9) sewing machine needle to avoid snagging delicate threads. Check out our current sales flyer (page 19) for a buy one-get one free offer on Floriani chrome needles if you need some smaller ones to sew delicate fabrics.
Final Thoughts About French Seams
- Use French seams when your fabric is too delicate to overcast the seam allowance to prevent raveling.
- The construction of a French seam provides a clean, finished, professional look to the inside of the garment, such as concealing pinked edges.
- Use a French seam for just about any clothing style or type.
- A French seam is most common on a straight seam. It is difficult to use on a curved seam, but can be done if you use very small seam allowances. Use scraps of the fabric to practice a curved seam before sewing on your actual item.
- Generally speaking, French seams are not suitable for bulky fabrics.
French seams are a simple and versatile way to create strong, professional-looking seams in any sewing project. A French seam uses two lines of stitches to encase the raw, unfinished fabric edges within the seam itself, which hides the edges from view, prevents fraying, and creates a clean and elegant look that’s perfect for anything from trousers and jeans to delicate foundation garments and lingerie.