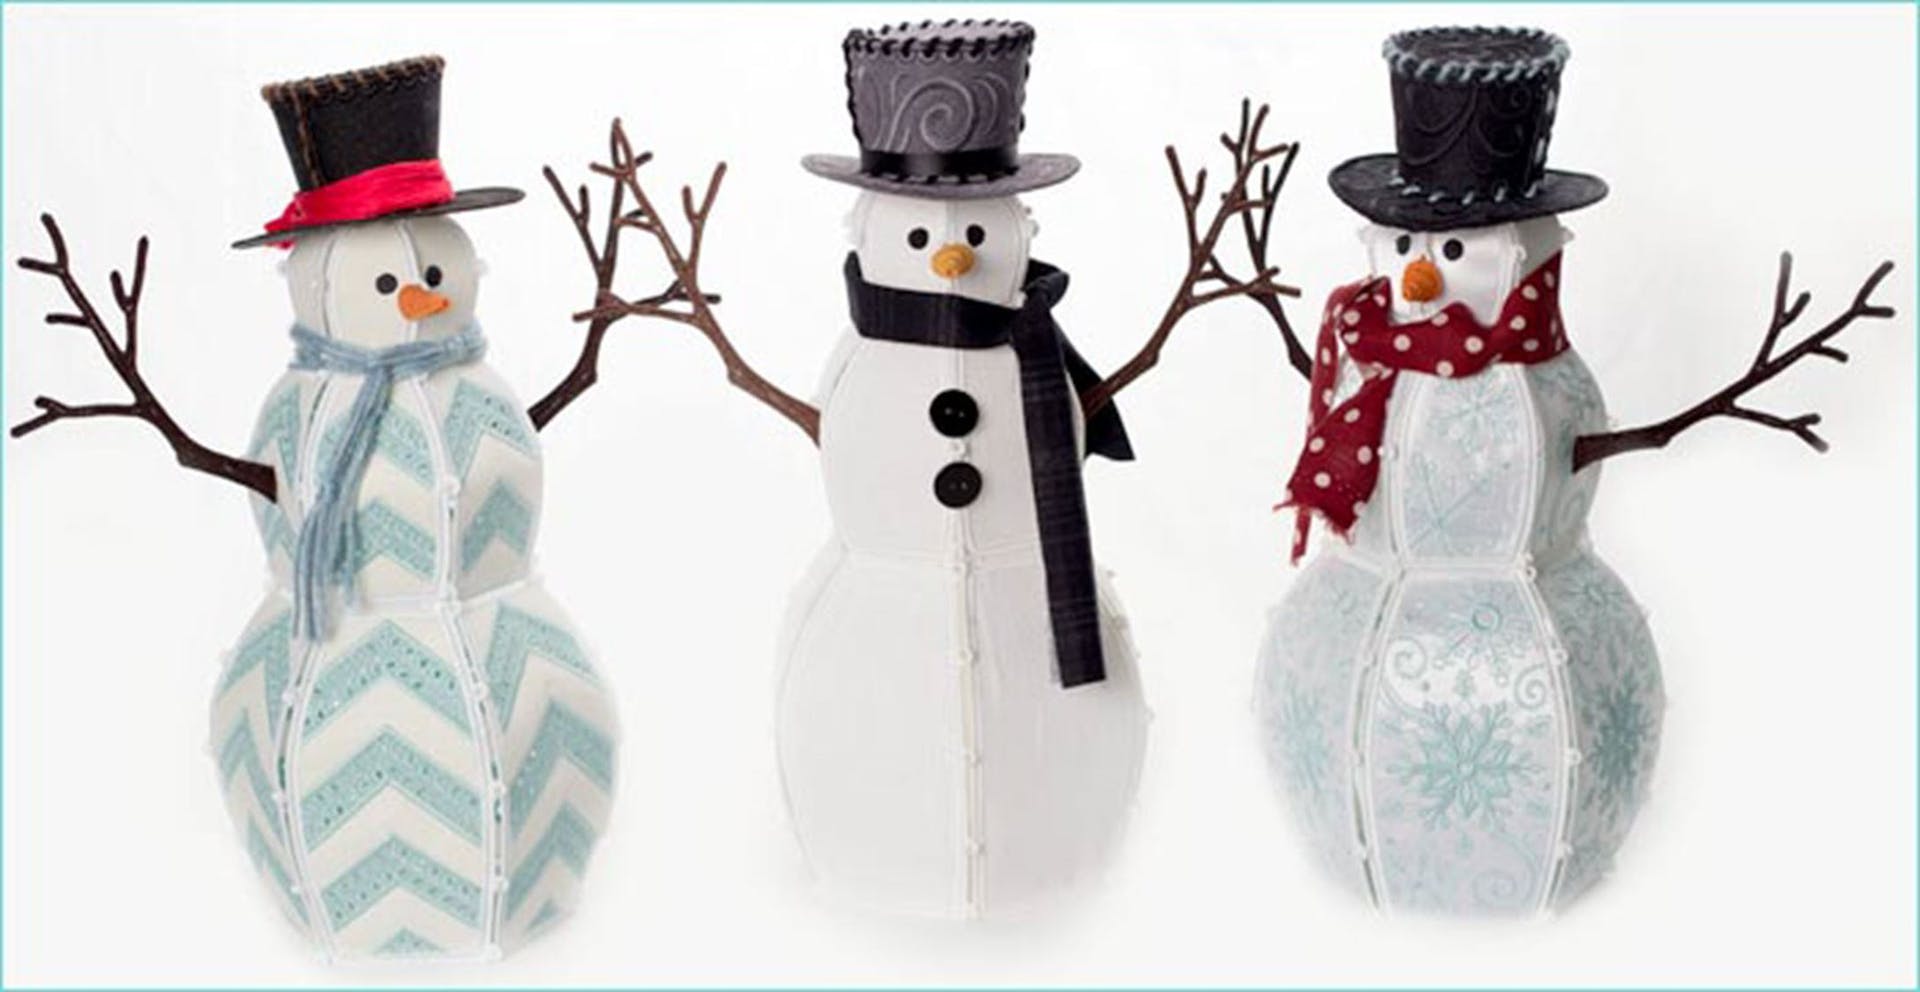
If you want to build a snowman, this freestanding collection is for you! Pick one (or two) from the OESD Freestanding Snowmen collection, and get ready for some fun. A freestanding embroidered snowman will melt your heart and look fantastic wherever you place it in your home this holiday season. At over 12 inches tall, this frosty friend will be the coolest winter decoration to deck your halls. You an even accessorize with scarves, hat bands and buttons.
When I attended an OESD spree party at our Littleton store, I purchased the “Freestanding Snowmen” collection. So, I decided to make one of those for my blog this week. I am ready decorate my house for Christmas, and this guy will fit right in.
One really nice thing about these designs, as well, is that fabric is used for the body and head of the snowman. They are not all freestanding lace, shortening the sewing time.
Pick a Design
The collection has three different designs that you can make. Chevrons are embroidered on the body of one, snowflakes on another and the third has no embroidered embellishments. Each is topped off with a whimsical top hat.

For this blog, I picked the snowflake-embroidered snowman. Regardless of which you choose, the construction is the same.
Embroider Snowman Sections
Stabilizer
I used Floriani’s Wet and Gone for the stabilizer. You need a stabilizer that will hold up to the number of stitches used, but will dissolve in water (or heat) when you’re finished embroidering.
The directions given for the project suggest adhering a firm stabilizer with temporary adhesive spray before doing the applique. This gives the fabric a more rigid structure to help it stand up better. I did not do this for my snowman and regret it. My freestanding embroidered snowman was a little “floppy”. The next one I make I’ll use craft fuse or some other heavy iron on interfacing to help stiffen the fabric.
Sew Out Steps
- Prepare fabric by adhering firm stabilizer to back of fabric.
- Hoop two layers of water-soluble stabilizer.
- Attach the hoop to the machine and select the design of your choice.
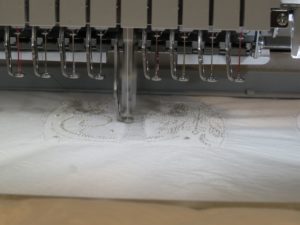
- Stitch the placement stitch.
- Place a piece of appliqué fabric over the Placement Stitch so that it is completely covered.
- Stitch the cut line and tackdown Stitch.
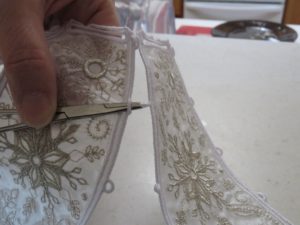
- Carefully cut away the excess applique fabric.

- Stitch the remainder of the design and repeat for any
remaining pieces.

- Remove the hoop from the machine and the design from the hoop.
- Once you have embroidered all sections, trim close to edges to remove excess stabilizer.
- Rinse/soak away remaining stabilizer and allow it to dry.
- Dry flat. (I place the pieces on a towel and then place a weight on top to dry the sections.)
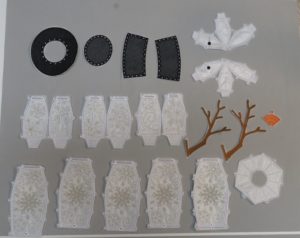
Pieces Needed
For each snowman, you need:
- 6 Bottom Sections
- 3 Middle Sections (back, left and right)
- Left Head Section w/ Carrot
- Right Head Right Section
- Base
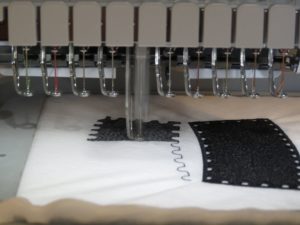
- Top Hat Sides, Brim and Hat top
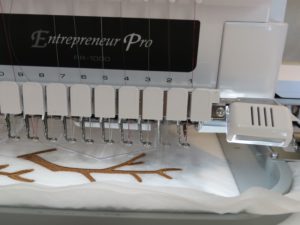
- Left Arm Branch
- Right Arm Branch
Build the Freestanding Embroidered Snowman
Buttonettes and Eyelets
When I saw the designs, I was quite intrigued by the unique way the OESD digitizers created the buttonettes and eyelets to hold the freestanding embroidered snowman together. The best way to “button” the snowman together is to place the tip of forceps into the eyelet and then pull the buttonette through the eyelet. I find that I have to open the forceps just enough to be able to grab the buttonette.
Assembly Instructions
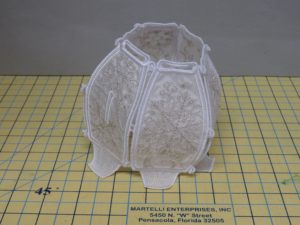
- Assemble the snowman bottom sections by inserting the five buttonettes of one bottom section piece into the five eyelets on the next bottom section piece. Continue with all 6 pieces until the bottom section is together, forming a circle. Set aside.

- Assemble the snowman middle sections by inserting two buttonettes into the corresponding eyelets on each of the 3 middle section pieces. Assemble the snowman middle
sections by inserting three buttonettes of middle back section to the eyelets on the middle left section. Continue with the middle right section to complete the middle section, forming a circle. Set aside.
- Assemble the snowman head by inserting two buttonettes into the corresponding eyelets on each of the two head section pieces, forming half a head.
- Next, assemble the snowman head sections together by inserting the three buttonettes on the back of the head into the corresponding eyelets on the other back head section. Insert the two buttonettes for the front of the head into the corresponding eyelets on the other front head section, forming a head. Pull the buttonette of the nose into the two eyelets on the front from the back of the head. Set aside.
- Build the snowman by placing the tabs of the middle section into the slots of the bottom section, pulling from the bottom of the snowman.
- Continue building the snowman by placing the tabs of the head section into the slots of the middle section, pulling from the bottom of the snowman.
- Attach the left arm branch and right arm branch by sliding the end of the branch into the corresponding slot of the left middle section and right middle section.
NOTE: It helps to pin the sections in place as you assemble them. Remove the pins once you’ve finished assembling the sections together.
The Hat
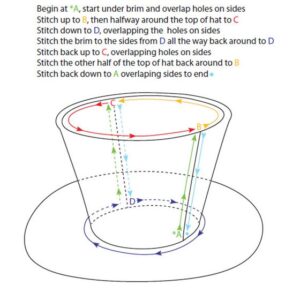
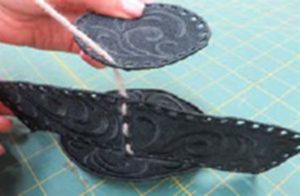
To assemble the top hat, follow the diagram below for the direction of stitching the top hat together.
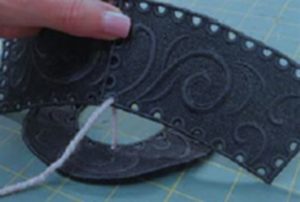
- Tie a knot at the end of the yarn.
- Start in the middle of the brim and bring yarn up through the hole in the brim.
- Thread the yarn through the bottom holes of both of the hat sides.
- Continue up the side by overlapping the holes and bringing the yarn into and out of the holes.
- Continue around the top of the hat halfway.
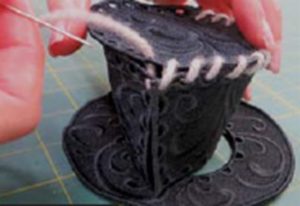
- Go down the opposite side of the top hat.
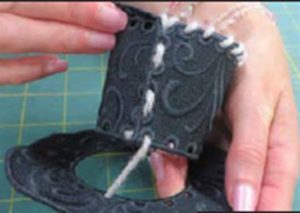
- Continue along the bottom of the side pieces by overlapping the yarn to the brim and to the other side.
- Go up the side in the opposite holes back to the top.
- Continue along the remaining top of the hat.
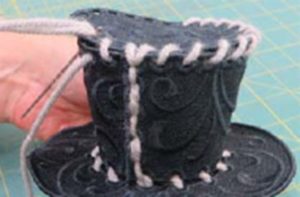
- Go down the other side of the hat in the opposite holes. You will end in the place
you started. Knot the yarn.

The top hat is complete. Embellish with ribbon, trim or feathers, etc. Place the hat on the snowman.
Note: I did not have any yarn. (I’m not a knitter!) So I used a pearl string to assemble the hat. Let you imagination run wild and assemble the hat with other narrow ribbons or trim.
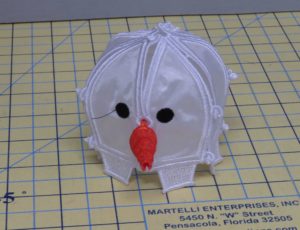
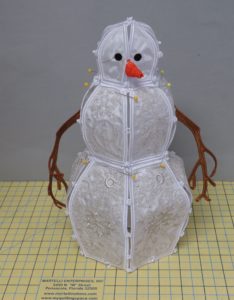
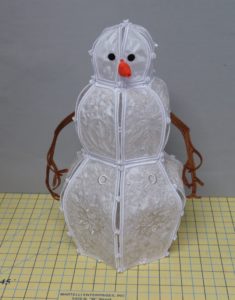
So here’s my completed freestanding embroidered snowman with “pearls” in his hat.) His arms are pretty floppy — probably need to starch them to get them to stand out better.) He also needs a scarf!

Oh, the Possibilities
OESD’s freestanding snowmen are the perfect winter décor. I think my creation for this blog looks pretty lonely, so I’ll make a couple more. Included in the design pack are snowman sections without embroidered embellishments. So, I am going to make one with sparkly Christmas fabrics and forego the embroidery. Other possibilities are to add a pop of color with fabric or with the satin stitching that creates the eyelets and buttonettes. I was even thinking about printing some fabric with a photo of a glacier I took in Alaska, and using that for the bottom pieces. I might have to buy some yarn for all those hats! The possibilities are as endless as our imaginations.
Coupon
Good quality wash-away stabilizer is critical for this project. It must hold up to the stitches used to create the edges of the pieces. It also must wash away completely when the pieces are completed. Stop in one of our stores and pick up a roll or two of fibrous wash away stabilizer. Here’s a coupon just for that.

Comments
Cathy Ellsaesser
If you downloaded the design from OESD it should still be available in your account. If you originally had a cd with the files, can you find the cd and then just copy them onto a USB stick for your machine?
If neither of these is an option, then I recommend you contact customer service at OESD OESD support. Maybe send them some pictures of your completed snowmen and see if they’ll send you the files.
I’d love to send them to you, but copyright laws prohibit that.
maxine biteler
.I made 5 of .12599-13 somehow I can not find the pattern..Is there anyway I can get it???????.
Cathy Ellsaesser
Amanda,
Thanks so much for posting your picture I love it!
Great idea with the wire. I’ve made three of these guys and all have droopy arms. I’ll be trying the wire trick.
Amanda
This would have been very helpful before I started my snowmen! (Thanks so much for writing it!)
I’m finding that no amount of starch will make the arms stand up like in the original pattern’s pics. I had to put a small wire on the back of my arms…
Happy sewing!!
Cathy Ellsaesser
So glad you enjoyed it. Thanks for the comment!
Bobbi
This blog was very informative and inspiring. Thanks!