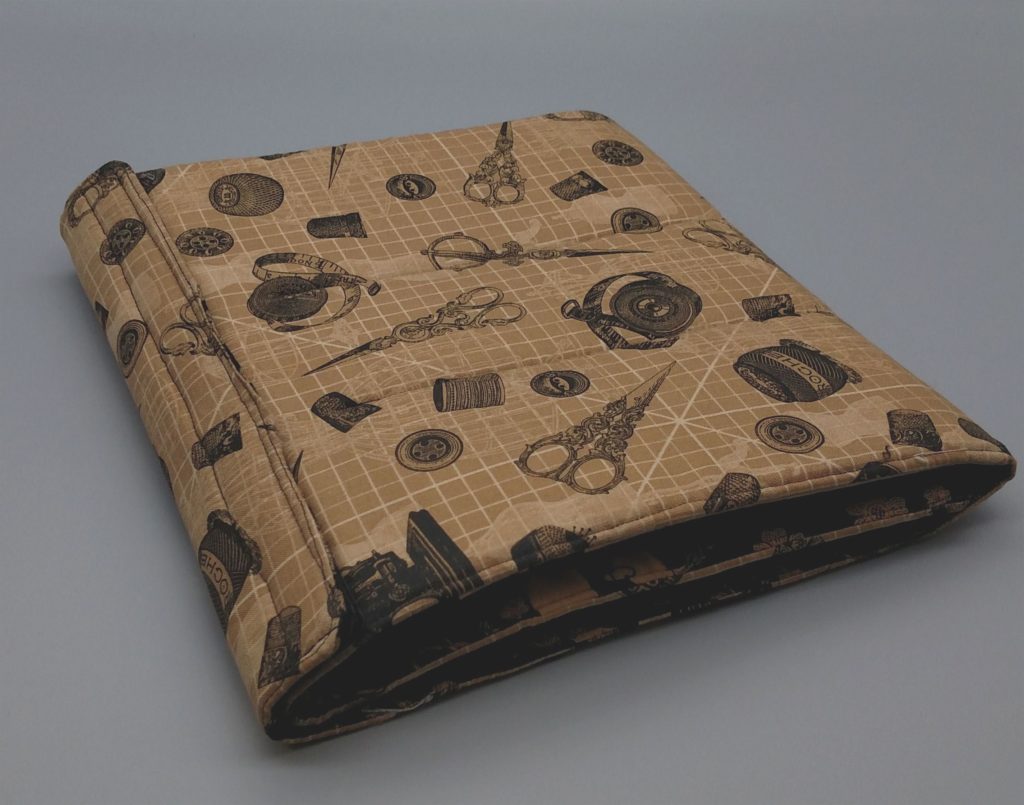
When we had the PFAFF event with Karen Charles back in May, she directed us in the making of three wonderful projects, one of which was a folded accessory holder. This holder is perfect for keeping your sewing area neat and tidy. It will help keep the important stuff at your finger tips while offering a stylish addition to your sewing room. Plus, it’s a great accessory to take to sewing classes.
When we had our event we were able to sew this folded accessory holder on the PFAFF Creative Icon. With this machine, we were able to do some of those wonderful PFAFF exclusive stitches like ribbon stitches, floating stitches and radiant stitches. Since not everyone has a PFAFF, (we can fix that!), I’ll show you how to make the folded accessory holder on any machine. However, the decorative stitches I chose for my project are stitches found on the PFAFF Performance and Creative Icons.
Sewing Supplies for Folded Accessory Holder
Yardage Needed
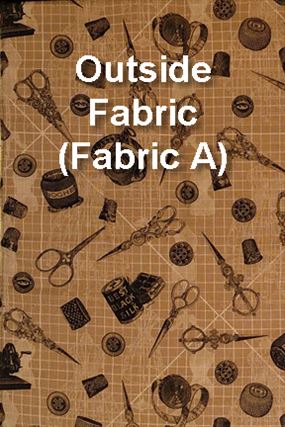
- Main fabric, Print (Fabric “A”) — ⅓ yd.
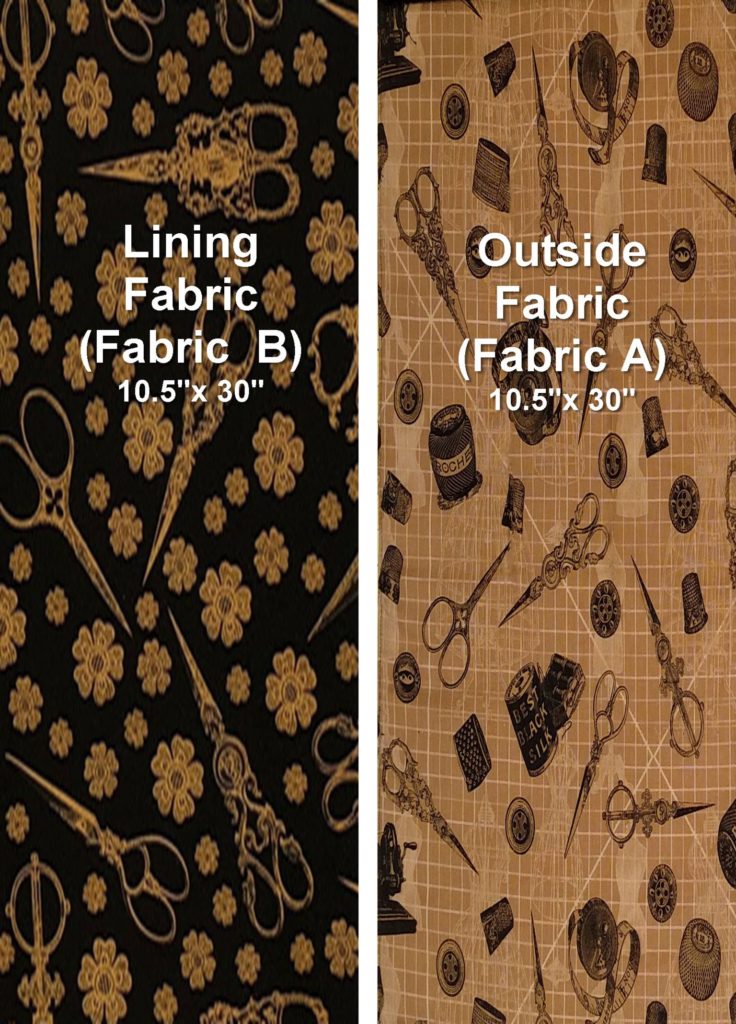
- Lining, Coordinating Print (Fabric “B”) — ⅓ yd.
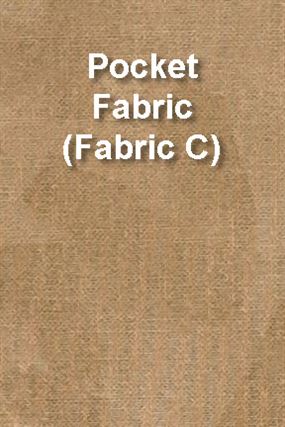
- Pockets, Solid or Tone on Tone (Fabric “C”) — ⅓ yd

Notions
- One piece of Soft and Stable or equivalent 10 ½” x 30″
- Two pieces fusible webbing 10 ½” x 30″ each
- Tear away stabilizer
- 22” Velcro 3⁄4” cut in half
- 18” Ribbon 1⁄4” wide to coordinate with fabrics (for PFAFF exclusive ribbon stitch)
In Your Sewing Room
- Sewing thread
- Scissors
- Straight pins
- Wash away fabric marker or chalk
- Rotary cutter, cutting mat and ruler
- Iron and pressing mat
- Appliqué Pressing Sheet (Large)
Prepare Fabric
Cut
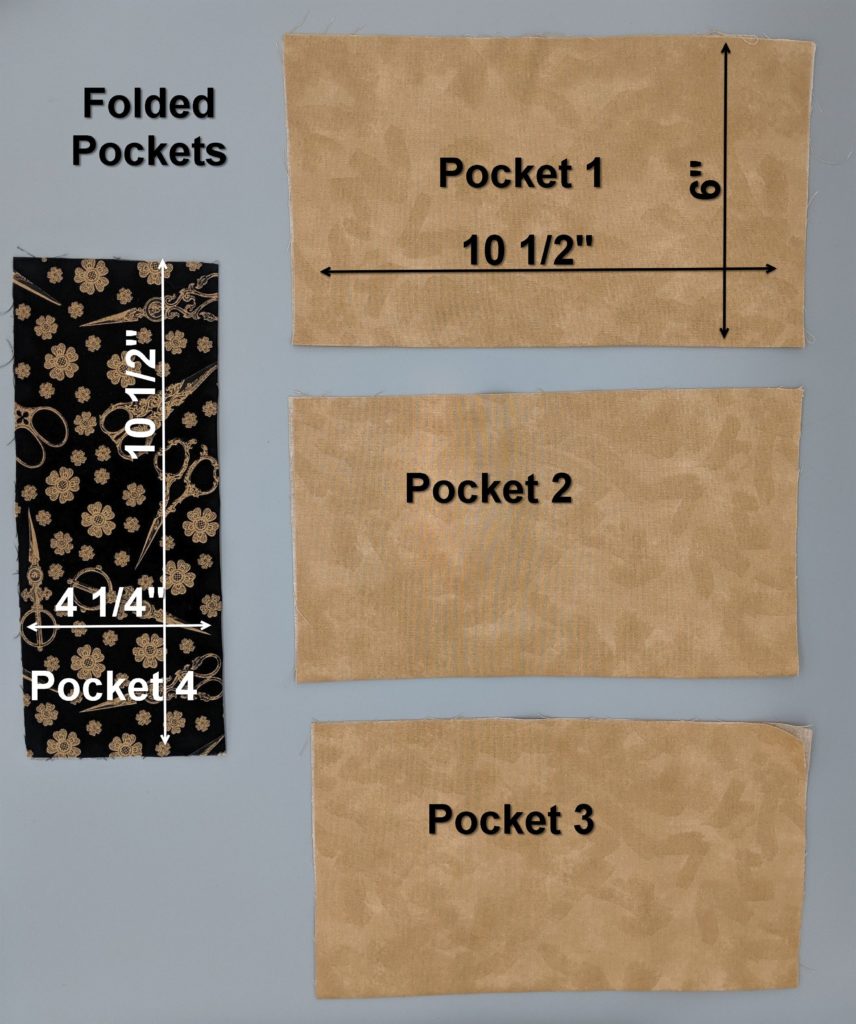
- One 10 ½” x 30″ piece of fabric A for the outside of the folded accessory holder.
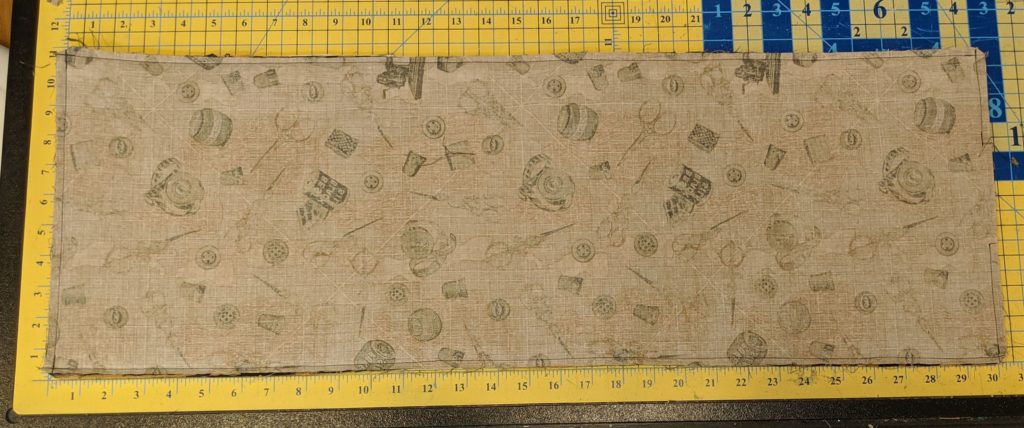
- One 10 ½” x 30″ piece of fabric AND one 10½” x 8½” piece of lining fabric B.
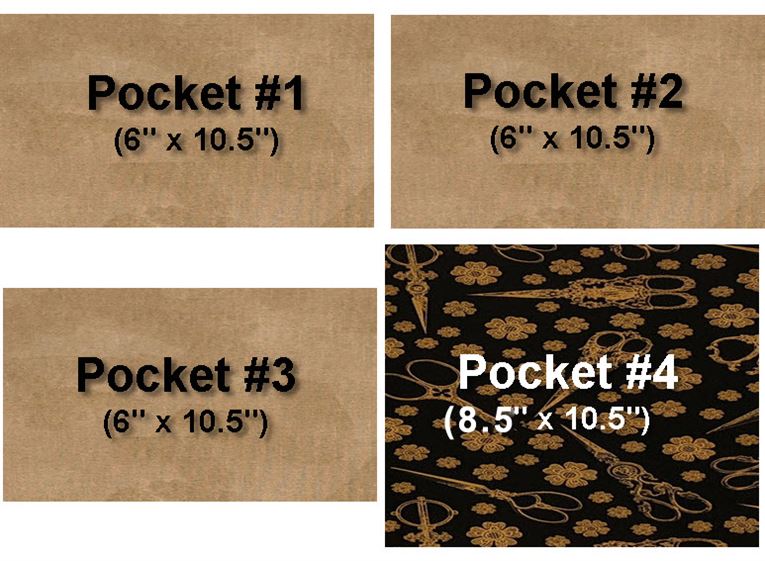
- Three 10½” x 12″ pieces of fabric C.
- One 10 ½” x 30″ piece of Soft and Stable.
- Three pieces of tear away stabilizer 5″ x 12″
Prepare
Fuse the Soft and Stable to the wrong side of the lining fabric B with once piece of fusible webbing.
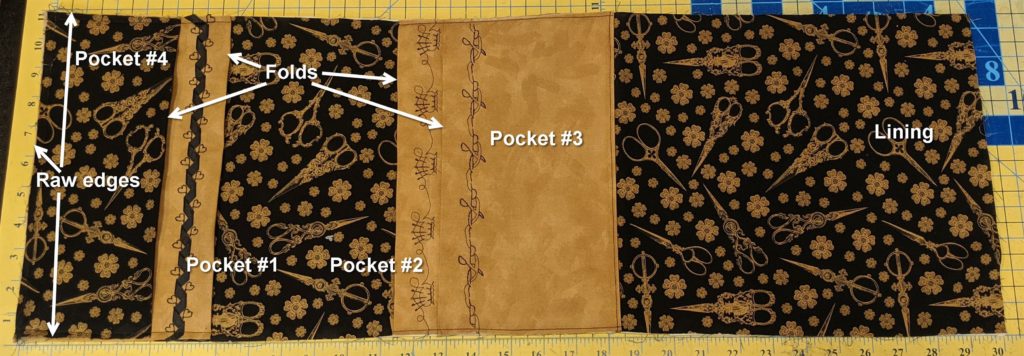
Fold the three pieces of fabric C in half to measure 10½” x 6″ to make the pockets. Press the fold.
Fold the 10½” x 8½” piece of fabric B in half to measure 10½” x 4 ¼”. Press the fold and set aside (Pocket 4).
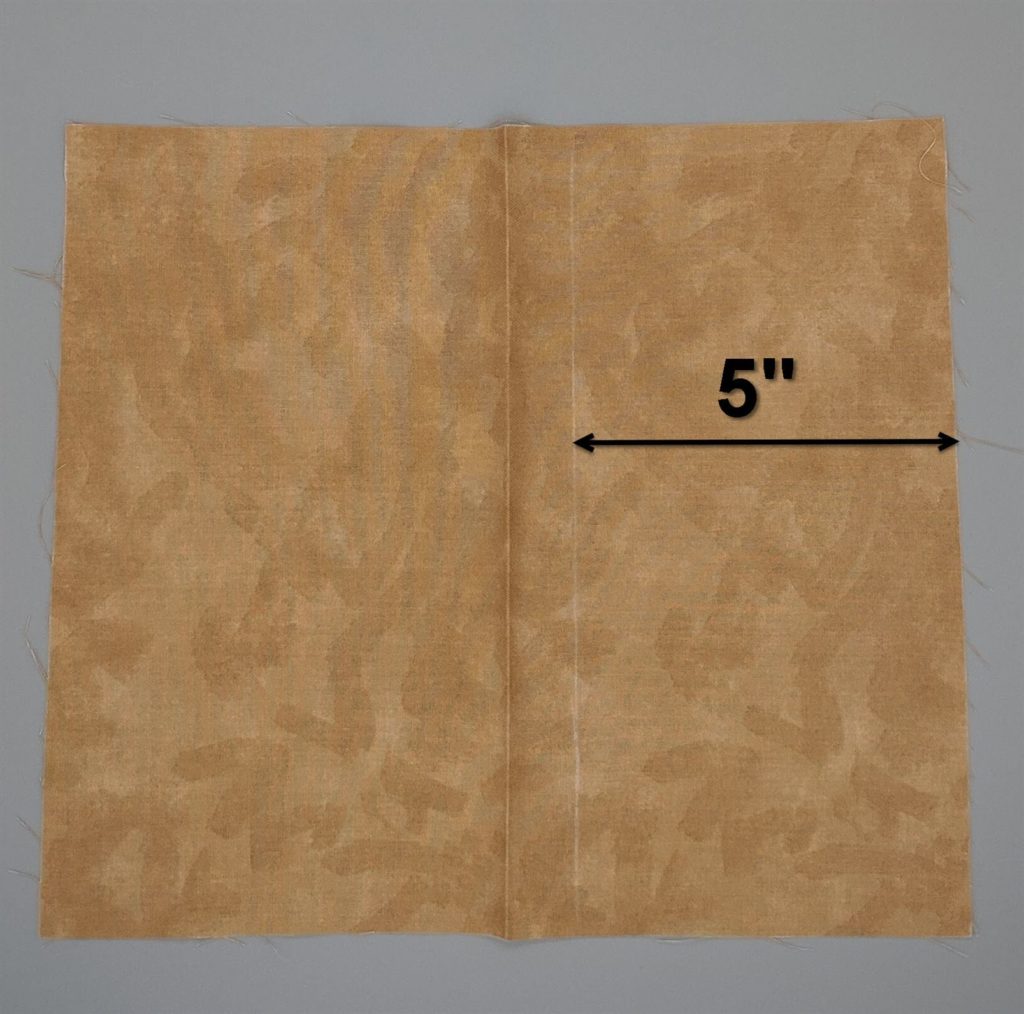
Open pockets 1, 2 and 3,from fabric “C” and draw a line parallel to the fold 5″ from the raw edge with a removable marker or chalk.
Sew
Decorative Stitches for Pockets
Pocket 1
- Open one of the fabric C pockets so that it is 10½” x 12″.
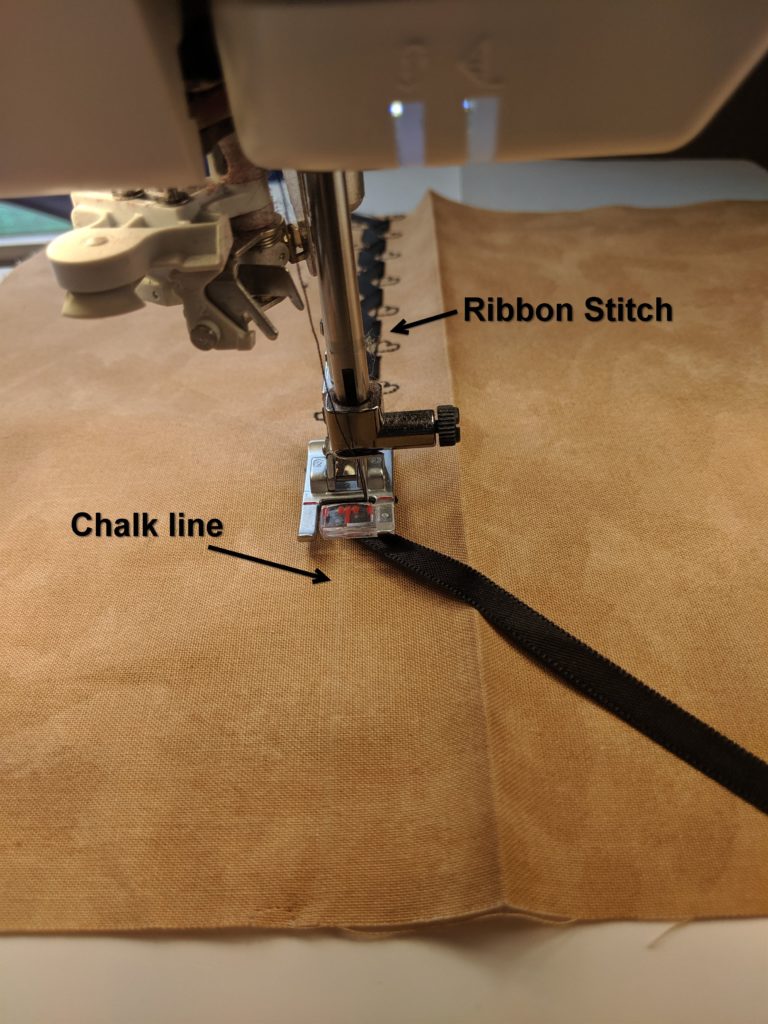
- Place a strip of tear away stabilizer under the straight line drawn as described above.
- Select a decorative stitch such as a single ribbon stitch (PFAFF exclusive).
- Line up the needle with the drawn line.
- Stitch chosen decorative stitch along the line.
- Remove the tear away stabilizer.
- Press.
- Fold fabric in half so the pocket measures 10½” x 6″.
Pocket 2
- Open another of the fabric C pockets so that it is 10½” x 12″.
- Place a strip of tear away stabilizer under the straight line drawn as described above.
- Select a second decorative stitch.
- Line up the needle with the drawn line.
- Stitch chosen decorative stitch along the line.
- Remove the tear away stabilizer.
- Press.
- Fold fabric in half so the pocket measures 10½” x 6″.
Pocket 3
- Open the final fabric C pocket so that it is 10½” x 12″.
- Place a strip of tear away stabilizer under the wavy line drawn as described above.
- Select a third decorative stitch such as one of the radiant stitches (PFAFF exclusive).
- Line up the needle with the beginning of the line.
- Stitch chosen decorative stitch along the curve.
- Remove the tear away stabilizer.
- Press.
- Fold fabric in half so the pocket measures 10½” x 6″.
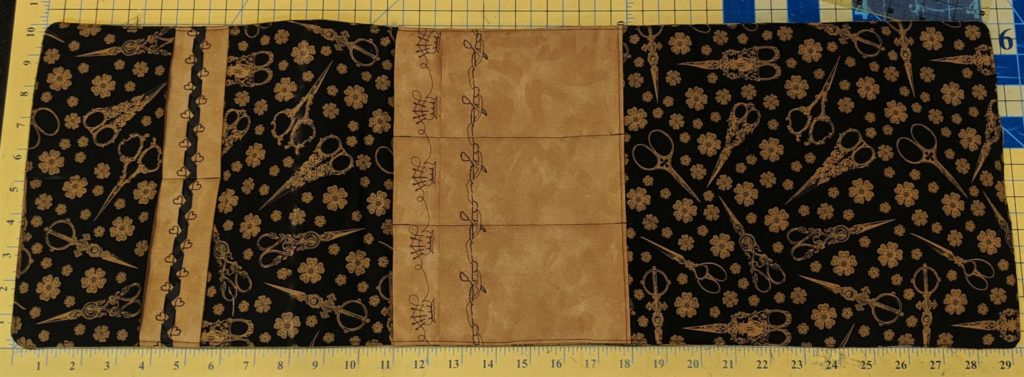
Place Pockets on Folded Accessory Holder
Place the lining fabric, that has been fused to the Soft and Stable, right side up on a flat surface.
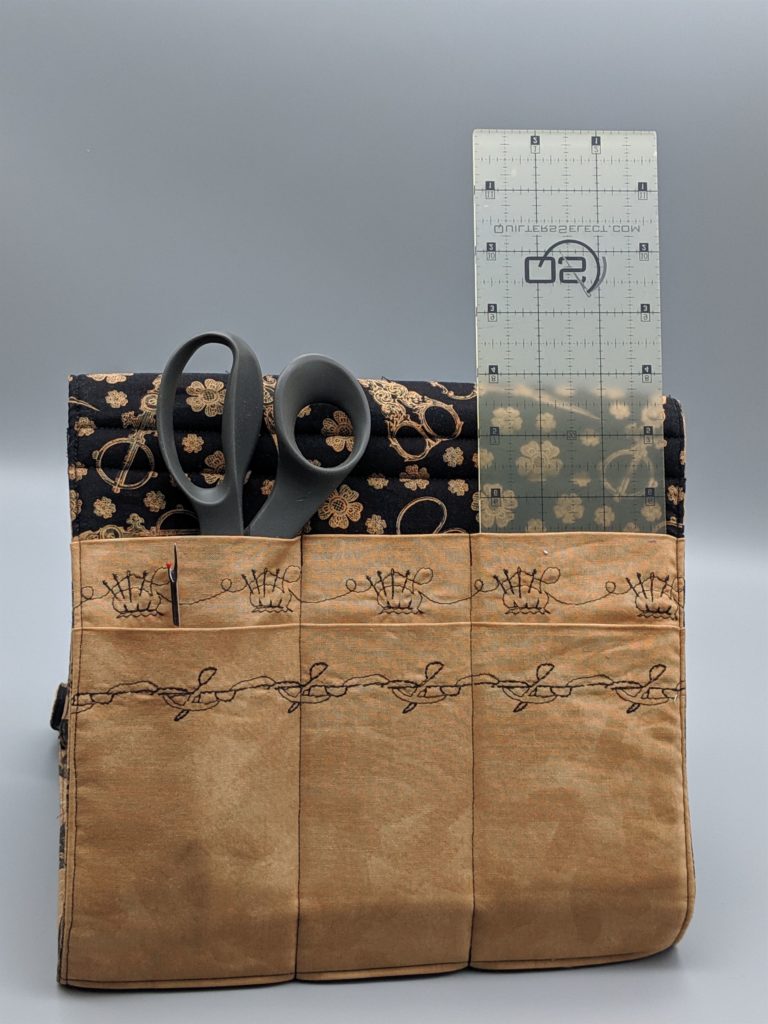
Pockets 1 & 4
Align the 12″ raw edge of the folded pocket 1 along the left edge of the lining.
Place the folded (10½” x 4 ¼”) fabric B pocket 4 on top of pocket 1 so that the raw edge of the pocket also aligns with the 10½” width of the left edge of the lining.
Stitch around the three raw edges of the pockets, attaching them to the lining.
Pocket 2
Place pocket 2 right side down with raw edge 17″ from the left edge where pockets 1&4 were previously placed. Make sure the top fold of the pocket faces right. Stitch a ¼ ” seam along the raw edge, attaching the pocket to the lining.
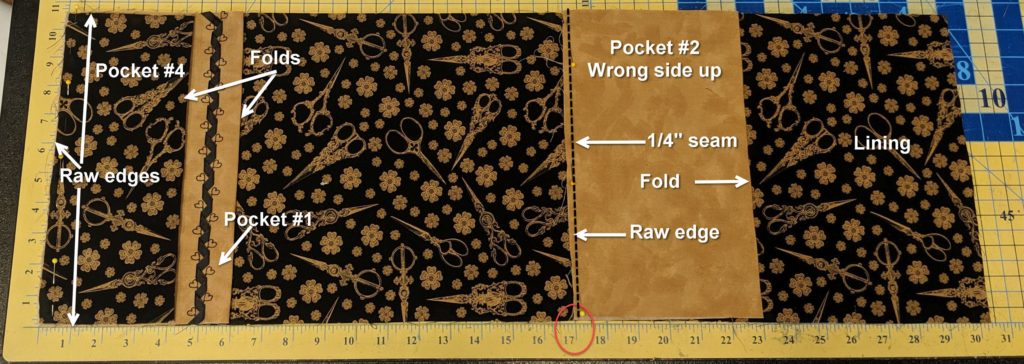
Fold the pocket over so that it is right side up and the folded top edge of the pocket faces left, toward pockets 1&4.

Press the pocket and stitch 1/4″ from the bottom seam.
Pocket 3
Place pocket 3 right side down on the right side of the lining with the raw edge 18″ from the left edge of the lining. The fold of the fabric is facing right. Stitch a ¼” seam along the raw edge.

Fold the pocket over so that it is right side up, and the folded top edge of the pocket faces left, toward pockets 1&4 and overlaps part of pocket 2.
Press the pocket and stitch ¼” from the bottom seam.
Stitch around all raw edges to hold pockets in place.
Front Fabric
Fuse a piece of fusible webbing to other side of the soft and stable.
Place the front fabric face down on the lining/pockets side of the folded accessory holder. Sew the front fabric to the lining with a ¼” seam. Sew with the Soft and Stable face up under your presser foot for best results. Leave a 4″ opening on the short end that has no pockets. For best results in turning the opening inside the seam allowance, stitch down into the seam allowance on either side of the opening.

Turn the accessory holder through the opening.
Make sure all pockets on the end are flipped to the lining side of the project.
Press the opening closed.
Press the entire project which will fuse the front fabric to the fusible webbing you previously ironed onto the Soft and Stable.
Top stitch 1/8″ from edge, all around the accessory holder, which will close the opening used to turn the folded accessory holder right side out.
Section Pockets
Section pockets by stitching lines as desired.
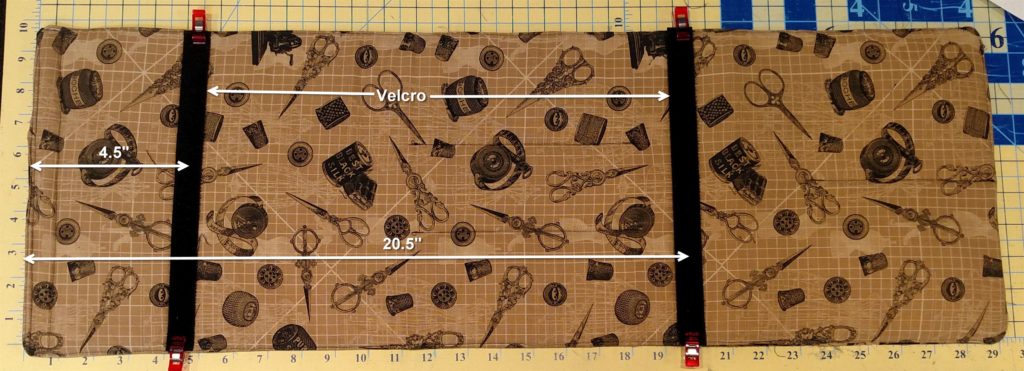
Velcro
Place the 11″ hook (rough) side of Velcro to the right side of the lining on the end where there are no pockets.
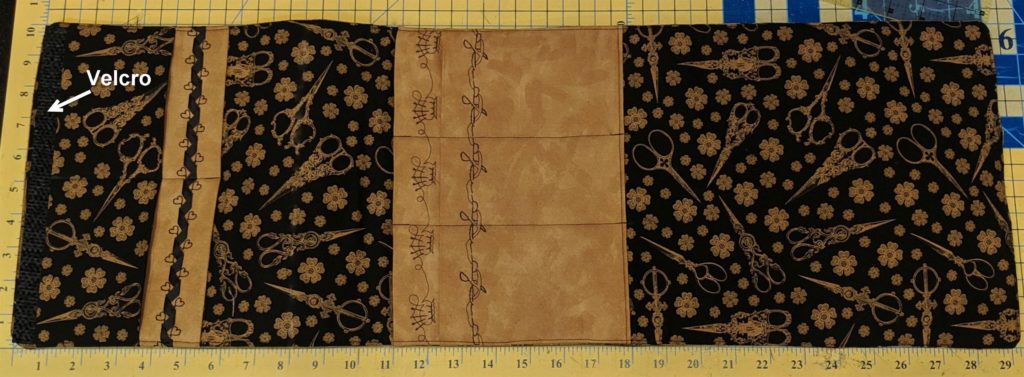
Flip the project over to the front. Place one 11″ loop (smooth) side of the Velcro 4½ ” from the edge that has no pockets on the lining side. Stitch around the Velcro.
Place a second piece of the loop (smooth) side of the Velcro centered on a line 20½ ” from the edge that has no pockets. Stitch around the Velcro.
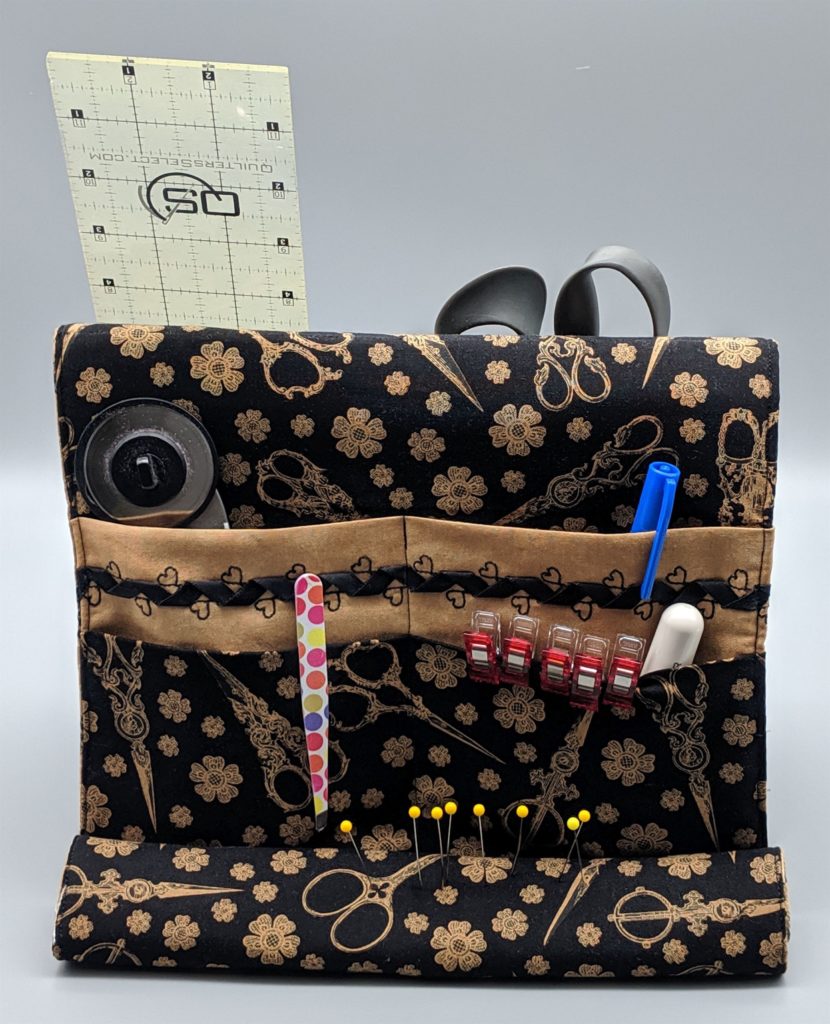
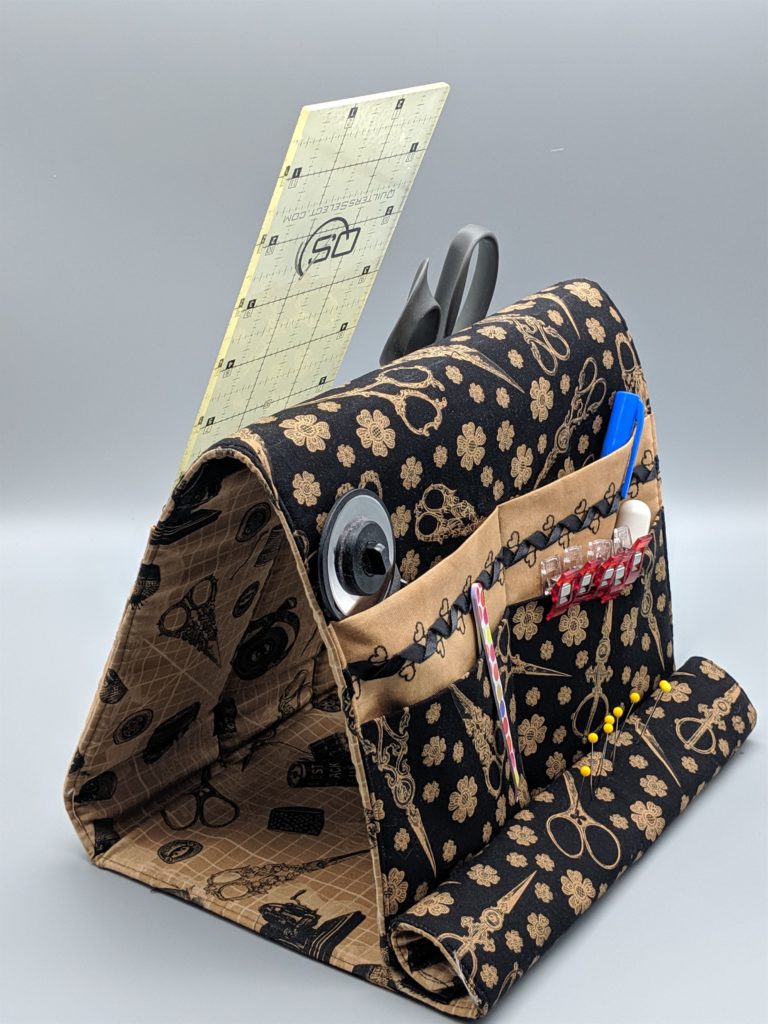
Stand It Up
To use the Folded Accessory Holder in the stand-up position, lay the pocket side face down. Roll the Velcro on the end with no pockets toward the front to stick to the Velcro that is located 4½ ” in on the front. This creates a ready-made pin cushion. Lift up the pocket side on the other end and stand up along the pin cushion. It will stand up better when you have a ruler, cutting mat and other accessories in place.
Fold and Go
To fold up the Folded Accessory Holder, lay accessory holder flat with the pockets face up. Fold the end with two pockets up over the middle pocket and then fold again. Pull the other end (where Velcro is on the edge of the lining) , wrap it over the top, and stick it to the piece of Velcro on the outside to close.
Cute and Functional
This great project can be made with different fabrics and stitches. Add embroidery to create unique and popular gift for your family and friends! Our many thanks to Karen Charles for sharing this wonderful pattern she created for PFAFF’s Creative Icon.
Soft and Stable
The Folded Accessory Holder is quite sturdy and stand up well. This is due to the Soft and Stable used to make the holder. You’ll want some of that when you make yours, to here’s a coupon for 30% off Soft and Stable. Click on the coupon to print it.
