Fabric Stabilizers…Another topic I get a lot of questions on. I found many of you aren’t aware just how useful stabilizers can be. So today I decided to cover tips, tricks, and ideas on using fabric stabilizers in all areas of your sewing projects.
Keep reading to learn what you can do with stabilizer BEYOND machine embroidery. PLUS you’ll learn how to use stabilizers to make your machine embroidery turn out better than ever! ( Look for the Chart in upcoming post ) An upcoming post will focus more on stabilizers and embroidery.
As I wrote this I realized, there is a lot of info on stabilizers. So with that in mind, I will begin with general info and a fun facts on stabilizers. Next, I will cover the different types of stabilizer. Finally, I will give you numerous ways to use stabilizer in crafting, quilting and sewing – complete with tips and tricks! You’ll be surprised at all the things you can use it for! Stabilizer is a very handy notion!
General info on Stabilizers:
- Fabric Stabilizer has been used for centuries (I bet you didn’t know that)
- Stabilizer and interfacing are SIMILAR but not the same thing – yet both enhance the project’s finished look
- Like interfacing, Stabilizer is a notion – not a tool
- Stabilizer supports the fabric while maintaining weave and grain. It also provides body, gives hand to the fabric, and prevents fraying. Interfacing only provides body, shape, and weight to a specific area.
- Typically stabilizer is applied to the WRONG side of fabric
- Stabilizers prevent warping or twisting of the fabric weave
- Not all stabilizer comes on a roll – some are even liquids!
- Even within the same category, there are several types of stabilizer
- Fabrics with open weaves such as netting, tulle, and burlap require a stabilizer to sew
- Delicate or slippery fabrics such as chiffon, silk, taffeta are much easier to cut, stitch, and create with when stabilized first with a wash away
- Stabilized fabric is ideal for creating shaped fabric objects and design elements
A Few Fun Facts
Yes, I did say that stabilizer has been used for CENTURIES. Some historians believe it may even have been used as early as the Egyptians in B.C. Most of us are familiar with today’s cloth-like or paper-like white material labeled “stabilizer”, often sold as rolls or cut sheets. But did you know that early fabric stabilizers were made from everyday common food items like sugar, honey, flour, eggs, and water? Gelatin makes a great stabilizer (Recipe is at the end of the blog).

Early cultures used common kitchen ingredients to make their cloth stiff and wooden like. Or to make the cloth weather resistant. Typically, baskets woven from fabric scraps, or natural grasses, were coated with a stabilizer to make them water resistant and stronger. And items like rugs and baskets would last longer with a stabilizer on them.

Fabric stabilizers were also behind most of the unique fashion trends from the various eras – like bustles, parasols, panniers, crinoline underskirts, masquerade ball masks, circus costumes, bow ties, spats, poodle skirts, and more. Remember the ruffled collar thing on Queen Elizabeth? ( That is actually known as a “ruff”). Without stabilizer, many of these fashion trends would never have been popular or possible. And for the fashion savvy, while design elements such as panniers and crinolines incorporated hoops, the fabric element was treated with a stabilizer to complete the look.
Stabilizer Basics Or Stabilizers 101
You need to know about stabilizers in order to get creative with them!
Stabilizer is typed into one of four categories or groups: Tear-away, cut-away, wash-away, and heat-away. Even a liquid stabilizer will fall into one of these groups. The group name refers to the method used to remove the stabilizer once the project is complete. Stabilizer is offered in an array of weights. Also, it comes in various forms such as fusible, self-adhesive, non-fusible, spay on, tapes, etc. Note: Some projects require the stabilizer to remain permanently and some stabilizers are not removable.
I didn’t forget toppings. Toppings are just a subgroup applied differently. Toppings are a type of stabilizer used on the right side of fabric. Like stabilizer, they come in all weights, forms and types. But some stabilizers may also be used as a topping. And some toppings can be permanent too.
Essentials of the different groups:
Tear-away: Just as the name says, a tear-away stabilizer simply tears off, or tears away, once the stitching is completed in the area where the stabilizer is used.
- This is a cloth or paper-like stabilizer available on rolls or in pre-cut sheets
- Found in fusible and non-fusible
- Weights vary from sheer to heavy
- Meant to be temporary since they are designed to tear easily
- Some brands tear more easily than others
- May be used as a topping
- Most often a non-woven
- May be sewn in
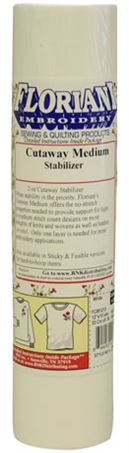
Cut-away: It literally is cut away after the stitching is completed.
- Cloth or paper-like available in pre-cut sheets or on rolls
- Weights vary from light to heavy
- Typically sewn in
- Adds strength to fabric
- Some toppings are cut-away
- Thickness and weight vary between brands
- Available in both woven and non-woven
- Heavier is better for denser stitching
- Prevents fabric see through
- Should be soft in areas that will be next to skin
Wash-away: This group dissolves when wet.
- Available in film, liquid, cloth-like, or paper-like form
- Found on rolls more often than in sheets
- Thicker film resembles vinyl
- Thinner film feels like plastic kitchen wrap
- Available in weights super sheer to medium
- Good choice for toppings
- Liquid stabilizer is applied with sprays, brushes, or by soaking
- Great for specialty fabrics or fabrics with high nap
- Best choice for working with lace
Heat-away or Melt-away: Unique stabilizer removed with heat.
- Available in film, cloth-like, or paper-like form
- Offered in both precut sheets and rolls
- Film is most common form
- Extra care needed when removing
- Great for dry-clean only fabrics
- Seldom used as topping
- Typically removed with a DRY iron
- More difficult to remove than other stabilizers
Now that you are familiar with the types of stabilizers, let’s move on to the FUN stuff – using it!
Creating and Crafting with Stabilizers
Time to think outside the box! (Yes, if you do machine embroidery you NEED stabilizer. The success of your embroidery project depends on using the correct stabilizer for your design, fabric choice, and project. So, for all you machine embroidery enthusiasts, I have a chart for you at the end of this post. Feel free to print it. Keep it handy. Refer back to it. )
But stabilizer can be used for so much more than machine embroidery. I use it in all kinds of projects to achieve professional results. Did you ever see a project and wonder how they did that in their home? Ever notice fine details and think the person was gifted? How often have you struggled with hems, lace applications or other specialty finishing techniques? Stabilizer is the key. Stabilizers take the stress out of creating. They make your sewing journey easier, more relaxed, and more fun.
Tips and Tricks with Stabilizers
Crafting
Cutting machines: Have you ever tried cutting fabric in a cutting machine? How did it work? I hear from crafters all the time about cutting machine frustrations. The key to successfully and easily cut fabric in any cutting machine is stabilizer.
- Liquid is best here, but fusible works well also
- Make sure fabric is DRY before cutting
- The more rigid you make your fabric, the easier it will be to cut
- Try double sided fusible for easy appliques
- Use liquid and fusible together on very delicate or thin fabrics
- Don’t be afraid to experiment!
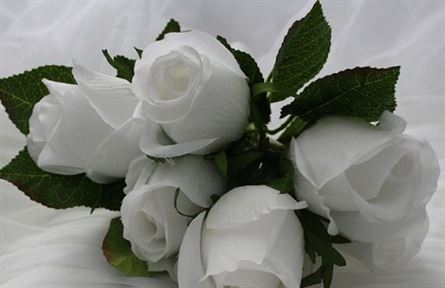
Fabric and Paper Flowers: Have you been afraid to try crafting your own fabric or paper flowers? Perhaps, you are frustrated with fraying fabric. Maybe it’s been difficult to work with petals and leaves. Again, it’s stabilizer to the rescue.
- Print patterns and outlines on sheets of stabilizer first
- Apply stabilizer to the back of fabric before cutting
- Prevent fraying with either liquid or fusible stabilizer
- Double sided fusible is great for shaping blossoms
- Try liquid stabilizer on paper. Sometimes, you may work the paper even when wet!
- Also, a spritz of liquid stabilizer on your completed flower helps maintain shape and repel dust
Tote bags, handbags, purses, beach bags, and shopping bags: Stabilizer is a must for these craft items. Shape your bags with stabilizer.
First, use stabilizer to provide support to the bag bottoms.
Tip: Try using a double sided fusible so you can fabric wrap a piece of thick cardboard or plastic to create a removable bottom support!
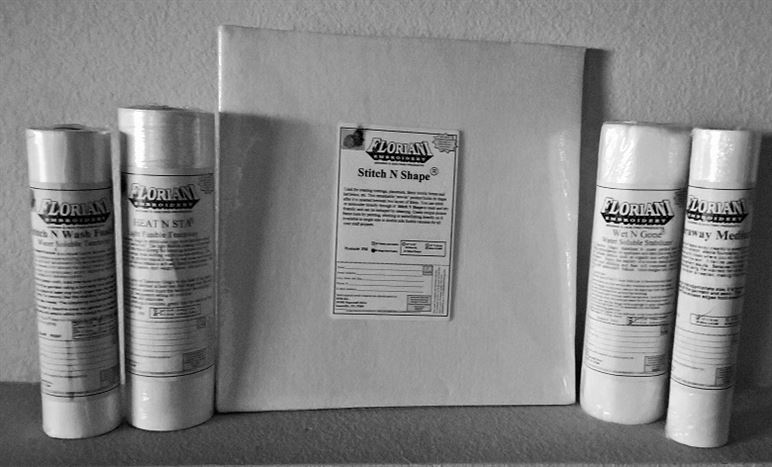
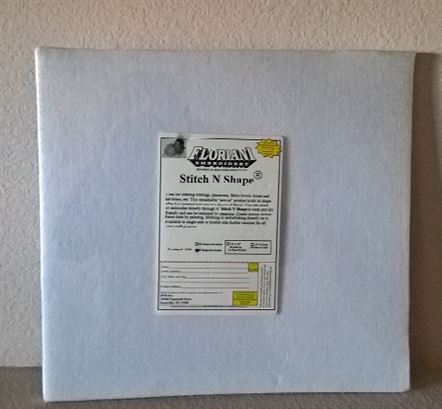
Next, place it on the sides of the bags. Sandwich a heavy weight fusible ( I like Floriani Stitch N Shape) between the outside and lining.
Tip: I fuse the Stitch N Shape to the wrong side of the outside fabric NOT the lining. Then I complete the bag per instructions.
You will be amazed with the great results.
Try using stabilizer in fabric handles as well. It’s also a must when attaching handles to bags to support the bar tacks.
Sewing with Stabilizers
Chiffon, Taffeta, Lawn, and other Delicate or Loose weave fabrics: Did you ever have trouble just doing a straight seam on a sheer or slippery fabric? If you tried to stitch a satin on a machine, then you know how frustrating this task can be! But stabilizer really does help. Stabilizer tape applied along the edges of the fabric prevents fraying and also stops all the sliding. The fabric will still glide through the machine but without the frustration!
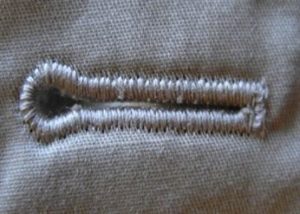
Buttonholes: If you ever had trouble with buttonholes, then stabilizer will help. When you look closely at commercial high end or “designer” garments, you will notice the stabilizer in their buttonholes. Stabilizer will keep the fabric from warping, puckering, or twisting. Just place stabilizer on the wrong side of the fabric before stitching the buttonhole. You’ll be amazed with the great results you achieve when using stabilizer for your buttonholes!
- Allows easier stitching with specialty threads
- Prevents fabric from puckering, warping, or twisting
- Also helps maintain even stitch tension
- Any form will work, but liquid may not provide the added strength
- Try wash-away and liquid on sheer or delicate fabrics
Hems: Probably the most overlooked place to use stabilizer. As easy as a hem should be, many actually find them difficult. Or perhaps you find hemming tiresome. Maybe it’s just one task you try to avoid. Did you ever wonder why? If your fabric frays, then your hem will be frustrating. If the fabric is slippery, then your hem will be aggravating. What if the fabric edges tend to roll? Rather than avoid, staple, or glue, try stabilizer. And, yes, there are quite a few who staple and glue instead of stitching their hems!
- Apply stabilizer tape along the fabric edge to prevent fraying and rolling
- Double sided fusible tape is great for holding the hem in place while stitching!
- Topping will help the fabric slide easier through the machine
- Both stabilizer and topping enhance hand sewing of hems
- Wash-aways leave no trace, therefore they are great for hemming
- Spray on stabilizer is great for preventing puckers with delicate fabrics
Quilting
Yes, stabilizers have many uses in quilting! One of my favorite uses is for applying quilt binding.
- First, I make sure to cut my quilt back larger than the front by about 2 inches all the way around.
- After I quilt the back and front together, I add double sided 1/2 inch fusible stabilizer tape to the OUTSIDE backing edges.
- Next, fold once along the taped edge – you now have the fusible facing up.
- Fold again. You now have the fusible tape against the quilt front with the right side of the backing up, creating a binding!
- Fuse the folded edges and stitch in place! So easy and fast! You can even use this method with mitered corners!
Try using stabilizers with T-shirt quilts. Apply fusible stabilizer to the back of the t-shirts, and any other knit fabric you will using, before cutting. The knits will be easier to cut and easier to piece! I use a water soluble paper-like fusible for this. You can easily remove it before gifting the quilt!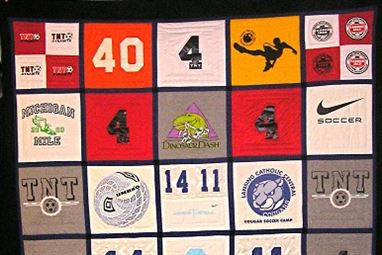
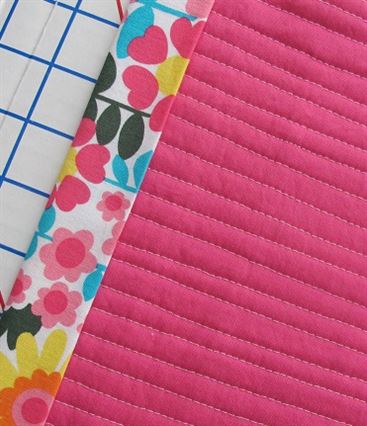
Stabilizers are perfect for quilted kitchen items like potholders, placemats, appliance covers, and casserole carriers. I prefer Floriani Stitch N Shape for appliance covers, placemats, and casserole carriers. You can also use a fusible stabilizer that looks and feels like fleece or batting. Both work well for these kitchen items! Try the fusible binding tip here, too.
Making a crazy quilt with velvets or silks? Then you should try heat-away stabilizer! Velvets and silks don’t like water or steam. The heat-away prevents damage while providing the benefits of stabilizer. It’s great as a topping when adding the decorative stitches to your crazy quilt. Plus it shields the surface of the velvet from crushing. Please see the caution note below!!!
Tip: Heat-away can be messy to remove. Use your DRY iron to “toast” off the stabilizer. As the heat “cooks” the stabilizer, it will get brittle and begin to flake. After it cools, use a microfiber cloth or small SOFT brush to get rid of the flakey material. Also – depending on the fabric, the time it takes for the heat-away to “toast” will vary. And, yes, it will work on a low iron setting. However, it will take longer. Hairdryers also work well to brown the heat-away.
Caution: Heat-away is NOT liquid friendly. Avoid getting heat-away wet once it is applied to the fabric. If steam or other liquids such as starch is applied to heat-away, then the fabric may be permanently ruined! It is important to use a DRY iron or hair dryer to “toast” the heat-away.
Rocky Mountain Sewing and Vacuum
As you can see, there is tons of information, tips, and tricks with using stabilizer. Probably, I could write a book. Feel free to leave a comment. If you have questions, please ask either through our website or in person at our stores. If you want to see a topic covered in the blog, then please ask!
If you want to experiment with stabilizers and fabric, then request a class! Want to learn all about stabilizers through a class setting so you can add them to your sewing journey? Please LET US KNOW ! We want to hear from you, our customers!
Don’t forget to check out our class calendar page.
To get your free sample, you must visit any Rocky Mountain Sewing location. Rocky Mountain Sewing stores carry a full line of stabilizers and other sewing notions!
Here is your recipe for making Gelatin Stabilizer:
For every 1 Tsp. of unflavored Gelatin use 16 ozs. of warm water. Stir until gelatin is completely dissolved. Hot water may be used if fabric can tolerate it. A 3 gallon bucket works best for yardage pieces. If you are using scraps or smaller pieces of fabric, then a bowl is fine. (8 tsps. gelatin per every gallon of water)
Soak the fabric for at least one hour. The larger the price, then the longer the soaking time. Usually, 3 hours is long enough for a 2 yard piece. After soaking, squeeze out excess water. Next, roll in a dry towel. Twist gently to get any remaining excess water. Carefully shake out to flat piece, then allow to air dry. Gelatin will completely rinse out when project is finished. (Commercial industries use this to work with chiffon, taffeta, anything that ravels and frays easily. They also use gelatin to stiffen silks and silky polyesters to make them easier to handle during construction. )
Comments
Cathy Ellsaesser
For best results I would use a satin stitch along the edges of the tags. If that’s not practical or possible, then try some fusible webbing or interfacing ironed on the fabric to keep the edges from fraying. You could also use fray check along the edge. I don’ think a stabilizer would really do the trick.
Christine Reffitt
Absolutely in valuable information! Thank you for taking the time to share!
Christine Taylor-Sutler
Which stabilizer would I use to embroider bag tags to keep the edges from fraying?
Megan McCabe
We’d probably recommend a cutaway or a tearaway for that purpose. Floriani’s Power Mesh or OESD’s Poly Mesh could be good otpions!
Donna L Adams
Can you recommend a stabilizer (not fusible) that I could use as a base for a string quilt? It would have to be lightweight, washable, and able to be left in the quilt.. Oh, and not shrink
Cathy Ellsaesser
I would try OESD’s Wash Away Stabilizer tape. It is 3/4″ wide.
OESD Wash Away Tape
They also have a tear away version.
OESD Tear Away Tape
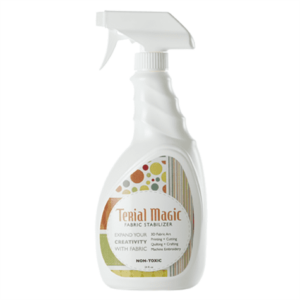
If you don’t want a tape, you could also try to starch the edge of the tulle and make it stiff. There is also a product called Terial Magic which stiffens fabric and would work. Both the starch and the Terial Magic would wash out as well.
I did find this DIY project online. Maybe this will help.
I Have a Veil (or Two)
Jan
Hi, I am planning on doing hand beading on the edge of my daughters bridal veil. Is there something you can recommend that will stabilize the tulle to make the beading easier, but then of course either tear or rinse off?
Thanks in advance!
Cathy Ellsaesser
Not being able to iron the fabric really limits the best stabilizer to use on delicate fabrics. So, for your embroidery, I suggest using a cut away mesh like Floriani No Show Mesh or Embellish Soft Cutaway.
If you have a serger, I recommend serging the edges of the fabric after you cut them out. If you do not have a serger you could try to use something like Fray Check on the edges of the fabric after you cut the pieces out. Since you can’t fuse anything to the fabric, I’m not sure how an adhesive tape would work — would it stay in place?
Another option, if possible with the pattern, is to sew french seams. This would encase the raw edge of the fabric in the french seam, eliminating fraying/raveling after sewing. French seams are easy in straight seams. For arm hole seams, you’ll probably have to sew a regular seam then encase that seam in some binding.
I have a blog on french seams, if you’re interested.
Oooo! La La! French Seams
Gail
I am making a komono with a silk look-alike material that is washable. It frays badly, so I think I should use a tape stabilizer on the edges of the robe pieces after I cut them out. Is that what you recommend? Also, I want to do a little hand embroidery on the back of the komono before I put the lining in. What do you recommend I use for the area I’ll be embroidering? I should also mention the instructions for this fabric include NO ironing which limits the type of stabilizer I can use. Your advice would be very much appreciated. And thank you for this wonderful set of information.
Cathy Ellsaesser
You might try Embellish Fusible Dissolvable Tearaway stabilizer:
Embellish™ Fusible Dissolvable (by RNK) Tearaway is manufactured using partial tear away stabilizer plus water soluble stabilizer, leaving the right part of your design stabilized without bulk. There is also a fusible version which would eliminate the need for you to use glue.
Floriani has Stitch N Wash stabilizer is easily torn away without distorting stitches or harming the delicate fibers of heirloom quality fabrics. The design will retain the non-soluble part of the Floriani Stitch N Wash Tearaway Stabilizer throughout the life of the garment keeping the embroidery looking smooth. Any remnants of the Floriani Stitch N Wash Tearaway Stabilizer around the design will wash out in the laundry. This Floriani Stitch N Wash Tearaway Stabilizer is now available in 8 ½” x 11″ sheets for feeding through a printer for paper/foundation piecing designs and templates.
OESD has Ultra Clean & Tear PLUS Tearaway Washaway Stabilizeris a high quality medium weight tearaway, washaway stabilizer with a water soluble adhesive coating.
I think any of these will work for you.