
I do a lot of embroidery with appliqués. All appliqué designs, as far as I know, provide a “placement stitch” so you know where to put your fabric for the appliqué. Many people will place a piece of fabric larger than the placement stitch, and tack it down with the “tack down stitch”. They then cut close to the tack down stitch, trimming away the excess fabric. This is a quick and easy technique for simple appliqués. However, this can be tedious for complicated appliqués. So, for those appliqués, I create an appliqué cut file, and use my Brother ScanNCut.
The placement stitch in the embroidery design is the appliqué cut line for the ScanNCut. The ScanNCut takes files with a .fcm extension, and embroidery editing software such as Floriani’s FTCu make it easy to export the placement stitch as an appliqué cut file for the ScanNCut. Another program that can export the placement stitch as an appliqué cut file (.fcm) is Brother’s BES4 Dream Edition.
BES4 Dream Edition
In a previous blog, Make It Personal By Creating a Monogram: Part 2, Monogramming Software & Machines, I described BES4 as a tool for monogramming. Although primarily for lettering and monogramming, the BES4 Dream Edition™ Embroidery Lettering Software is a full-featured desktop software that includes a wireless upgrade for select Brother machines. (If you think that this software is only for owners of the Dream Machine, think again. Select Brother machines can use the wireless hardware included with BES4. So, if you have a Brother Quattro or a Dreamweaver, you might be able to use the BES4 wireless feature.)
With BES4, you can take the placement stitch for an appliqué and create an appliqué cut file for use on the ScanNCut. So for this blog, I’ll show you how to create an appliqué cut file for the ScanNCut with BES4.
Create Appliqué Cut File
For this example, I am using a file from an Anita Goodesign collection The Cool Kids.
Open File
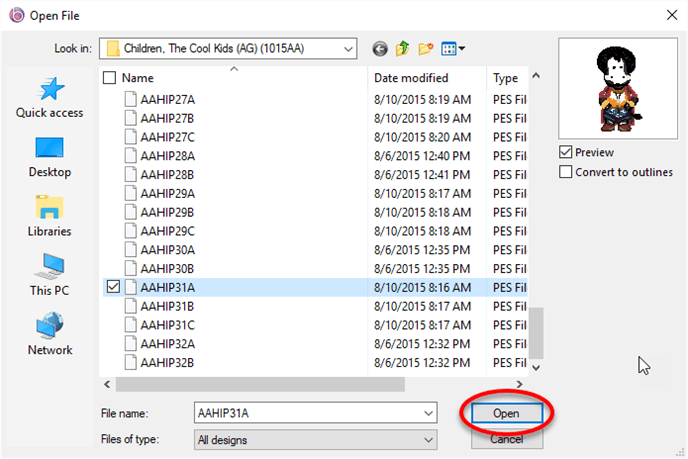
Launch BES4, and select Open a Design at the bottom of the screen.

Navigate to the directory where your stitch file is located, select your file and click on Open.
Select Placement Stitch(es)
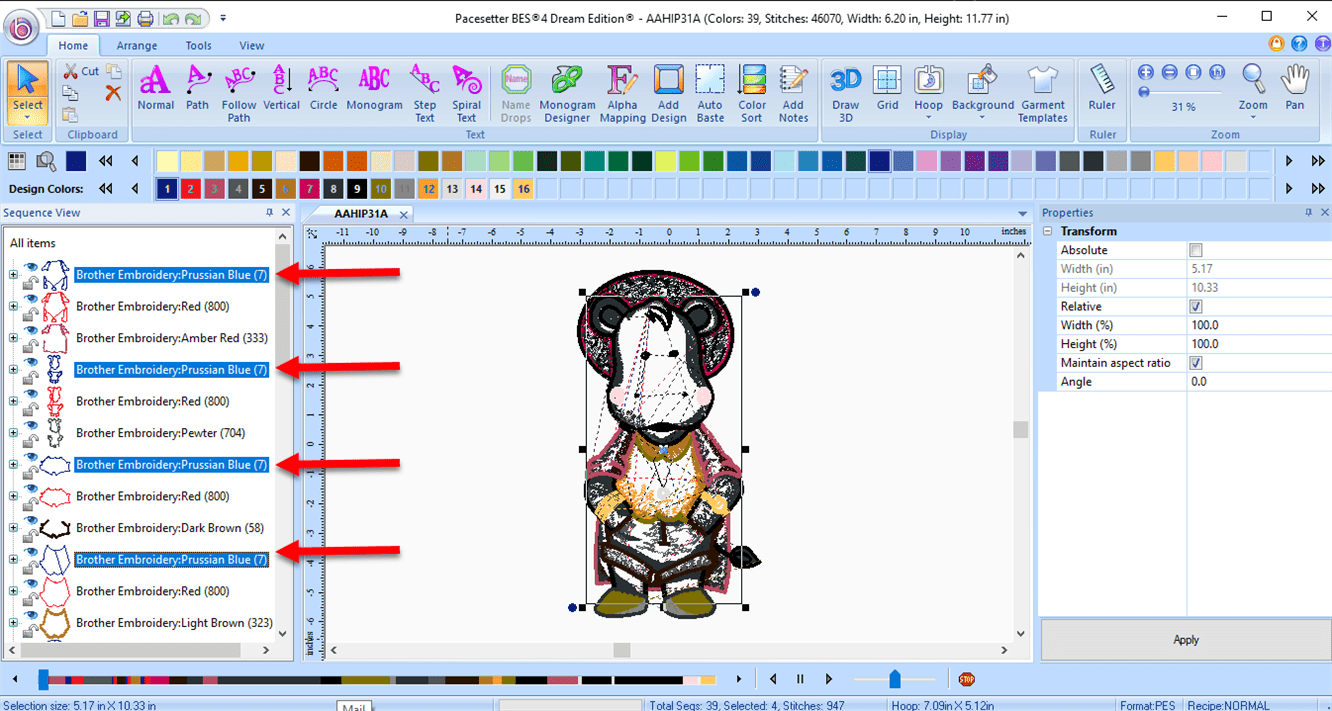
From the sequence view of the design, find the placement stitch(es) for the appliqué. As a general rule, you can scan the sequence list and pick the first sequence that creates the appliqué. Usually in Anita Goodesign collections, the placement stitches are all the same thread color (in this case, Prussian Blue). The tack down stitch is always after the placement stitch.
Hold down the Ctrl key to multi-select if needed.
Create the ScanNCut Artwork
When you create ScanNCut artwork from an appliqué in an imported stitch file, such as *.pes, a special procedure must be followed. This procedure involves converting the first run stitch segment of the appliqué (the placement stitch) to a specific Brother thread color, which the ScanNCut tool then converts to a filled artwork segment.
To use the ScanNCut tool with stitch files:
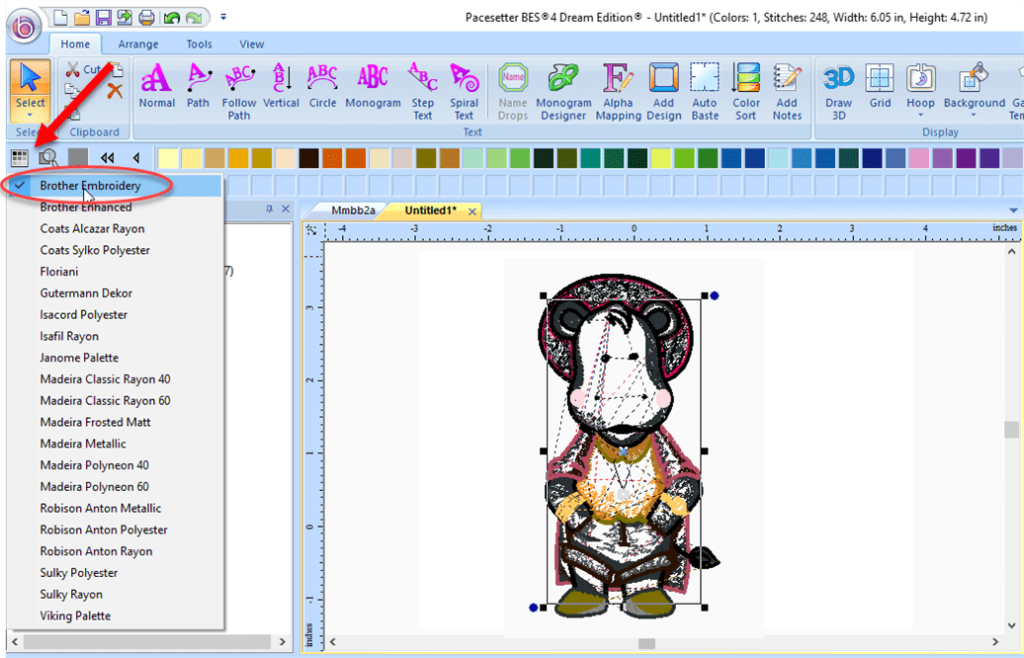
- Select the Color Palette icon.

- If necessary, change the current thread chart to Brother Embroidery
- In the thread palette, change the color of the appliqué placement stitch to Brother: Appliqué Material (100).
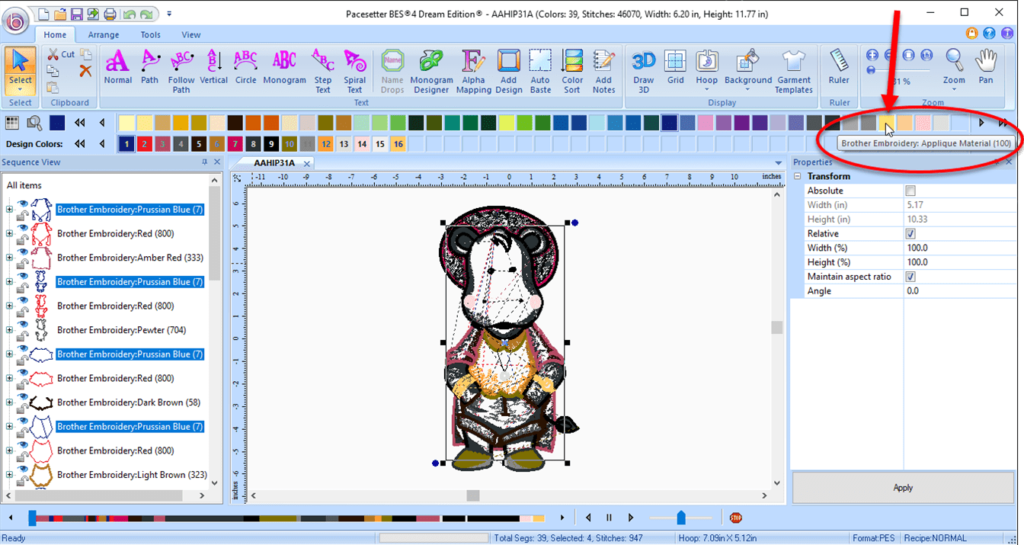
- Click on the Tools in the menu, then click the ScanNCut button.
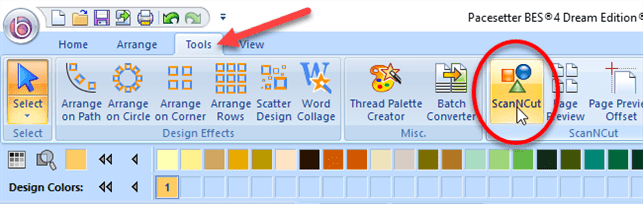
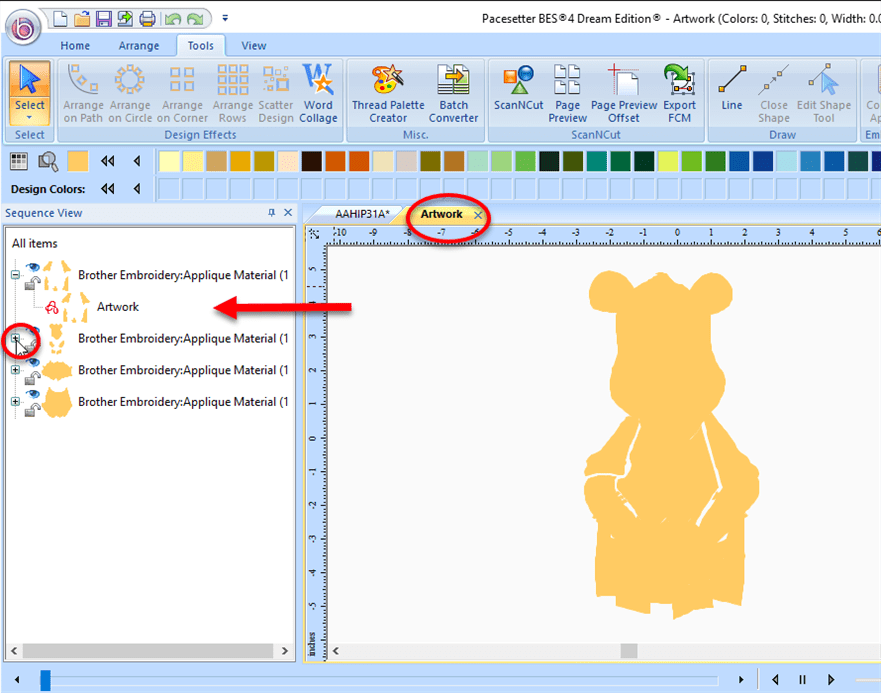
An Artwork tab will open in the workspace, containing the artwork segment(s).
Note that four artwork sequences were created. Click on the + sign next to the sequence to expand it.
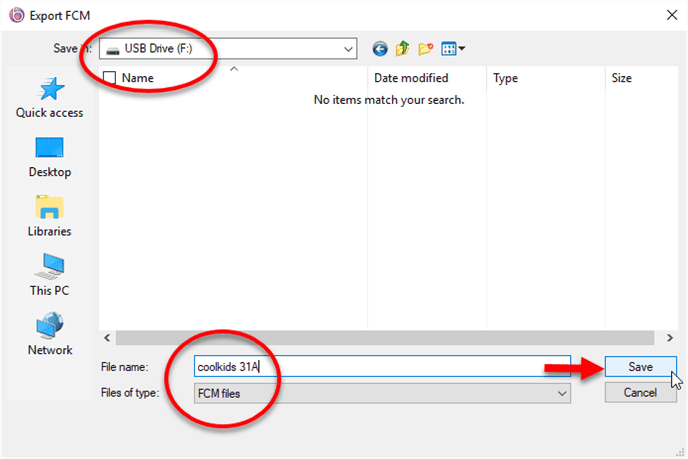
Export .fcm File
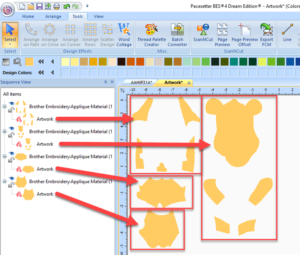
Export the artwork shown above to an appliqué cut file for the ScanNCut. If you wish, separate out the pieces before exporting.
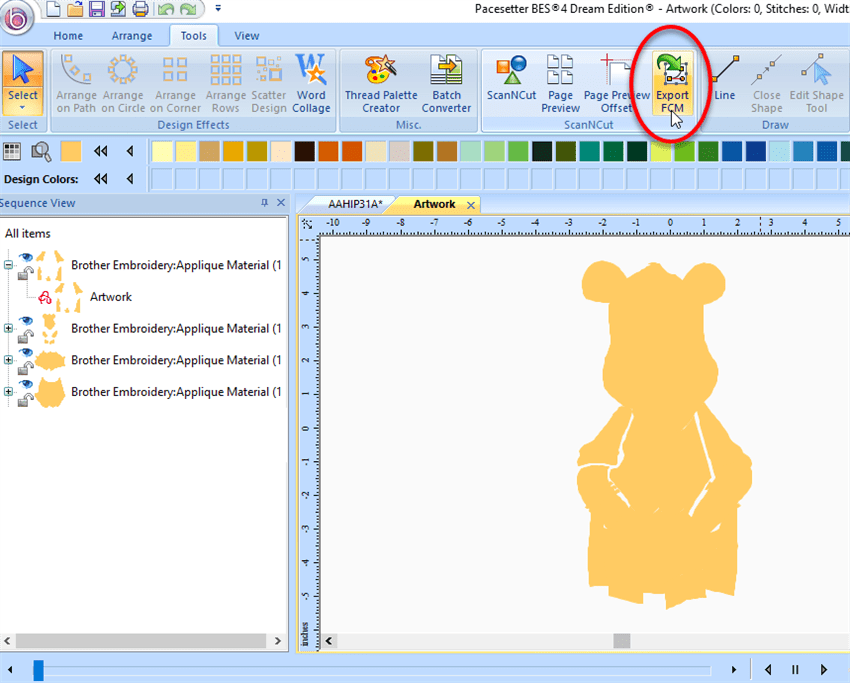
Click on Export FCM ![]() from the Tools menu
from the Tools menu
Save .fcm File to USB stick
The .fcm file is the appliqué cut file for the ScanNCut. Save your .fcm file to either your computer or to a usb stick that can be used in the ScanNCut.
Note: With BES4 you can set up a “cloud” account, and save the design to the cloud. This enables you to send your .fcm file from the cloud to the ScanNCut directly. I’ll tell you how to do that in an upcoming blog.
The ScanNCut
Load Cut File
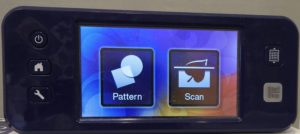
Once you have your design on the usb stick, you can load it into the ScanNCut.
- Touch Pattern from the ScanNCut home screen.
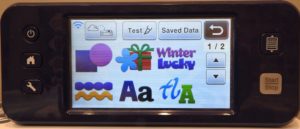
- Select Saved Data.
- Touch the USB icon.
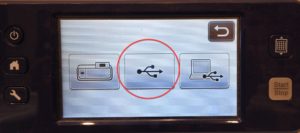
- Select the appliqué cut file (.fcm) you want to cut.
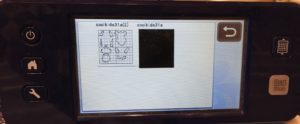
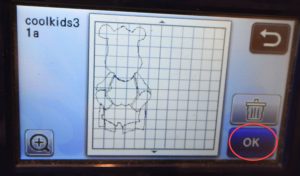
Note: Sometimes when the appliqué cut file comes from stitch files that have been converted to artwork, the thumbnail of the file is shown as a black square. Not sure why that is, but once you open it, it’s fine. Then you can save it, overwriting the file on the usb stick and it will show the cut lines on the thumbnail. - Click on OK
Arrange Pieces for Cutting
- Separate the individual pieces for cutting, allowing sufficient space between each group for placement of desired fabric.
- Select the edit icon on the ScanNCut
 , and arrange the different pieces, then click on OK.
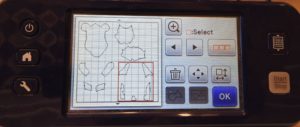
- Arrange your fabric on your mat, and cut out the appliqués.
Next Up: Making the Appliqué Just a Little Bigger
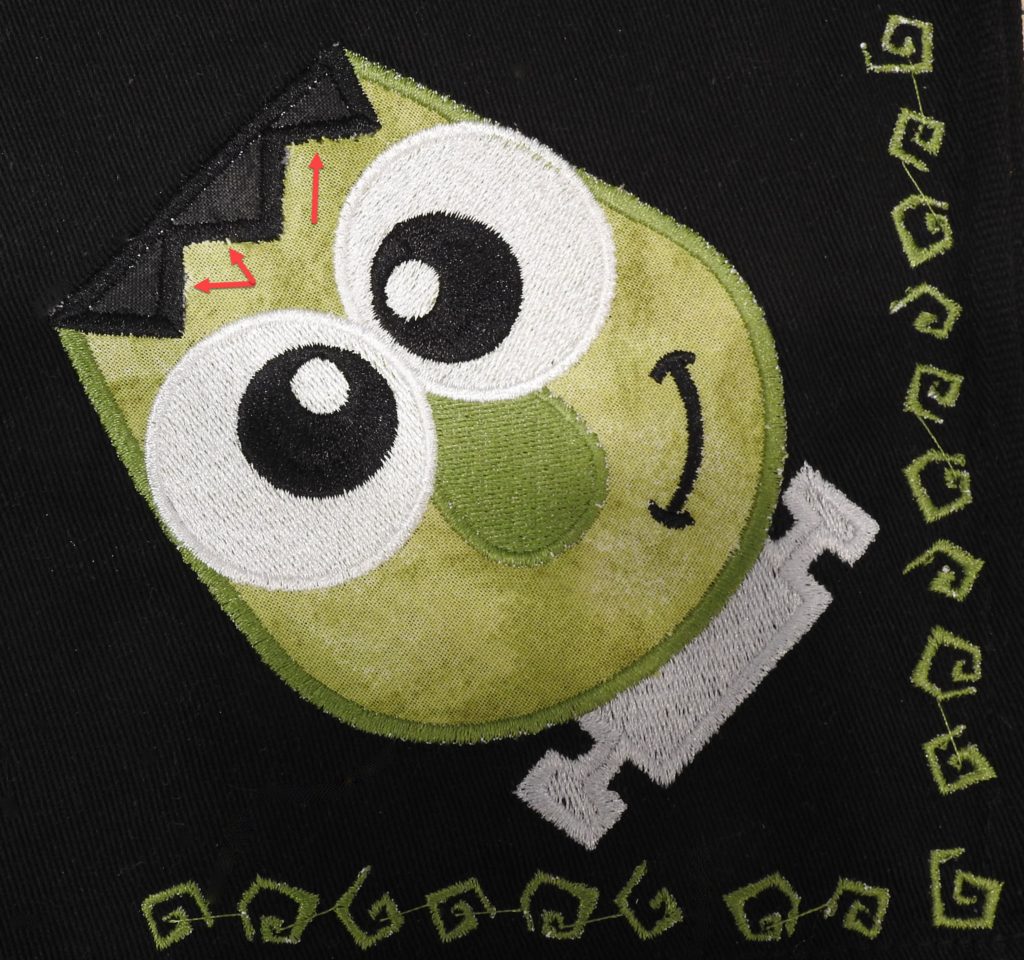
Be aware that cutting the appliqué directly on the placement line may cause a problem. If the cover stitch used to hide the raw edge is narrow, it might not cover the edge of the appliqué sufficiently, leaving some of the raw edge showing. This has happened to me on occasion where the cover stitch is narrow.
In my next blog, I’ll show you how to use BES4 to increase the size of your appliqué just a little to alleviate this problem. So stay tuned!
Comments
Megan McCabe
Simply Applique is a program focused on creating applique designs, while BES4 is focused on lettering. They dabble a little bit into the other’s category, but the Simply Applique software will do even more for your Scan N’ Cut!
Kathy Garrett
Very good video. I have BS4 and a SNC DX. Do I need Simply Applique software or does the BS4 do everything I need?
B
I want to thank you for illustrating the Bes 4 to Scan and cut. I have looked at other videos but they all use the newer SNC. I have a dx125 that only uses fcm files. I was at a lost w a PES file. Thank you so much! I am a newby to this hobby & retired. I refuse to keep buying costly equipment to have fun
Sharon
Thank you so much for considering this topic!!
Cathy Ellsaesser
Right off the top of my head, I would say that it will be simpler with the new ScanNCuts, but I have not tried using a PES file directly in the machine yet. So I don’t know if there are any issues or what steps need to be taken if there are. I am currently swamped with some other projects but will hopefully be able to try this and write a blog about it in November. I do appreciate your comment and suggestion and will get that blog out as soon as I can.
Sharon
For those of us with the Scan n Cut DX 225 that reads PES files, would we use this same set of instructions, or would there be a simpler set of steps? I have had issue PES with some PES purchased appliqué files not all behaving the same way, and therefore not being used in the same way with the DX225. It would be awesome if you could do a blog on using the DX225/230 with Appliques and either BES4 or PEDesign11. I’m just trying to figure out how to best use this machine. Many thanks
suethegran
Thanks
Cathy Ellsaesser
Thank you for your feedback, and I am glad the blog was helpful.
sandrarae headley
I appreciate being able to read and try the information you provided. I have a 650 Scan and Cut and BES 4 and my local dealer really doesn’t know anything about using either one. He is an excellent dealer but I think he has too many machines to concentrate on the software and extras. Thank you for sharing your knowledge. I would like to learn to use these programs now that I bought them.