Although cotton face masks do not stop the SARS-COVID-19 virus as the N95 masks do, they do offer some protection, particularly in helping people not touch their face, a major source of transmission. In addition, with the current shortage of face masks, they can be used in other areas of the hospital or homes to help contain sneezes or coughs.
This video is a great tutorial on how to make these masks simply and quickly.
In addition, here are the step-by-step written instructions to go along with the video. The video is very well done, and the process very well explained. We also thought some written instructions to have in your sewing studio might be helpful. Besides, I needed to help make some cotton face masks!
Supplies Needed
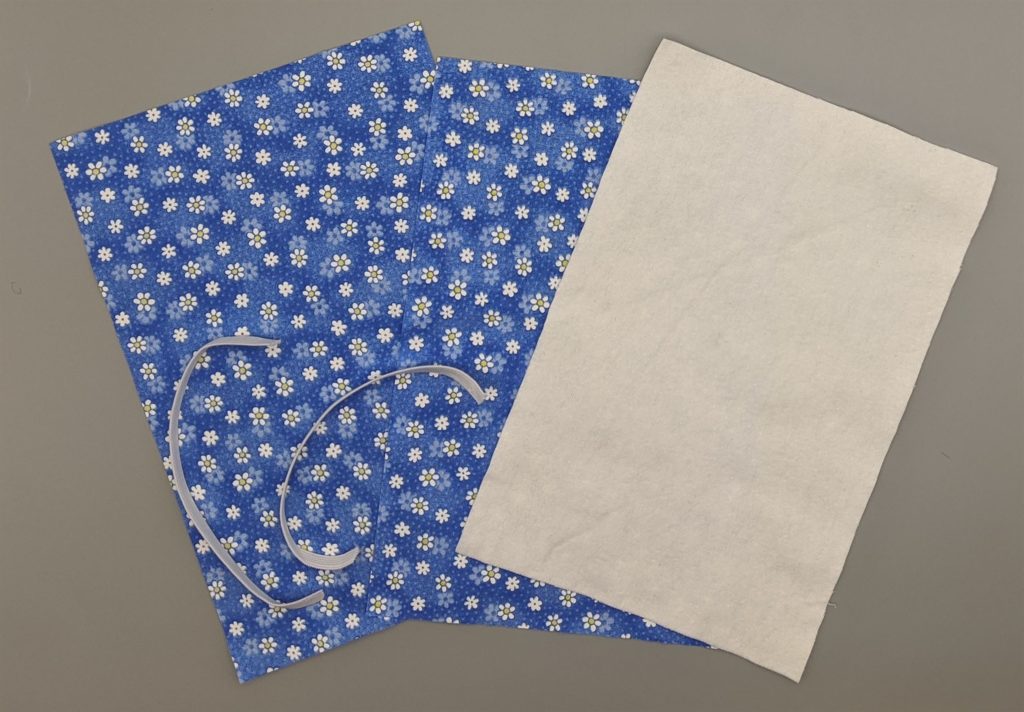
- 2 pieces of quilting cotton fabric 6.25″ x 9″
- One piece of flannel or other cotton fabric such as t-shirt knit for interlining 6.25″ x 9″
- 14″ elastic (knit elastic preferred)
- Thread
- Sewing machine
- Pattern
Step-By-Step
Cut Fabric
Cut two pieces of fabric that are 6.25″ x 9″. One is the front of the face mask and the other is the back of the mask.
Interlining
Cut one piece of fabric for interlining 6.25″ x 9″. This will go in between the two pieces of cotton. This can be flannel, t-shirt knit, muslin or other 100% cotton fabric. I imagine that fabric used to make technical clothing would also work. All fabrics used must be able to wick away moisture. Polyester is not a good idea as it doesn’t “breathe”.
Assemble the Layers
Place the piece of interlining down on your worktable. Put one piece of quilting cotton right side up on top of the interlining.
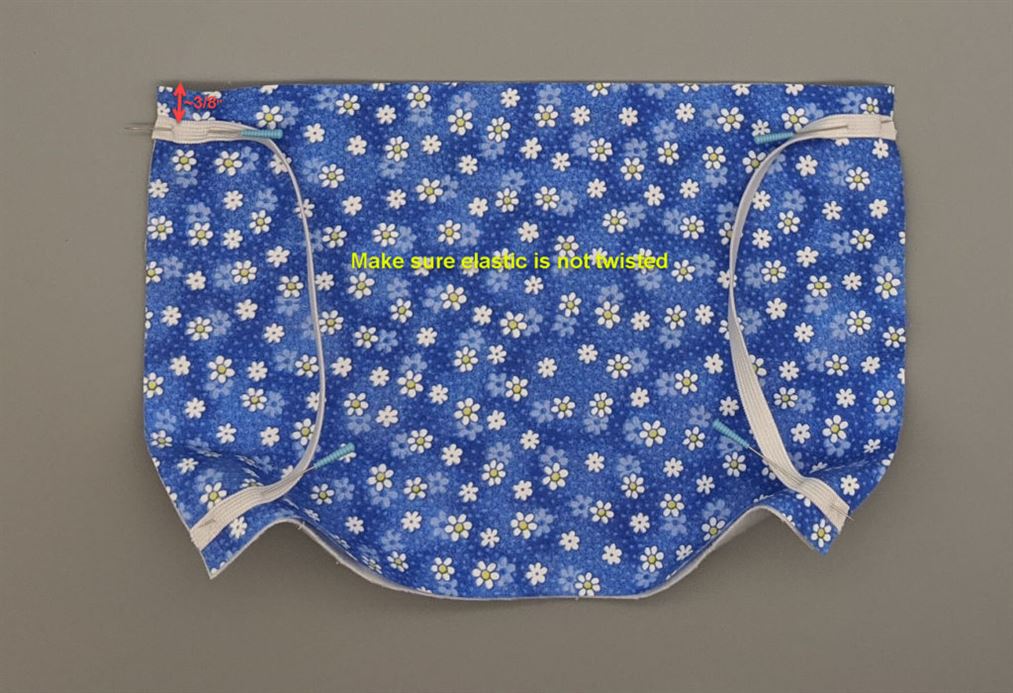
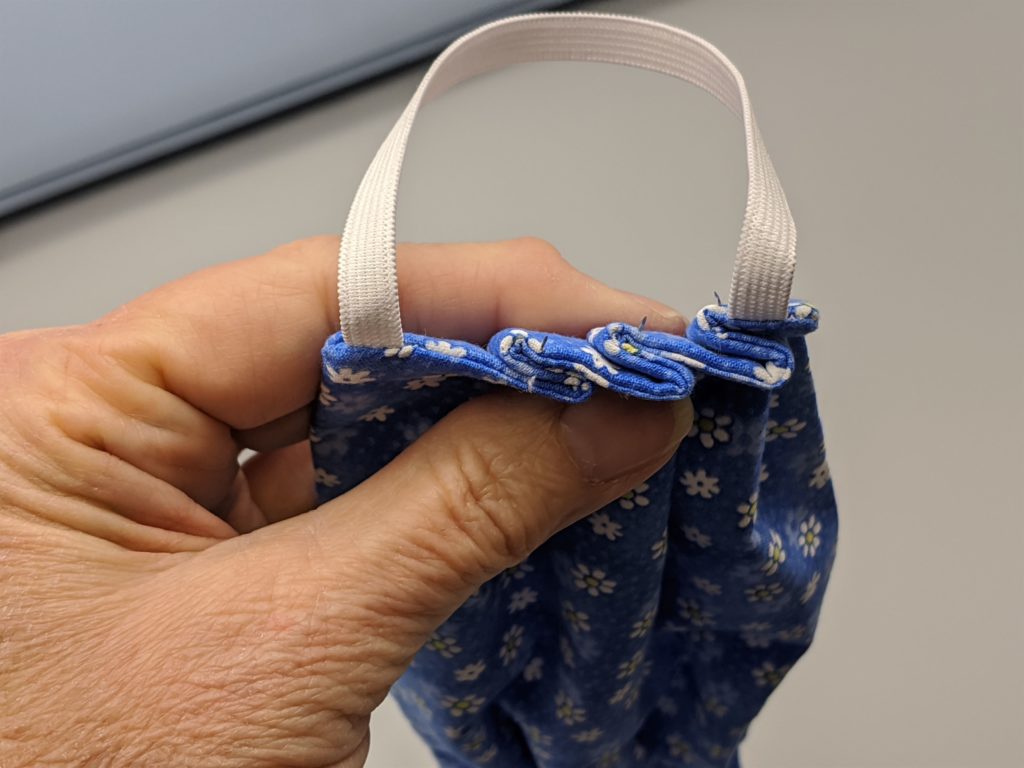
Position Elastic
Elastic is hard to come by — sort of like toilet paper, I guess! Alternatives to 1/4″ elastic are fold over elastic, hair ties cut apart, or fabric ties. Just think about what would be comfortable behind someone’s ear or around their neck when wearing the face mask.
Place one end of the 7″ pieces of elastic in the top right corner of the mask. Pin in place through the quilting cotton and the interlining.
Make sure the elastic is not twisted. Place the other end of the elastic in the lower right corner of the mask. Pin in place as before.
Repeat for the left side of the mask.
Finish Assembling the Cotton Face Mask
Lay the second piece of cotton fabric right side down on top of the mask. Pin in place. Check to make sure that the elastic is secured by the pins and not in the seam allowance.
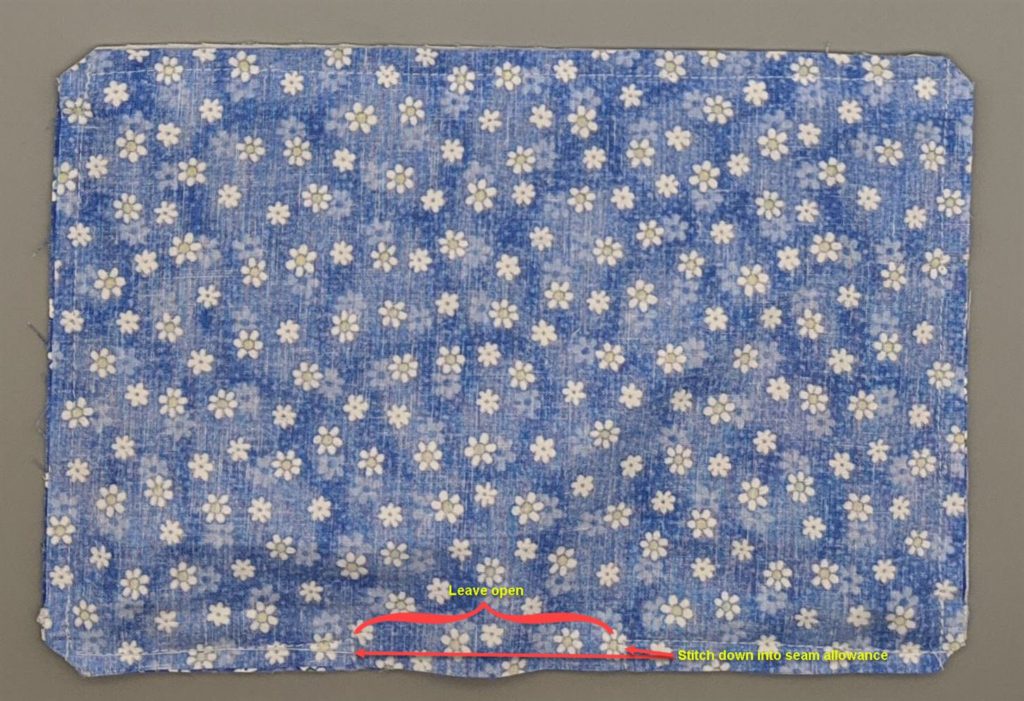
Sew Seams
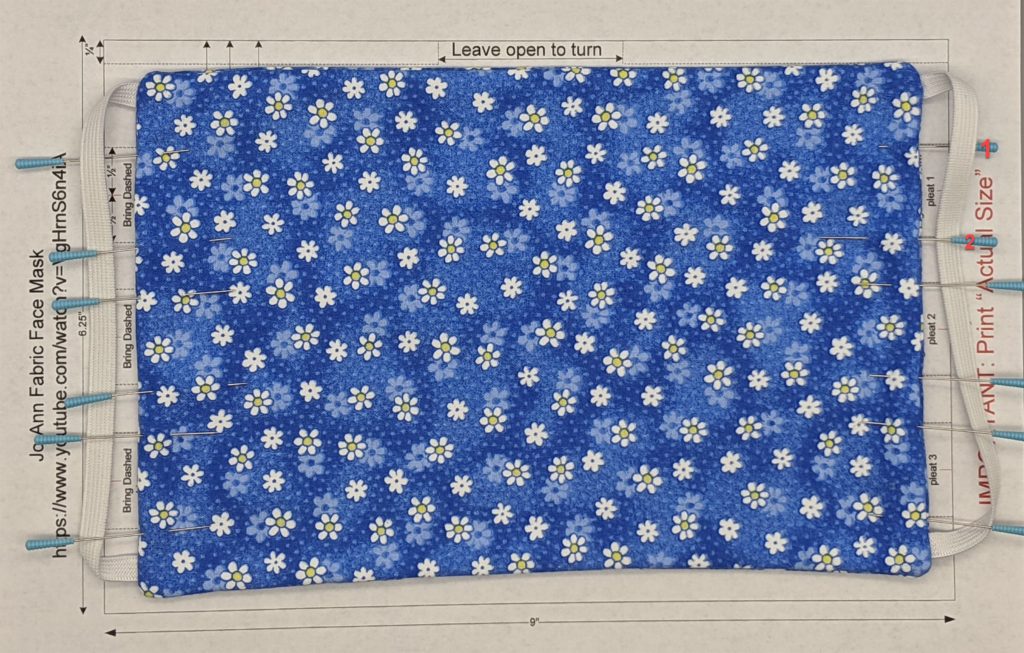
With a 1/4″ seam, stitch all the way around the face mask, leaving a 3″ opening on one of the sides or the bottom of the mask.
I like to stitch down into the seam allowance at each end of the gap. This makes it easier to turn the opening to the inside when you turn the fabric right side out and have to stitch the opening closed. (see red arrows below)
Trim corners on the diagonal.
Turn Mask
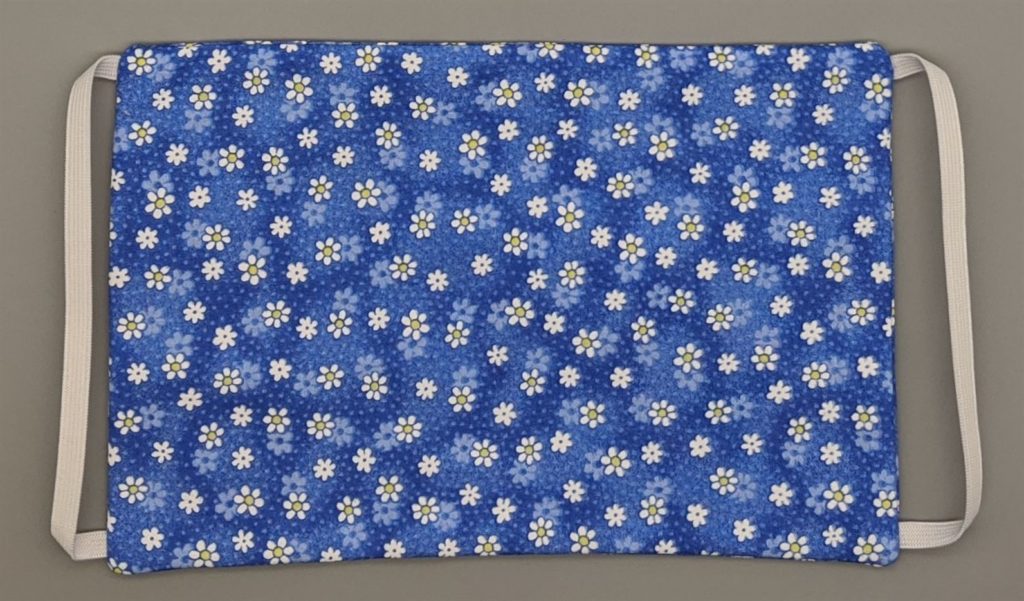
Turn mask right side out through the opening you left in the side.
Poke out the corners. (A great tool for this is the Precision Turning Tool from RNK )
Tuck seam allowance at the opening the bottom inside.
Press.
Mark Fabric
Using the pattern, make the appropriate marks on the face mask to know where to fold the fabric to create the pleats. You can mark those with a pin or an erasable fabric marker such as a Frixon pen.
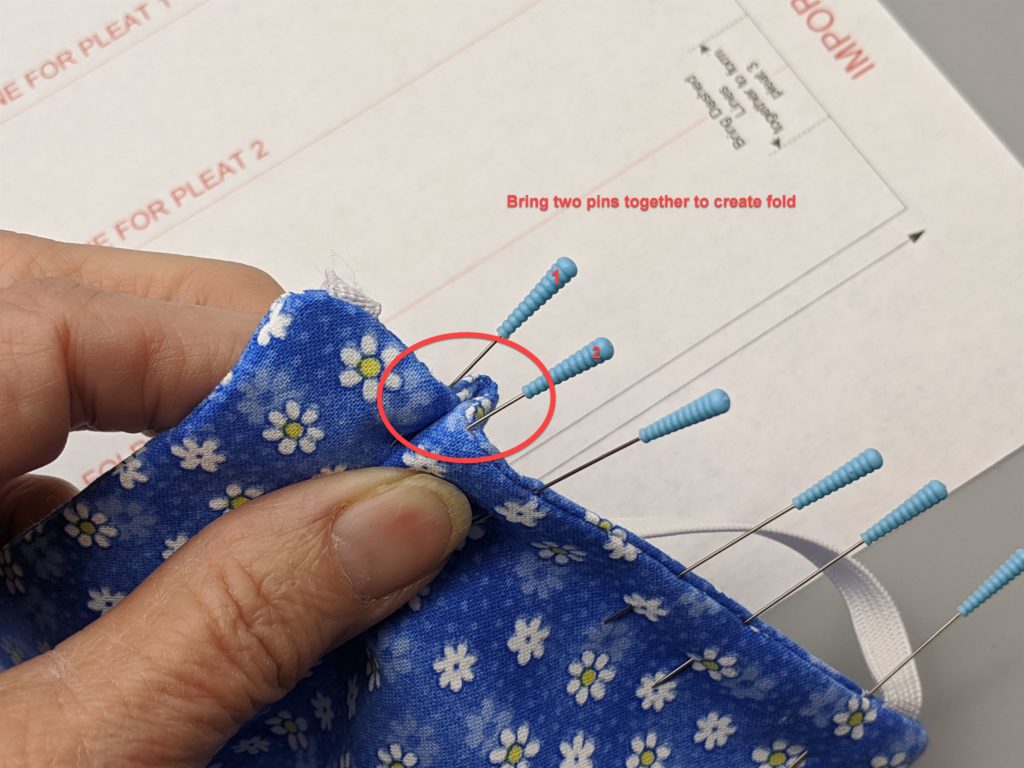
Make Folds
Fold the mask along the fold lines (fold through both layers). and place a pin 1/2″ from the fold to hold the fold together. Repeat on the opposite side of the face mask and then for the other two pleats.
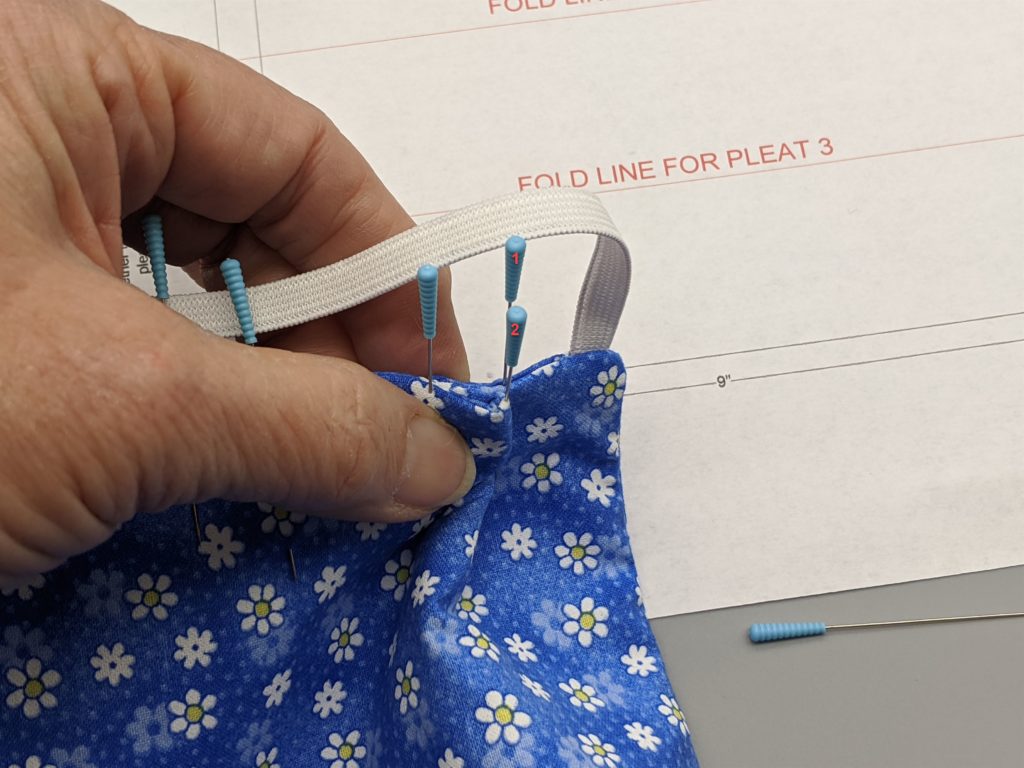
Flatten the folds so that all pleats fold in the same direction (down) and pin in place.
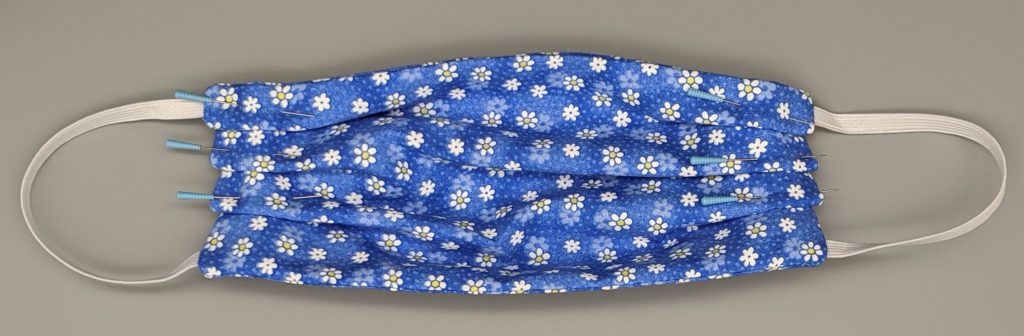
Adjust the pleats as necessary so that they don’t overlap to reduce bulk along the edge.
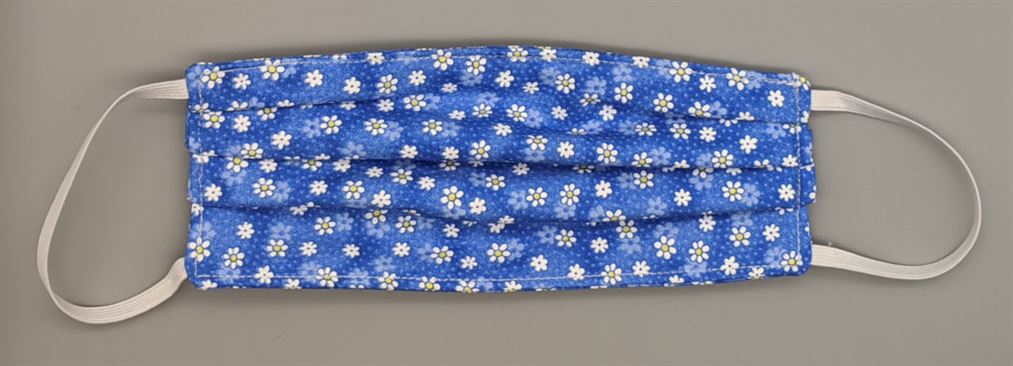
Top Stitch
Pin all the pleats in place and then top stitch all the way around the face mask, 1/8″ from the edge. This will secure the pleats and stitch closed the opening in the bottom of the mask.
Now What
We are working with D. McKenney and Macri Dental who will pick up the finished cotton face masks from our stores in the Denver area. They will then take them to be autoclaved (sterilized), and then delivered to areas of need in the Denver area.
Before you drop your completed cotton face masks at the stores, please call first to make sure some one is there to get them from you.
- Arvada — 303-404-0370
- Aurora — 720-870-2711
- Littleton — 303-979-2334
Colorado Springs Peeps
I am hoping someone in our Colorado Springs “family” knows of a similar contact that can help pickup, sterilize and deliver face masks to those places in Colorado Springs in need. If so, please email me at rockymountain.blogger@gmail.com.
Sewing Machines for Making Cotton Masks
Here are a couple popular sewing machines by Pfaff for making cotton face masks.
Thank You
To our community of sewists and crafters, thank you so much for your help in this endeavor. We love our customers and want you to stay safe, healthy and sewing. Let us know what we can do for you to help with that!
I really like the sentiment from Connie Webb of Tangled Webb Productions who wrote:
“… It is comforting to know that our families (blood and not) are wrapped with love in the quilts we made that keep them warm, the clothing we’ve stitched for them, the articles we’ve mended for them and the words of encouragement we whisper while we sew. “