In my previous blog, The Brother Luminaire. Part 1: Light Years Ahead, I showed you some of the new features of the Brother Luminaire XP1. These included the new StitchVision technology and Innoveye improvements. Now, I want to take you on a tour of the My Design Center and embroidery improvements.
My Design Center
The enhanced My Design Center integrates with industry-first InnovEye Plus Technology. This integration offers design capabilities at your fingertips. No PC required! It’s a great way to create custom, personal works of art, and a really fun way to create embroidery! Oh, and with a 800% zoom and pan tool, you can really see what you are doing.
Create
Draw or doodle directly on the LCD display, and watch it spring to action in the large drawing area. Or, use the industry-first Scanmation Scanning Frame to scan drawings, line art, handwriting, or printed clip art. Then, transform it into embroidery data. You can also import JPEG images using the USB port, and watch in amazement as the image is turned into stitch data using just the machine.
Outline Recognition for Stipple and Fill Patterns
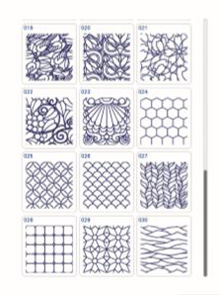
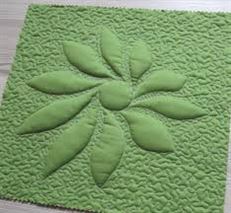
Accurately stipple anywhere on any project. Add stippling or fill to any embroidery design, whether built-in or imported. Import your new outline, choose from 30 built-in decorative fill patterns or stippling and the machine does the rest. You can even add different fills to separate sections. Plus, with the enhanced preview mode, see both the scanned design and selected stippling.
Inside & Outside Auto Stipple and Fill Pattern Capability
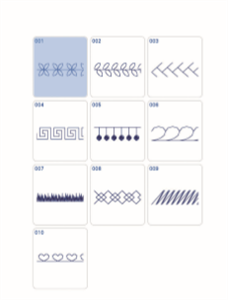
Use the built-in library of 60 closed, 30 open shapes to add interesting detail to any project. You can even combine shapes and apply inside or outside stippling. In addition, you can choose decorative fill patterns with separate stitch settings to create unique designs.
There are 12 new patterns including flipping capability.

All this with undo and redo capability as you test out different settings.
Take a look and see how easy it is!
Enhanced My Design Center on the Brother Luminaire XP1
Echo Quilting
The advanced Echo Quilting feature allows you to surround any embroidery design with beautiful echo stitches. The echo designs follow the contour of the design, and line spacing can be adjusted. Adding a creative and supple ripple effect to your embroidery design just got simpler.
Echo Quilting on the Brother Luminaire XP1
Custom Draw Stippling
Use the ScanImation Scanning Frame or draw directly on the LCD display to create your own unique patterns. Get the look of complicated freehand stippling without the use of software or stitch regulation.
Trapunto-like Embroidery
Save up to 20 shapes from embroidery outlines. With these outlines, you can give your projects a unique trapunto-look by padding areas within (or outside) the outlines.
Embroidery
Once you have completed your design in My Design Center, you have some great options for the sew out.
Hoops
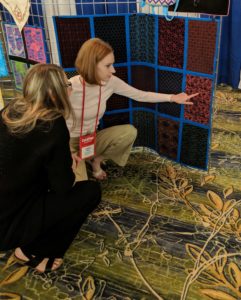
The Brother Luminaire XP1 comes with 4 embroidery hoops: 4″ x 4″, 5″ x 7″, 9.5″ x 9.5″ and a whopping 10 5/8″ x 16″.
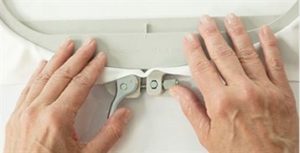
The 10 5/8″ x 16″ hoop has efficient rubber plates on both sides of the inner frame to hold fabric security. A new ergonomic Spring Lever Release enables easier, clamp free hooping. Simply place your fabric in the hoop and engage the lever. This really makes it easy on your hands when hooping fabric.
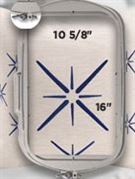
Now that’s a big hoop!

Don’t worry about the stability of that big hoop on the machine. Brother has enhanced their Accutrac system for superior stitch quality. It offers more embroidery arm support in both horizontal and vertical directions. A powerful, brushless motor for the embroidery unit provides quiet and controlled operation with beautiful embroidery output.
Did I say quiet? Yes! You won’t believe your ears are working. You can barely hear this machine when it is stitching out an embroidery design. Even in a class room with two dozen machines running at once, you could hardly hear them.
Thread Palettes
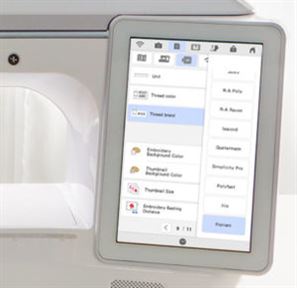
Now you can pick your threads from the Floriani collection. Brother expanded the thread color palettes in the Luminaire with the addition of Iris, Simplicity and Polyfast brands as well.
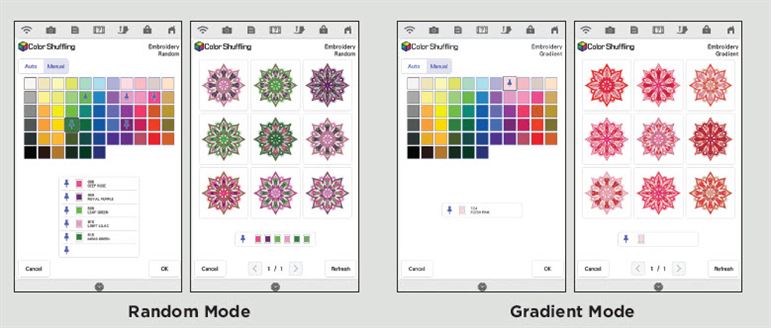
Color Shuffling
Enjoy even more options with enhanced color palettes in the Brother Luminaire XP1. Love a certain color scheme? Not sure how to combine colors? Stick a pin in your favorite colors in Random and Gradient modes. That way you ensure your favorite colors are included in your shuffle.
Built-in Embroidery Designs
Of course, you don’t have to create your own designs. Let your imagination and creativity run wild with the extensive library of over 1,100 built-in embroidery designs on the Brother Luminaire Xp1. Use designs from Anna Aldmon, Zundt, Zentangle and Pierre Josephy Redouté to create your masterpiece. Personalize them with 24 embroidery lettering fonts.


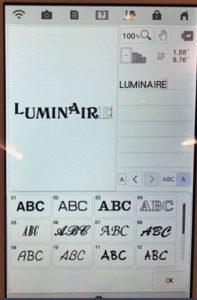
Lettering
You have the upmost flexibility in lettering on the Brother Luminaire XP1. Easily adjust the position, size, font, spacing and rotation of individual letters in your text. You get 24 built-in fonts. There is a simplified user interface for text input and editing. Quickly curve or array your text.
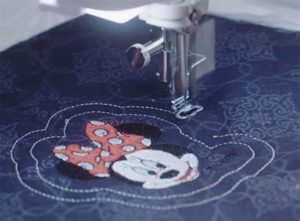
Disney
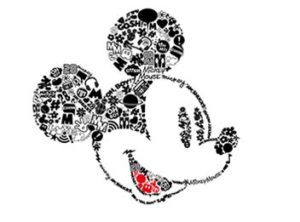
Brother says “Disney is in our DNA,” and the Brother Luminaire XP1 has 192 Disney embroidery designs built right in. It also has 10 Disney sewing stitches that can be used in embroidery. And you know, you can only get Disney on Brother machines.

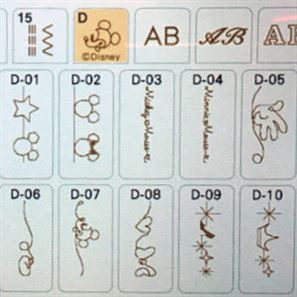
Look at this cute Mickey with word and icon fills!
You also get exclusive access to a constant parade of Disney•Pixar embroidery designs through the iBroidery.com download center. iBroidery.com provides many additional designs you can download for a fee. The licensed designs are exclusive, and only work on Brother’s Disney machines.
Accessories
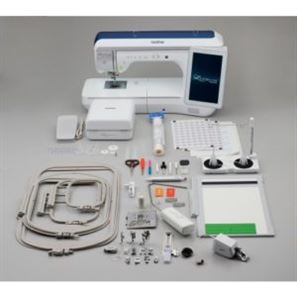
The Accessory box has 3 trays for storage, and fits nicely under the arm of the machine.
Open it and find:
- 14 accessory feet, including 3 free-motion and one piecing foot
- MuVit Digital Dual Feed system with general foot
- Camera detection buttonhole foot
- Action needle plate with enhanced guidelines
- Straight stitch needle plate with angled lines for piecing placement
- Foldable two-thread spool stand that magnetically attaches to the top cover
- Dual purpose stylus
- ScanImation scanning frame
- Large adjustable knee lever
Check out this brochure for more information on the Brother Lumunaire XP1
See the Brother Luminaire XP1 at the What’s New Party
These two blogs have only scratched the surface of the Brother Luminaire XP1. Check out our product page for the Luminaire. Also, come and see for yourself at our upcoming What’s New party. You’ll also hear about all the other new products coming your way. There’s no charge to attend the party, but we need to know how many to plan for. So please register. If you come 30 minutes early, and see some demos, you’ll get an extra door prize ticket!
Comments
Cathy Ellsaesser
When you first bring a design in from the machine’s memory, rather than use set or add, use delete and it will delete it from the machine’s memory. You have to do that before you set is. Otherwise, delete will just remove it from the screen, but it will still be in the machine’s memory.
Evelyn Metzgar
How do I delete designs that I saved to my Luminaire Innovis XP1?
Cathy Ellsaesser
So sorry, but we are not allowed to give out price information on the internet. However please give us a call at any of our four locations and someone from our professional sales staff will be happy to assist you.
RMSV Colorado Springs: 719-597-8888
RMSV Aurora: 720-870-2711
RMSV Arvada: 303-404-0370
RMSV Littleton: 303-979-2334
Bukenya brian
I look forward to your reply on email or WhatsApp number +256700150252
Cathy Ellsaesser
Not sure what you’re asking about. Do you mean line drawings you have scanned?
Margie
Thank you! Is there a way to delete saved outlines. I have unnecessary duplicates
Cathy Ellsaesser
I believe you have the grid and cross-hair turned on globally. To turn them off, go to to page 8 of 11 of the settings and, under Embroidery Frame Display you will see Frame Size and Grid. Touch Grid and a pop up will show 5 icons. The top icon is to turn the cross-hair on, the second icon turns the grid on and the third icon turns both off. Touch the third option and the grid and cross hair won’t be displayed.
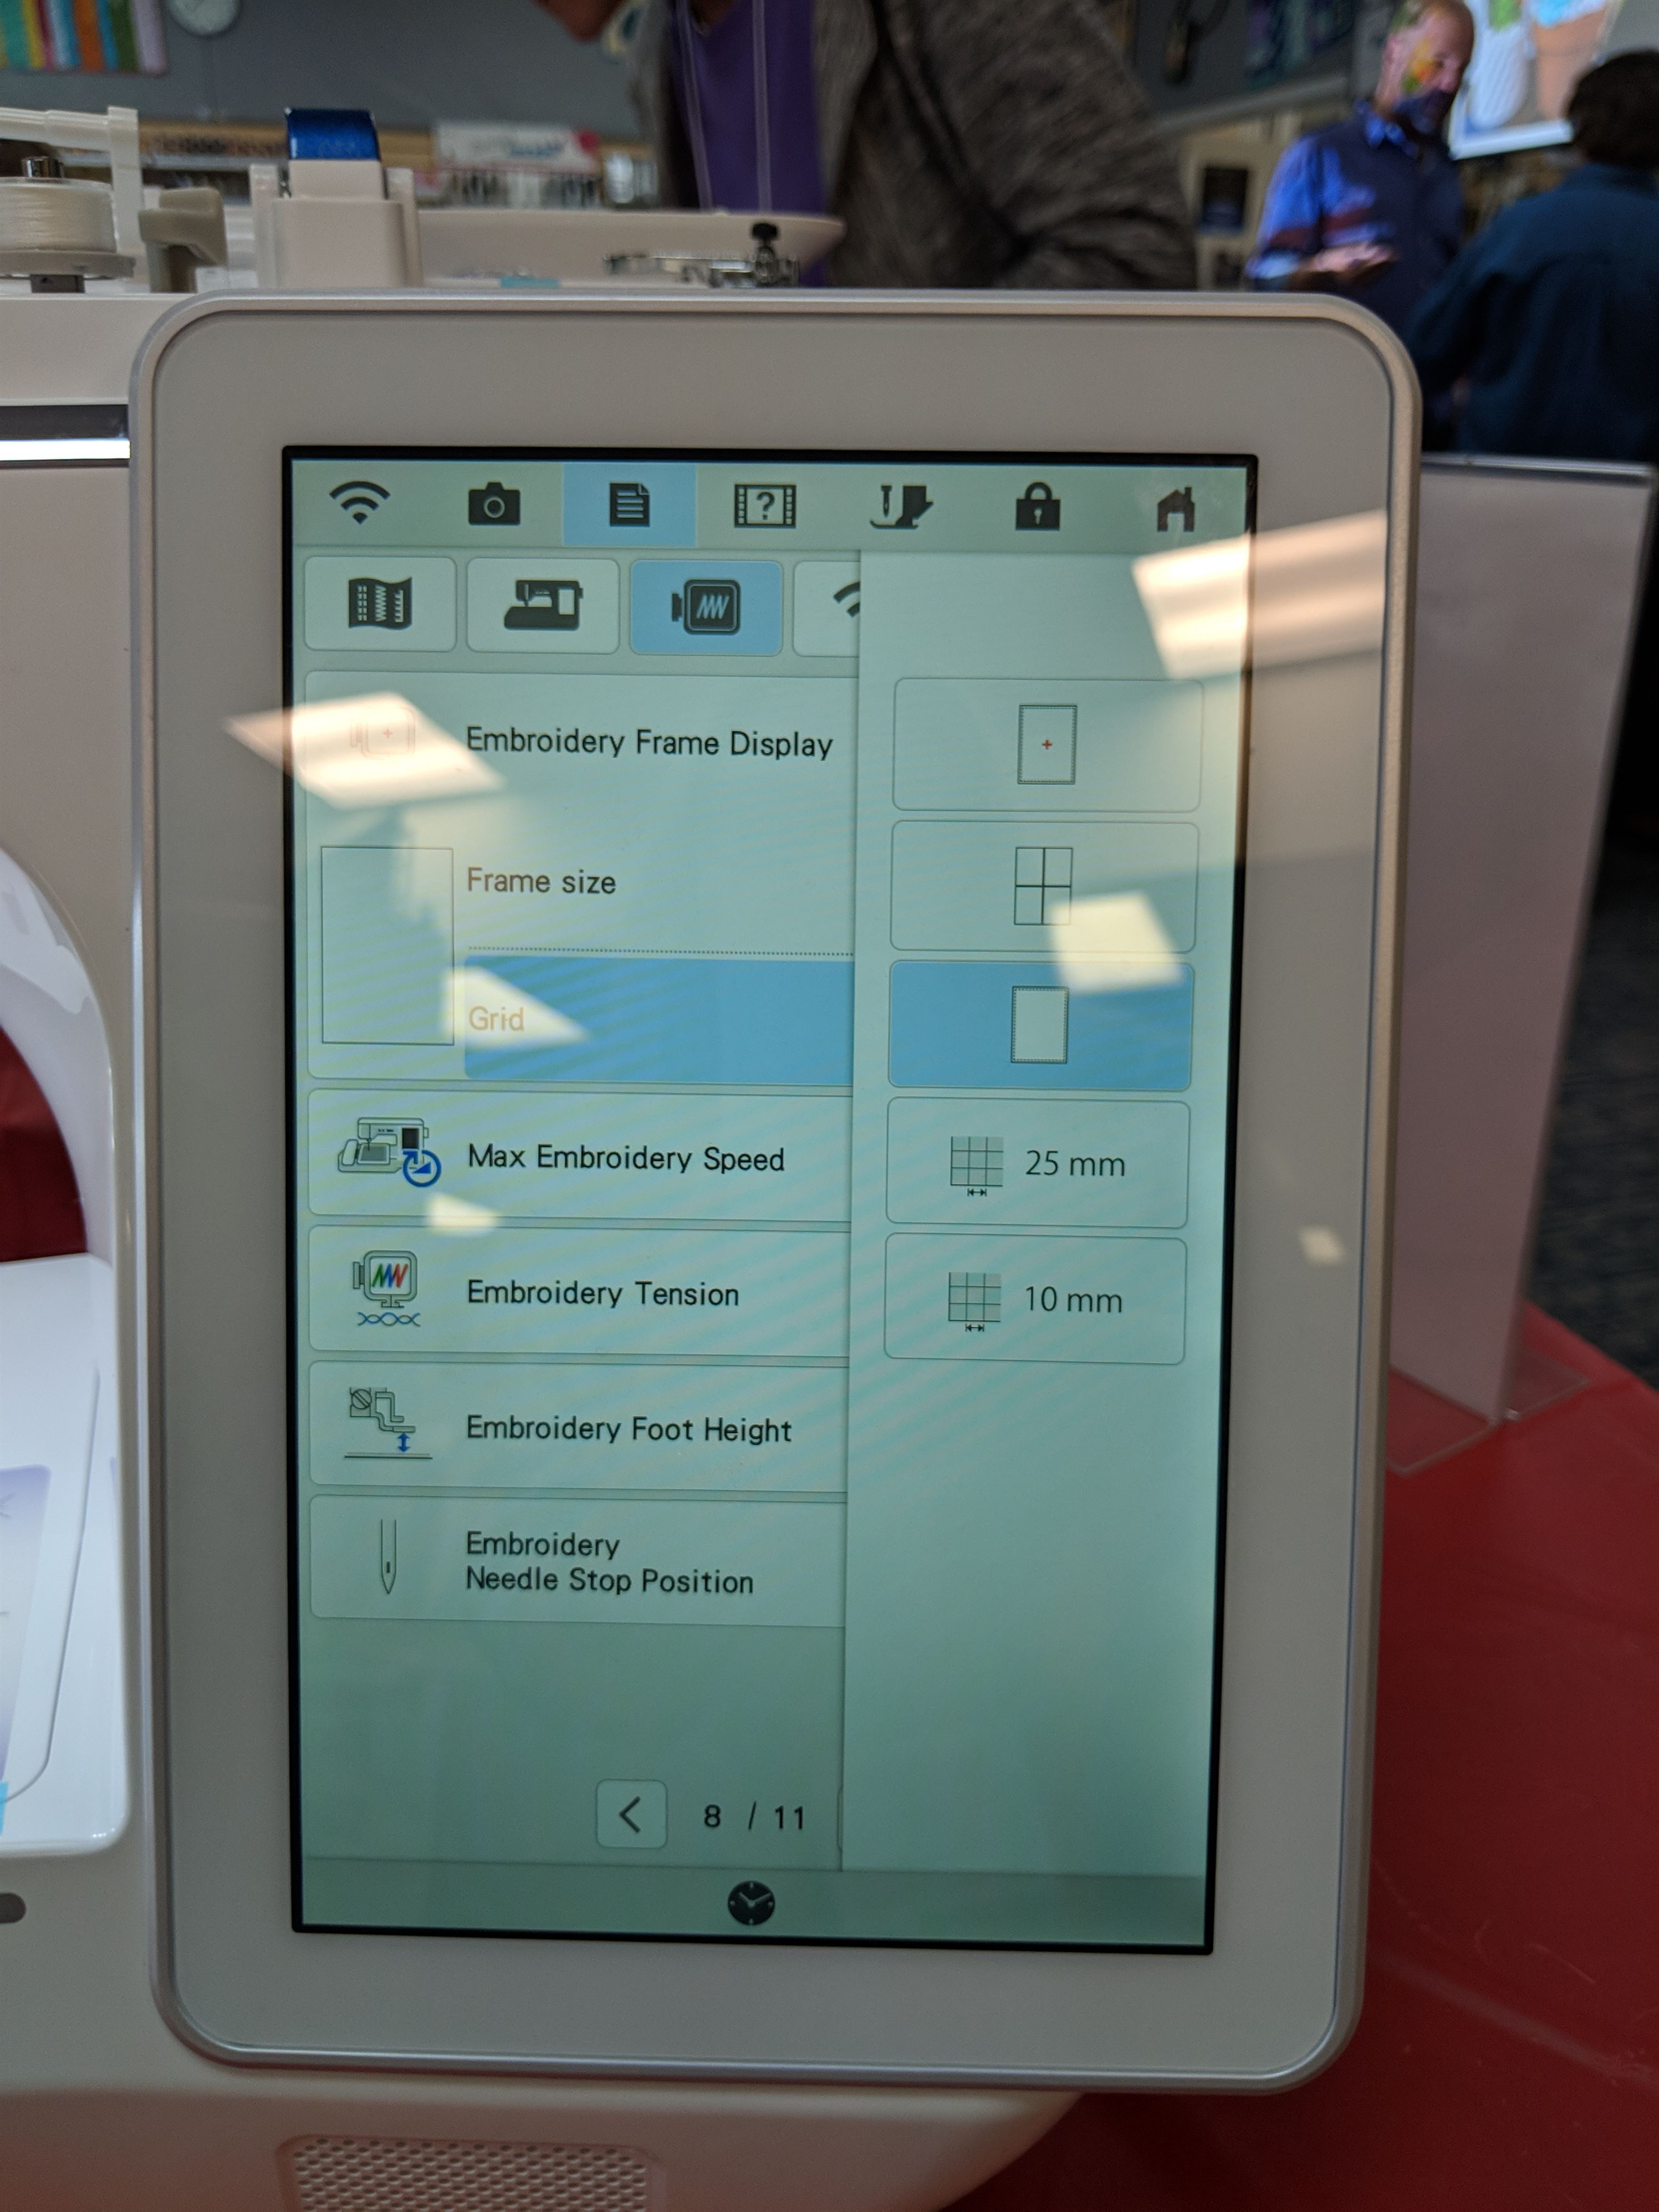
Screen 8 of 11 on Luminare set up pages.
I hope this helps. If not, let me know and send a photo of your screen and we’ll see what we can figure out.
Cathy Ellsaesser
I am not sure what you are seeing, but I am guessing you have the grid turned on. I do not have a Luminaire at home, so next time I’m at Rocky Mountain Sewing and Vacuum, I’ll get on a Luminaire and see if I can figure out what you’re seeing and how to turn it off. Sorry I can’t be more help right now, but I’ll reply back as soon as I get an answer for you. In the meantime, if you can take a picture of your screen and post it, that would help.
kay
how do I get rid of the dotted square with a re cross in the center when I go to My Design Center?