I had the great privilege to attend the Brother convention last week, and was able to see first hand and use the Brother Luminaire.
I’ll try, in this blog, to give you a preview of some of its features, but, trust me, you have to see it for yourself. There are so many wonderful features, it will take more than one blog to tell you about them.
Before the great unveiling, we were told very little, other than it was revolutionary, technologically advanced, fast, and quiet. Well, it certainly lived up to those adjectives and more.
The Engineers at Brother really listened to their customers, and made some wonderful improvements to their top-of-the-line machine. However, improvements are only part of the story. Perhaps the most stunning feature of the brother Luminaire is the built-in projector providing StitchVision Technology.
StitchVision Technology
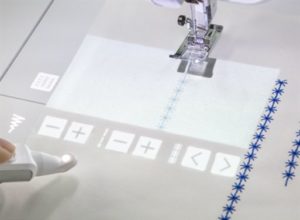
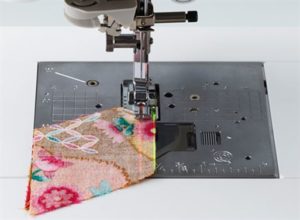
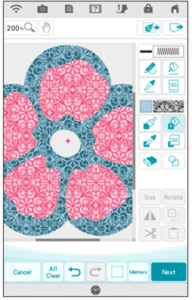
Preview, audition and edit designs and stitches directly on your fabric with StitchVision Technology on the Brother Luminare. This revolutionary new system provides virtually perfect stitch positioning. Get more precise previews via an intelligent projection of light. Choose your desired sewing stitch and watch in amazement as the stitch is projected onto the 5″ x 3″ virtual preview area. Seeing is believing!
Not only can you see the stitches projected onto your fabric, but you can also make adjustments to your stitches directly on your fabric. Adjust your stitch width, length, and left/right shift using the revolutionary stylus. Want to choose a different stitch? Easily switch your stitch design by pressing the left or right arrow keys using the stylus.
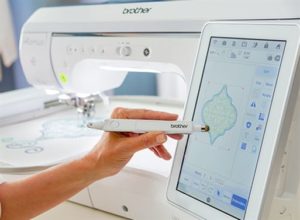
Of course, you don’t have to do everything on the projected image. The stylus’ soft tip works on the LCD display, allowing you to select, move or enhance projects directly on the display.
Guideline Marker Line and Guideline Marker Grid
The 5″ X 3″ virtual preview area also displays a guideline marker in single, double, angled and grid lines. Use gridlines for creating multiple rows of parallel stitching. Imaging the ease of creating pin tucks, hems, curtain rod pockets, decorative stitches, cross hatch quilting, or smocking.
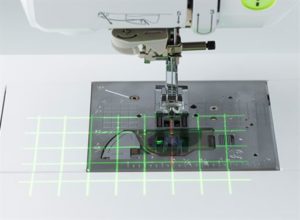
When creating mitered corners, sashing strips, or Y seams, diamond cross hatching or square corners, use the projector to preview your angle lines. You can set those to 45° or 60°.
You can switch colors of the guidelines and have them both red, or green, white or combinations of two of the colors. How’s that for flexibility?
Precise Placement of Embroidery Designs
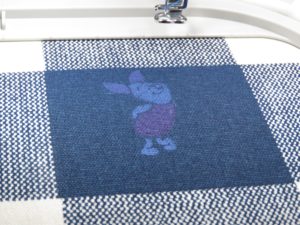
Use the StitchVision Technology for virtually perfect placement of your embroidery designs. After choosing an embroidery design, select the StitchVision Technology icon on the LCD display to see your embroidery design projected on your hooped fabric. So you get a realistic preview before you begin embroidering.
Easy-to-View Embroidery Pointer
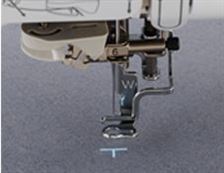
A built-in embroidery pointer is shown as a “T” mark on your fabric. Three color choices ensure visibility regardless of fabric color. The pointer can show the center of your embroidery design as well as the needle drop position on the fabric.
Innoveye Plus
We still have the wonderful camera built in to the Brother Luminaire. In fact, it’s like having a built-in camera and scanner! The ability to scan the entire embroidery area provides virtually endless creative options and helps ensure that all your projects are perfect.
The InnovEye Plus Technology has been enhanced to give you an even more precise and accurate experience. The high resolution camera viewing area now scans your embroidery area up to 400% wider than before. In addition, InnovEye Plus Technology has faster scanning speeds than prior models, so you can spend more time creating, and less time waiting.
Auto-Split of Large Quilting Sashes
Using the Snowman Embroidery Positioning Marker, now you can easily connect your patterns for beautiful quilt block borders. Choose from 10 built-in motifs.

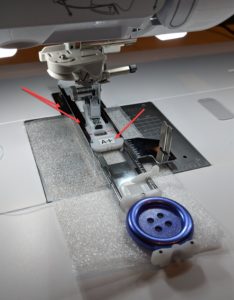
Camera-Detecting Buttonhole Feature
Need to create a buttonhole for a shirt, jacket or blouse? The InnovEye Plus Technology uses an A+ sticker to detect the button size and automatically determine what size buttonhole to make up to 47mm! And with the innovative stabilizer plates, twisting or stretching of the fabric is eliminated.
Watch it in action:
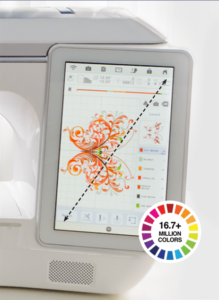
The Brother Luminare 10.1″ HD LCD Touch Screen Display
The simple and intuitive 10.1″ capacitive touch screen works like a tablet. You can easily slide, swipe, scroll and pinch-to-zoom. The user interface offers large, defined crystal-clear icons, and color navigation for easy viewing.
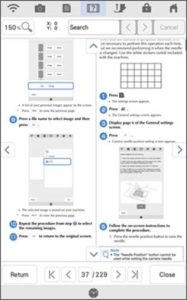
Built-in Instructional Manual and Tutorial Videos
Built-In tutorials in HD make learning easy! View over 30 tutorial videos, or stream your own creations using the industry standard MP4 format. As updates and new features or tutorials are released, they’ll include instruction manuals that will automatically be updated on the machine.
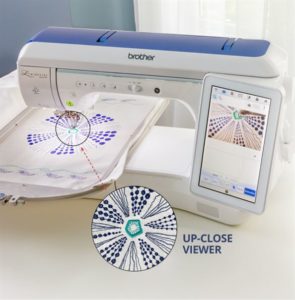
Zoom and Adjustment Features
View your creations in crisp, vivid color. Watch them become larger than life with the zoom function of up to 800% within My Design Center, and up to 200% in other modes. Easily adjust your design by rotating in 0.1 degree increments.
The Brother Luminaire Workspace
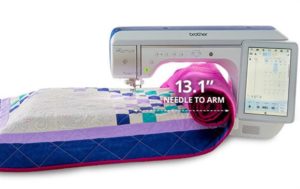
Experience the freedom and comfort of sewing on 65 square inches of workspace. This gives you the power to handle virtually any project with ease. A generous needle to arm distance of 13.1″ is our largest ever, able to fully accommodate a rolled king-sized quilt.
A scratch-resistant surface helps to reduce glare and allows smooth fabric feeding.
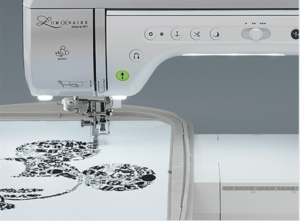
Enhanced 13″ LCD Lighting Area
Lighting is now more brilliant than ever before! The powerful, high-color 13″ LED lighting around the needle on the Brother Luminare keeps your workspace bright, with less glare and shadows, making it easy on your eyes. Regulate the brightness between five settings, including an “off” mode to find your ideal level.
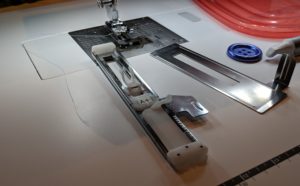
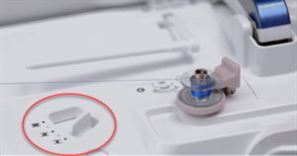
Needle Plate
No more screws to undo when changing the needle plate. Simply press a lever. No screwdriver needed! What’s more there’s a convenient storage compartment on the sewing unit to store an additional needle plate. In addition, enhanced guidelines make it easier to sew precise seams than ever before.

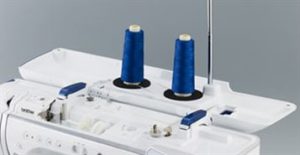
Dual King Spool Thread Stand
Open the top cover to easily attach the included magnetic Dual King Spool Thread Stand. No need to remove the top to attach it. This space saving innovative stand helps ensure proper thread delivery as well as prevent broken stitches and uneven tension.
Bobbin Winding
Only need a partial bobbin? Choose one of 5 settings on the separate bobbin winder for partial amounts. Choose the winding speed as well. Of course you can wind a bobbin while you’re embroidering.
And That’s Just the Beginning!
In another blog, The Brother Luminaire Xp1: Part 2 Embroidery and My Design Center, learn more about the Brother Luminaire, including My Design Center and new embroidery features. In the meantime, think about what you can embroider in a 10 5/8 x 16″ embroidery hoop! Check out our product page for the Luminaire for even more information.
Of course you can see this machine at our upcoming What’s New parties. Click here to register.
Comments
Megan McCabe
We don’t have a video on that at this time, however your machine has a tutorial for it built in under the video and tutorial tab on the top of the screen! Hope this helps!
Deb
I’m trying to use a double needle are there any directions on it?