
Many new embroidery collections that feature appliqué now come with .svg cut data for your cutting machine. But, did you know that you can create appliqué cut data from appliqué designs that feature that don’t have accompanying .svg files? With Brother or BabyLock embroidery machines, you can take any .pes file that has appliqué elements and create the information for your ScanNCut to use.
Appliqué Basics
Appliqués set up for machine embroidery usually have three types of stitches associated with them: the placement/outline stitch, the tackdown stitch and the cover or border stitch.
Placement Stitch
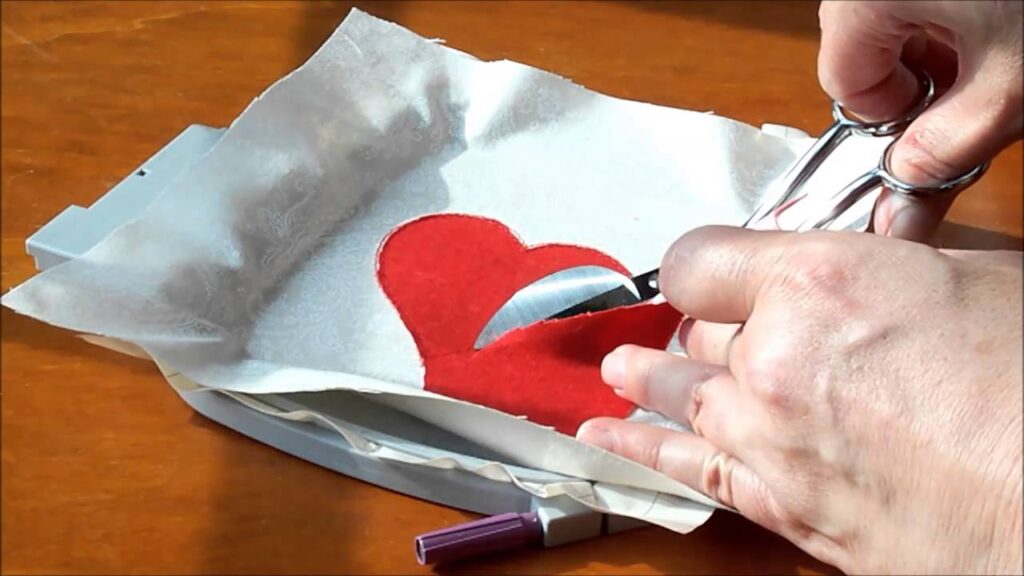
The placement stitch is a single line of stitching that indicates where to place the appliqué material. Use your ScanNCut to create appliqué material that is cut to the exact size and shape needed for the appliqué. This type of appliqué often has some sort of fusible webbing on the wrong side to secure the appliqué in position before tacking it down. Another method involves placing a piece of fabric over the placement stitch and then cut it to shape after the tackdown stitch. (See photo below.)
Who wants to do that when you can have a piece cut to the exact size and shape?
Tackdown Stitch
The tackdown stitch is generally inset slightly from the placement stitch so that the edge of the fabric is caught by the stitching. If you are cutting the fabric in place after the tackdown stitch, use curved scissors or duckbill scissors to snip away the excess fabric, cutting as close to the outside of the tackdown stitch as possible.
Cover Stitch
A satin or blanket stitch usually serve as the cover stitch, although some decorative stitches are also used. Of course, with raw edge appliqué, there is no cover stitch.
Appliqué Cut Data on The Brother Palette
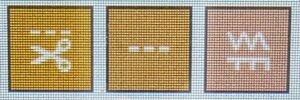
Many embroidery machines that have editing capabilities have multiple palettes to pick from in selecting thread color. Although other brands of machines like Janome, Bernina and Pfaff may have the ability to load different palettes, including the Brother palette, only Brother and Baby Lock machines have the capability to save designs in the format needed by the ScanNCut. These files have the extension .phc or .phx which the ScanNCut can “read”. This palette is called “Embroidery”. This palette has three unique colors reserved just for telling the machine that you are creating an appliqué.
The “Embroidery” palette is loaded on the high-end Brother Luminaire, as well as many of their other machines like the Innovis 3500. I also checked several Baby Lock machines, and they also had the Embroidery palette built in.

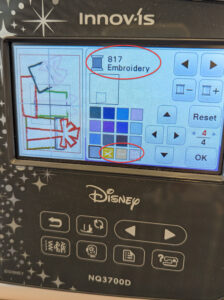
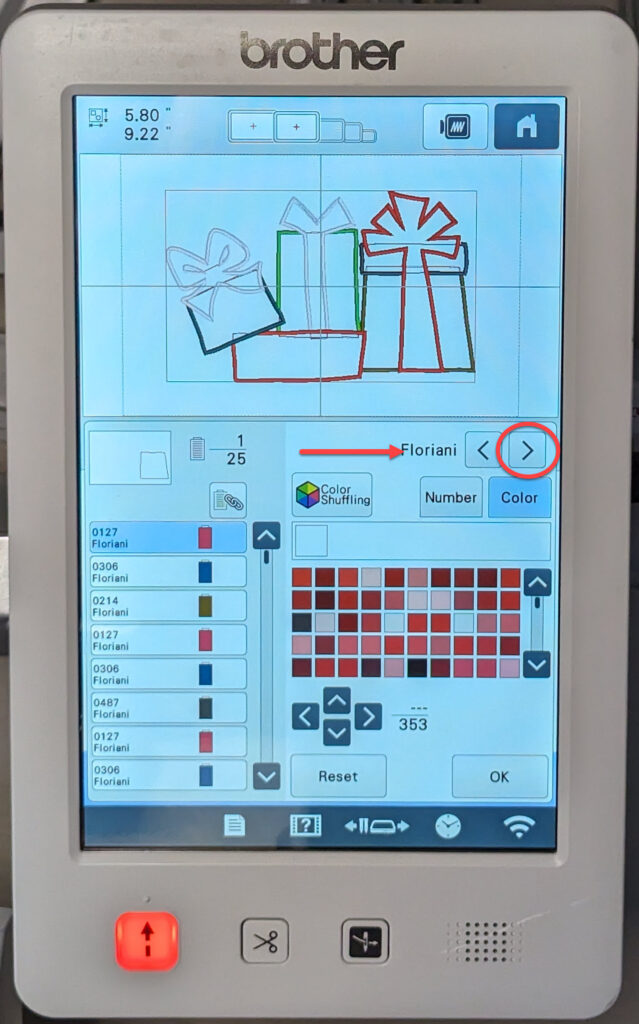
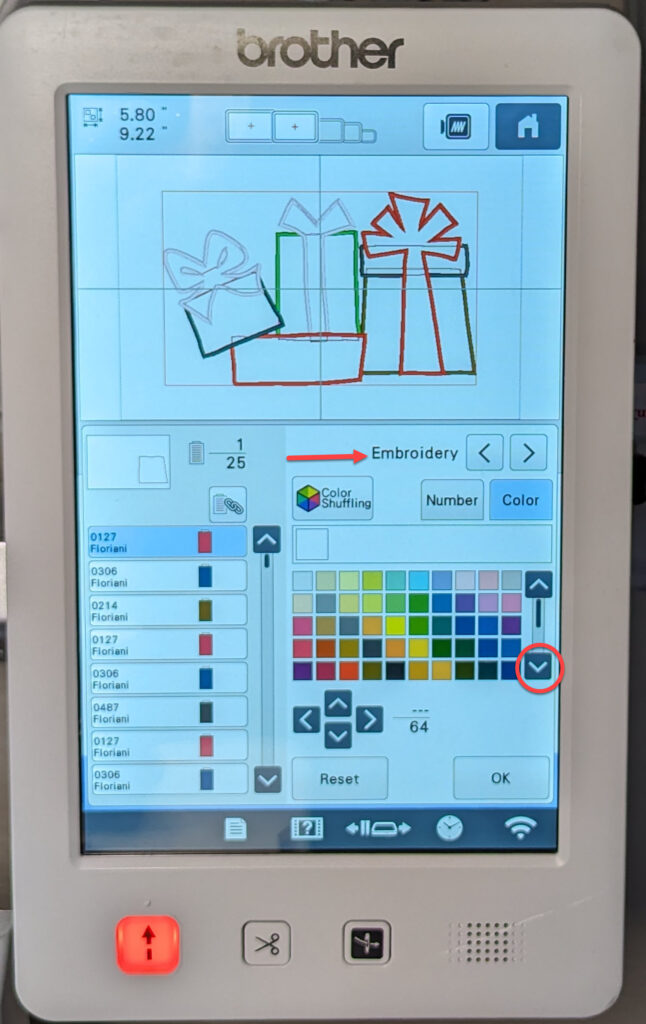
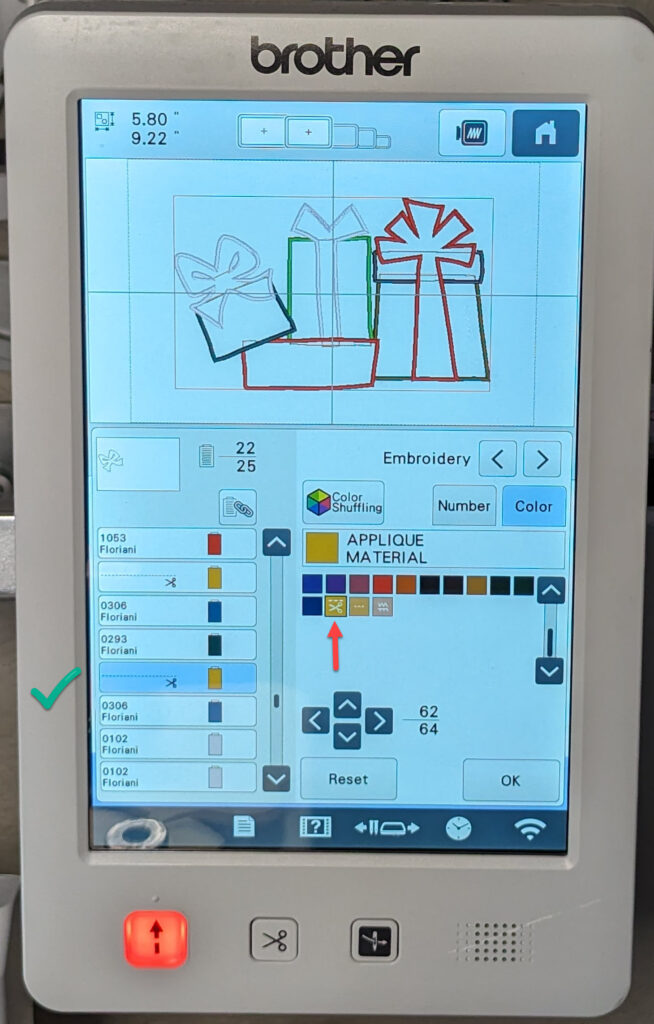
Select the thread color chart on your machine. If necessary, use the arrows to scroll through the palette options to find the one called “Embroidery”. If the entire thread chart is not visible, use the scroll function (circled in red below) to see additional colors. The thread assignments for the placement, tackdown and cover stitch for appliqués are usually the last on the chart.
Create Appliqué Cut Data by Changing the Colors of the Design
Load the .pes file with appliqué into your embroidery machine.
In all likelihood, appliqué designs that are provided by Brother or Baby Lock already have the correct color assigned to indicate it is the placement stitch for the appliqué . However, if you are using another design like from OESD or other design provider, you must change the colors assigned in the design for the placement stitch to the one recognized by the ScanNCut as cut data.
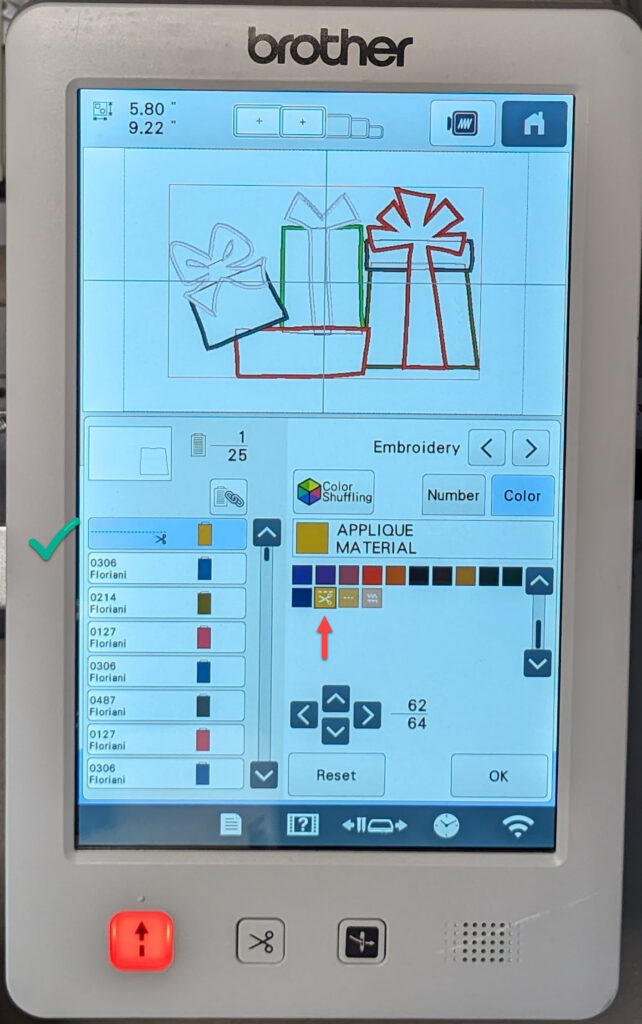
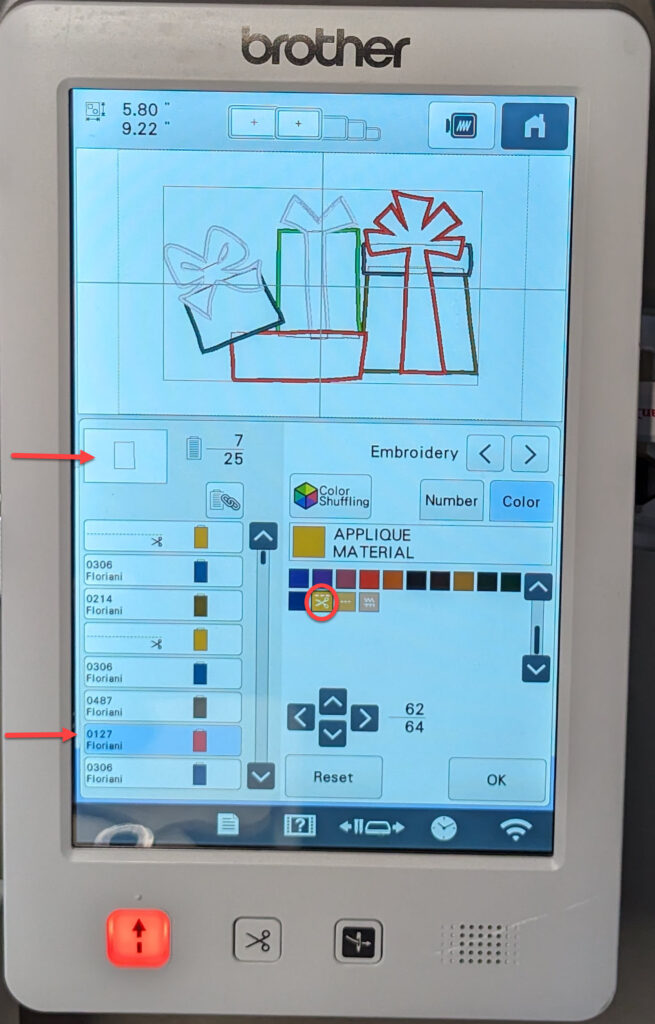
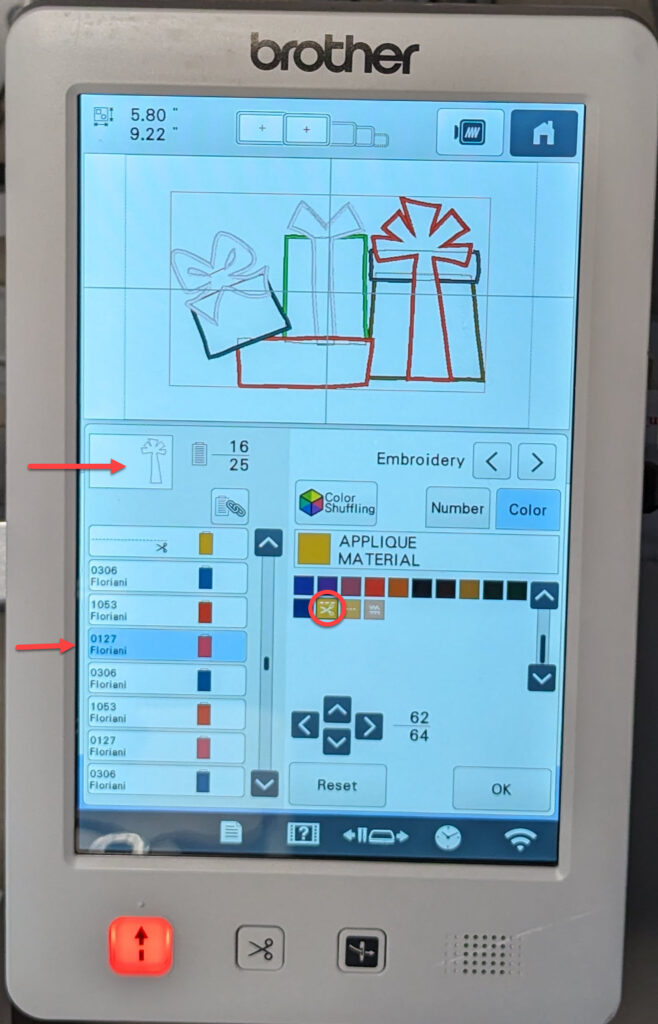
Find the steps that are the placement stitches of any appliqué parts in the design.
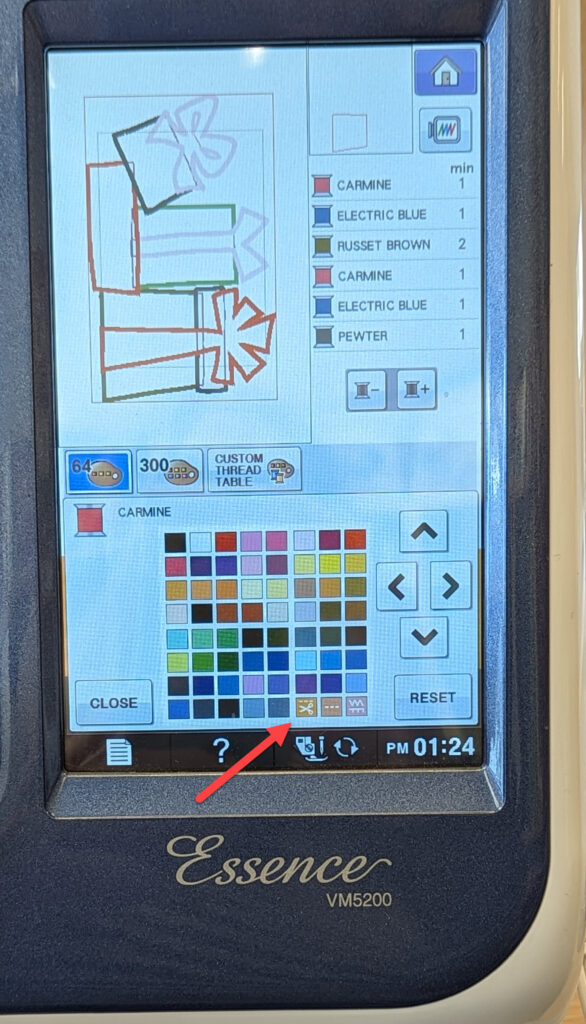
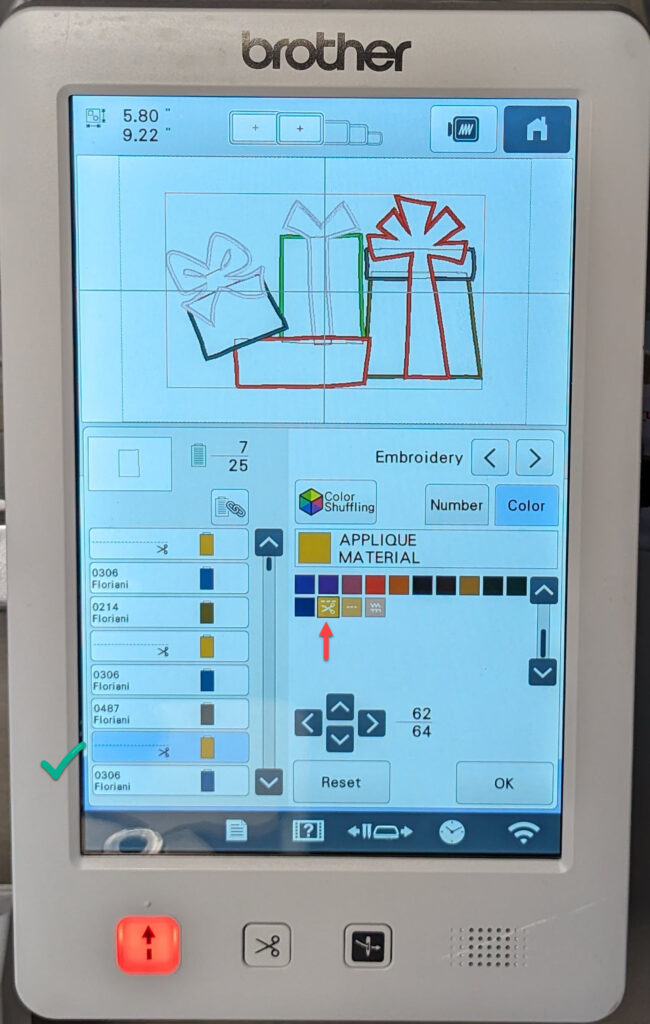
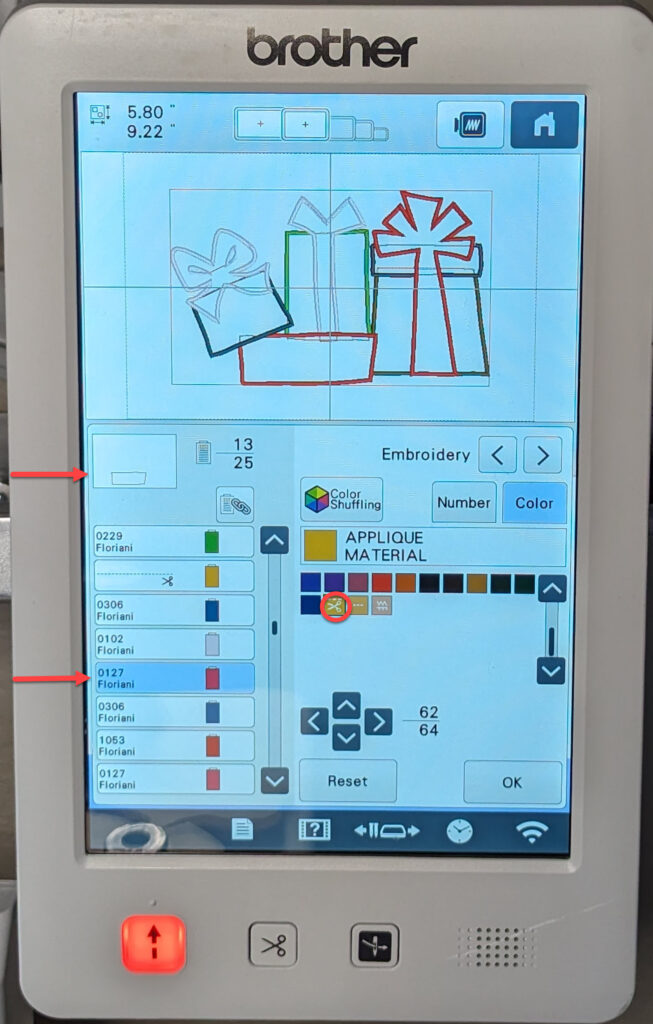
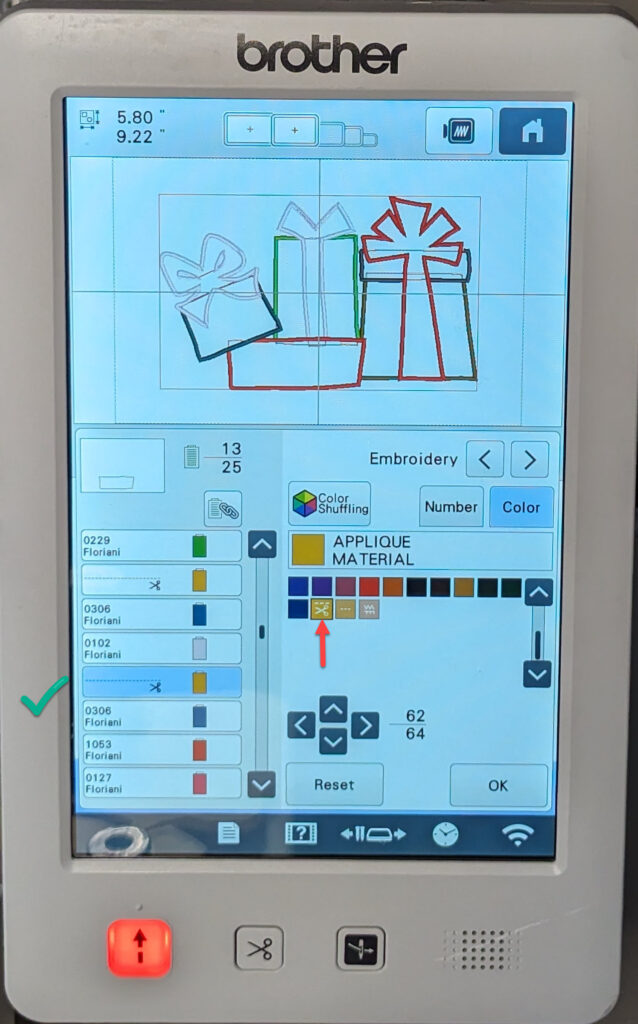
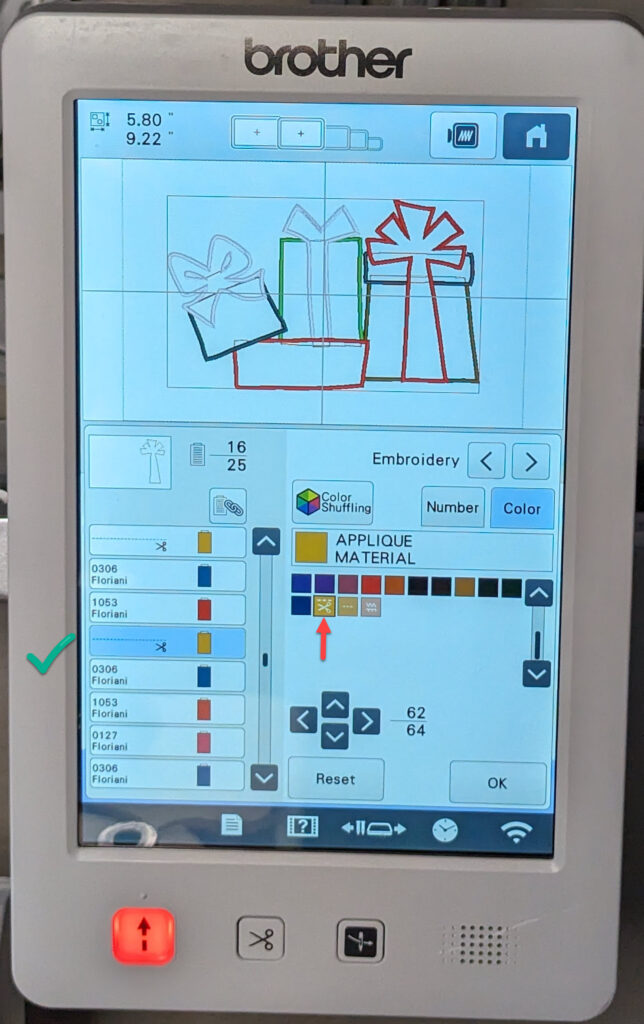
Change the color for the placement stitch to the specific color for that function in the Brother palette (the one with the scissors).

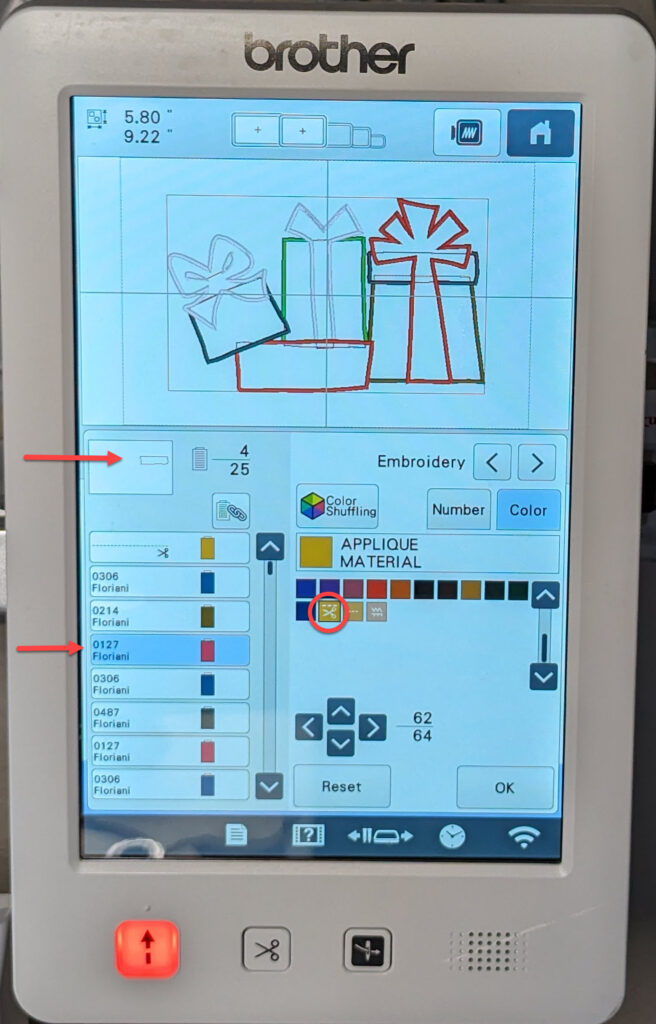
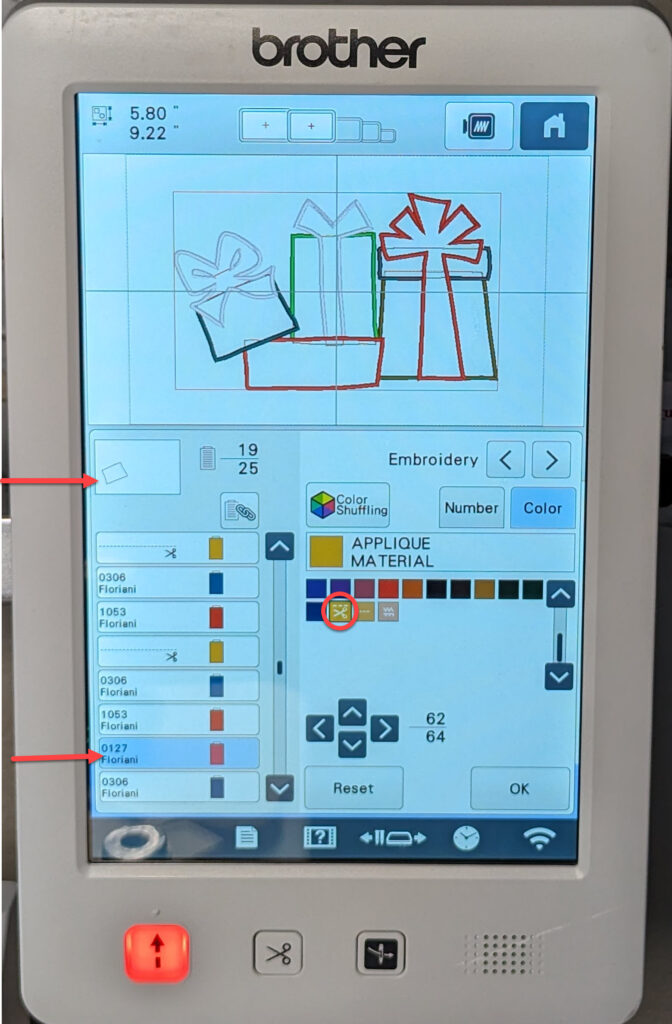
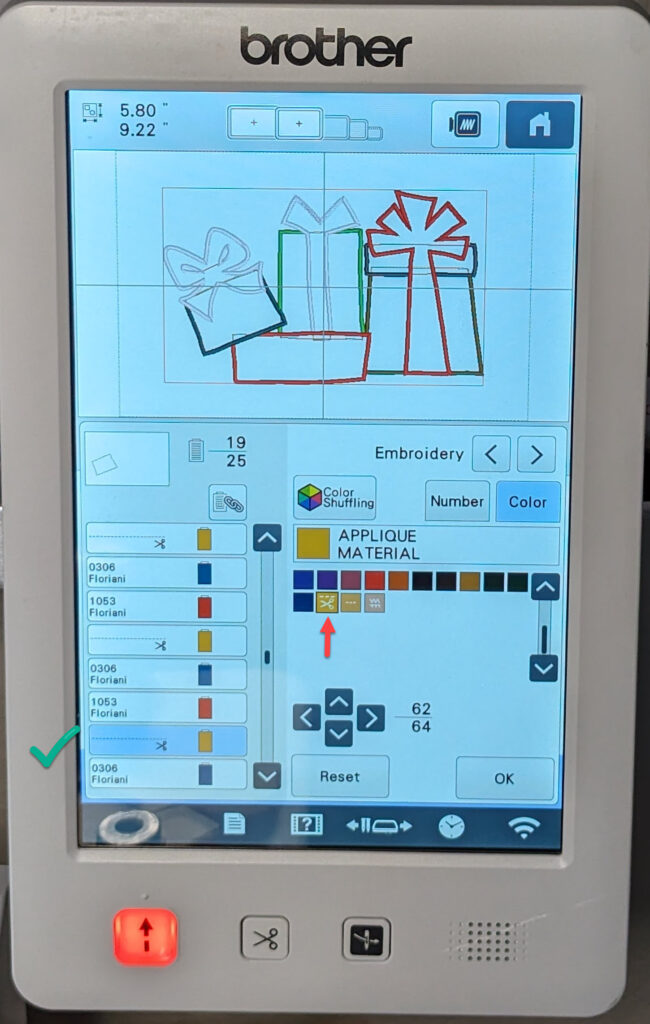
If there is more than one appliqué element, go through the design and change the placement stitch for those elements to the specific the appliqué cut data.


If desired, change the thread type to the one for the tackdown stitch . However, this is not necessary for the ScanNCut.
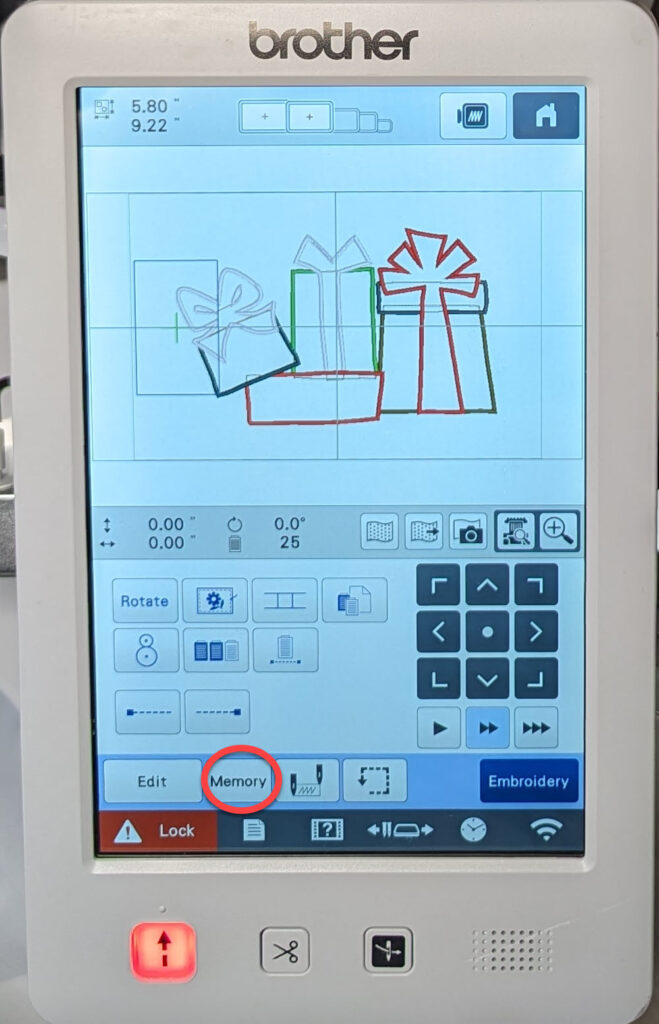
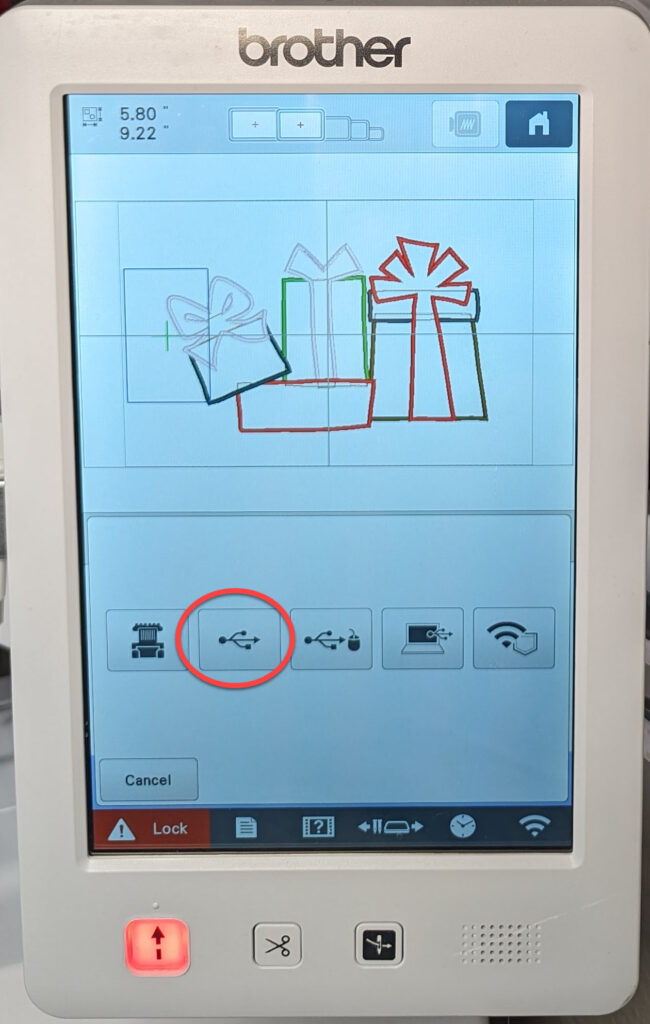
Save your design to a USB stick.
NOTE: If you have a Luminaire or other wifi enabled machine that is paired to your ScanNCut you can send it wirelessly (not shown).
Depending on your machine, the saved design will have either a .phc or .phx extension. It will not be a .pes file!
Retrieve Appliqué Cut Data on the ScanNCut
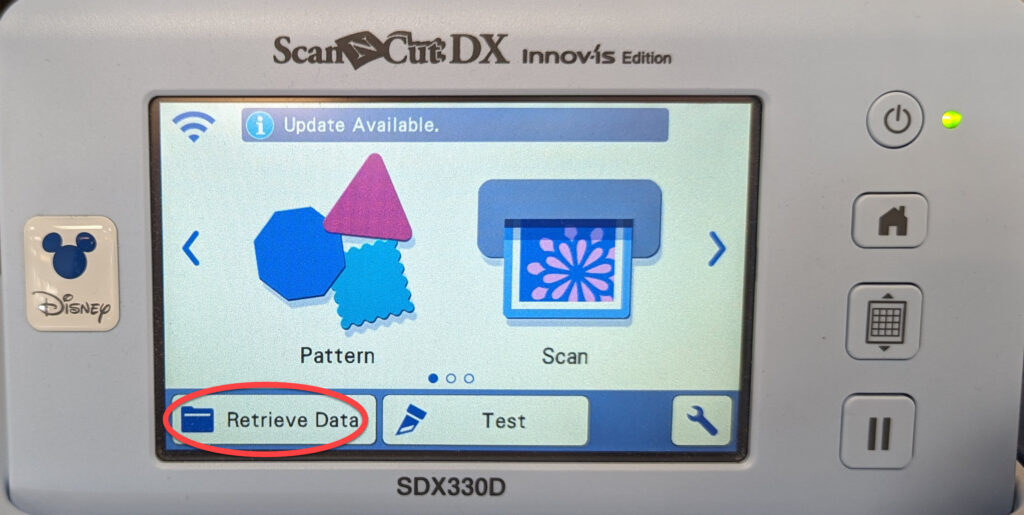
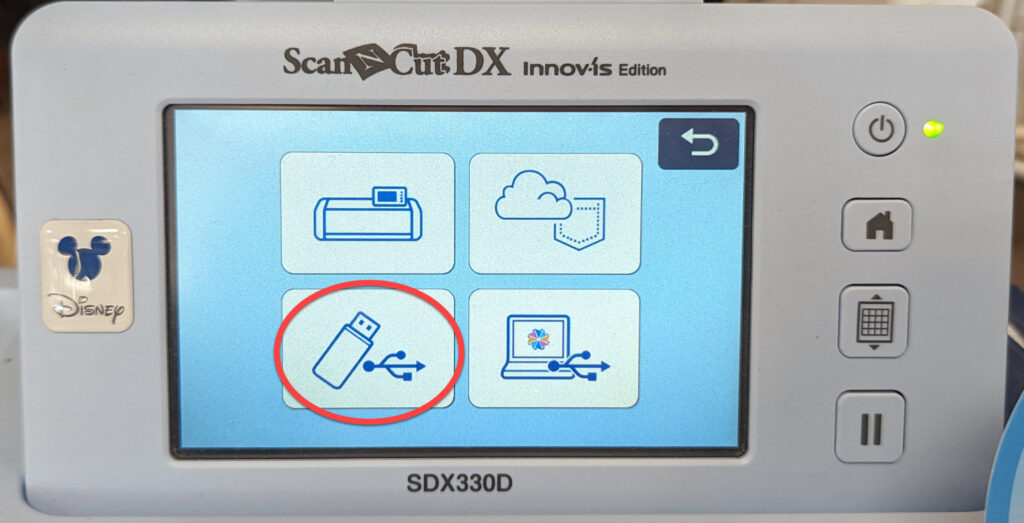
Now, place the USB stick in the ScanNCut and select “Retrieve Data”.
Select the USB stick as the source.
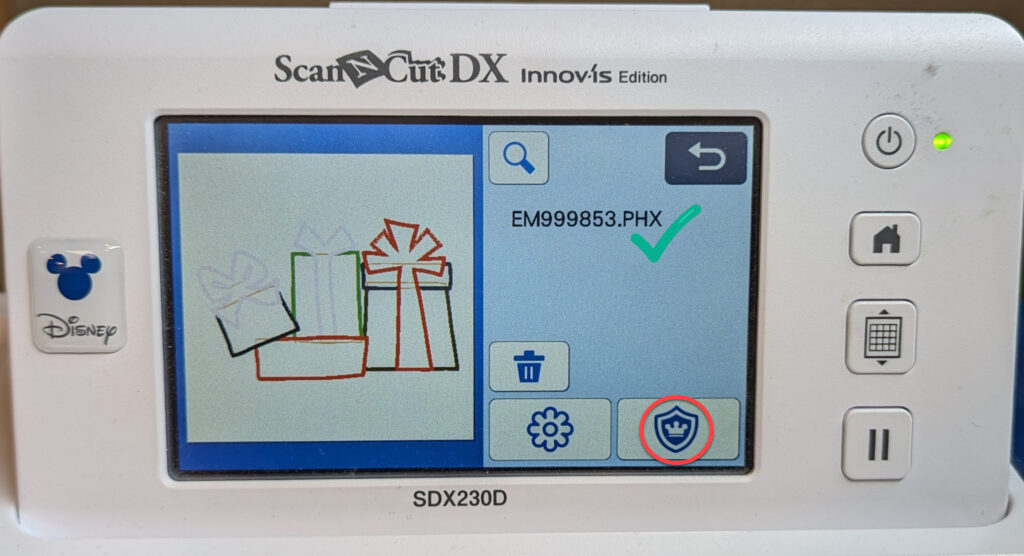
You do not want to select the .pes design. Instead, you want to open the bPocket folder to find the file saved on the embroidery machine. It should have a .phc or .phx extension, depending on your model of embroidery machine. Touch the icon for the file to load it into the ScanNCut memory.


Touch the Shield icon to see the appliqué parts.
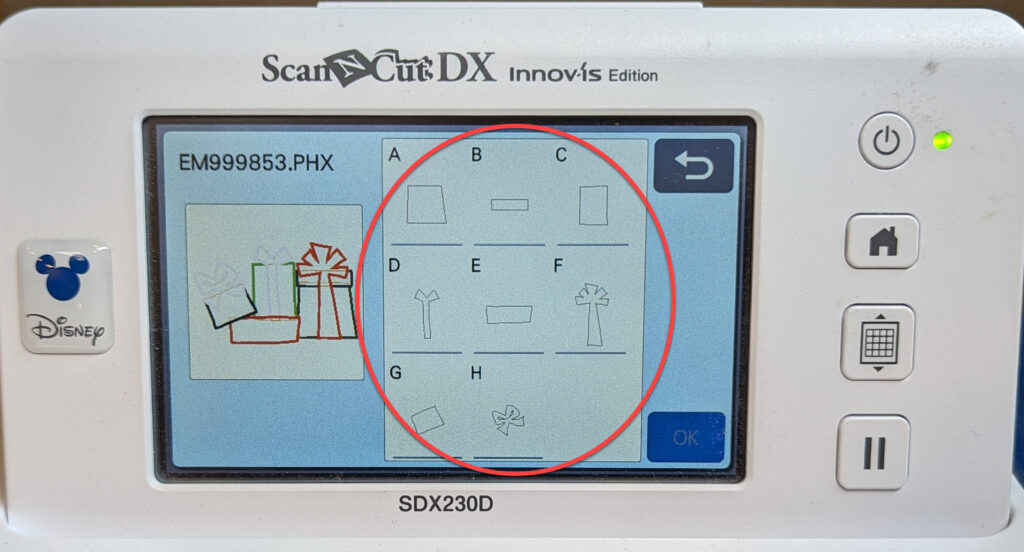
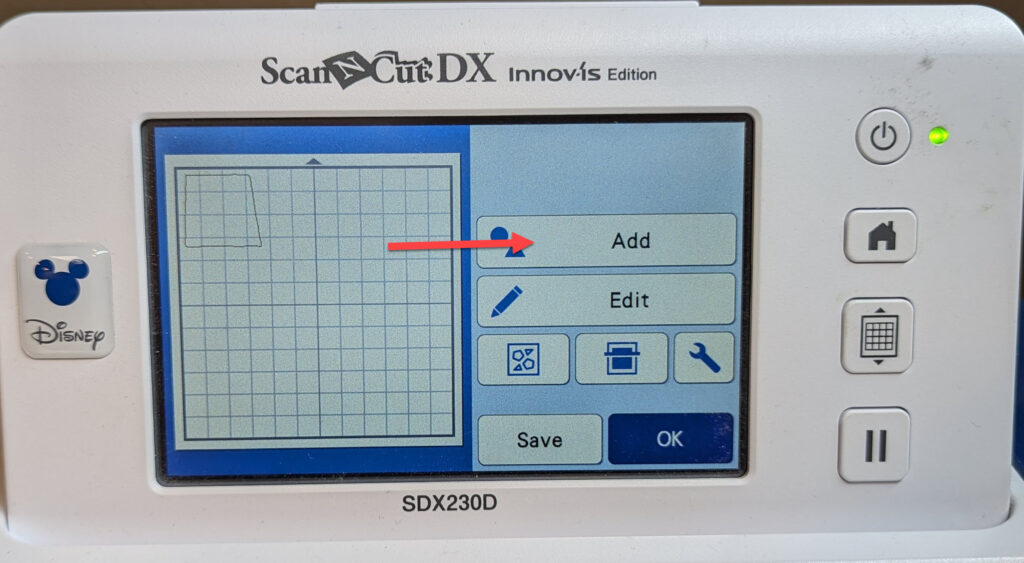
Select one of the pieces to cut. Click OK to add it to the mat.
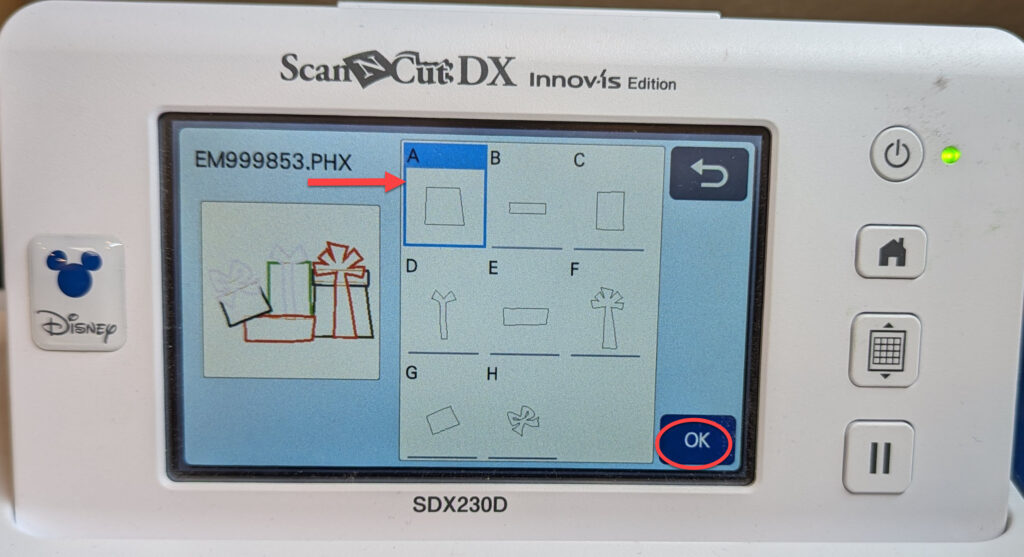
Once you have selected the piece to cut, the next screen will show you the size of the element. DO NOT change the size or your appliqué won’t fit when you stitch out the design.
You can, of course, cut more than one piece at a time. However, you can only select one at a time from this screen. After you click OK, click on ADD. Select Retrieve Data from the USB and the bPocket and add an additional piece. Once you have all the pieces on the mat that you want to cut, simply arrange your fabric choices accordingly. Scan the mat with your fabric in place and move the pieces to align with the fabric on the mat.
That’s it! Now you can cut out the appliqué shapes and use them in the embroidery stitch out.
But I Don’t Have a Brother or Baby Lock Embroidery Machine!
Of course, we can fix that! Just stop in one of our 4 locations to see these marvelous machines! However, you can still make cut data from the embroidery design even if you don’t have a Brother or Baby Lock machine. I actually wrote a blog about that a while back. Check out Create Appliqué Cut Data From a .pes File on ScanNCut SDX225.